Streaming with glitches feels like showing up on stage with a broken mic. OBS can fix that only if you set it up right. How do you use OBS for both recording and streaming? For the best result, it is not just about hitting the record button and live streaming. OBS has so many features that can help you make your streams smooth and more professional. As a steamer, you might have faced issues like blurry video, lag, or poor audio quality, which are some common issues. Luckily, these problems can be easily fixed with the right settings.
In this detailed guide, we are going to cover everything you need to know about the best OBS recording settings, which will include how to optimize video, audio, encoder, and output configurations for a smooth and professional live stream.
In this Article:
What is OBS Studio?
The OBS Studio is a free, open-source live streaming and recording software used by millions of content creators across the world. It is known for its versatility, ease of use, and powerful features which make it an ideal choice for both beginners and professional streamers. The software is being used for streaming video games, tutorials, or personal vlogs etc. The OBS Studio enables you to capture video from your webcam, screen, or other devices (such as game consoles, external cameras etc.) and stream it live to various platforms.
Key Features of OBS Studio:
Scene Composition: It allows the users to switch between different sources during a live stream.
Real-time Video and Audio Mixing: Provides tools for real-time adjustments.
Customizable Transitions: Create smooth transitions between different scenes and media sources.
Multistreaming: Using third-party tools like OneStream Live, you can stream to multiple platforms, like more than 45 Social Accounts simultaneously.
OBS settings are important because they directly influence the quality of your live stream or recording with OBS. Poor settings can result in blurry video, laggy streams, and distorted audio quality, as a result, it can negatively affect the viewer experience. Optimised OBS settings can help you achieve professional-quality live streams with minimal issues.
Optimizing your OBS recording settings allows you to find the right balance between video and audio quality, file size, and system performance. The best OBS settings for live streaming can vary depending on the social platform.
To have a smooth live streaming experience, you have to follow the recommended settings for platforms like Twitch, YouTube, or Facebook (each platform has different requirements, which we will discuss later). By setting up OBS Studio correctly, you can provide your audience with a high-quality, smooth broadcast.
What is Encoding and Bitrate?
Before you set up your OBS, it’s important to understand encoding and bitrate. When you know these terms, it will help you choose the right settings for your stream and recordings.
What is Encoding?
Encoding is the process of turning the raw video signals from your camera or screen capture device into digital signals that can be transmitted over the internet to your audience. This conversion makes sure that your video can be streamed on platforms like Twitch, YouTube, Facebook or any other social platform.
OBS Studio offers several encoding options, including software encoding (x264) and hardware encoding (NVENC, AMF). The choice of encoder impacts the performance and quality of your stream, depending on whether you use a CPU or GPU for encoding.
Bitrate Explained:
Bitrate is the amount of data transferred per second in your stream. A higher bitrate leads to better video and high quality audio, but it also requires more bandwidth and processing power. To get the best quality while keeping file size and upload speed in check, you need to understand the right bitrate settings for both streaming and recording.
For Streaming: A higher bitrate improves the quality of the video. However, streaming platforms often have maximum limits for bitrate (e.g., Twitch has a 6,000 Kbps limit for non-partners).
For Recording: You have more freedom to choose higher bitrates without the restrictions of streaming, which helps ensure better quality for post-production editing.
To get the best OBS settings for recording, you need to set up OBS Studio so that your recordings are clear and high-quality. Here are the settings you should use for both recording and streaming:
Video Settings:
To make sure your live stream looks pixel-perfect, it is important to adjust the OBS video recording settings.
1. Resolution:
Base (Canvas) Resolution: This is the resolution of your scene. Set this to 1920×1080 for Full HD, 2561×1440 for Quad HD, or 3840×2160 for 4K if your hardware and internet can handle it.
Output (Scaled) Resolution: This is the resolution at which your video is streamed. For high-quality streams, use 1920×1080 or 1280×720 if your system or bandwidth is limited.
2. Frame Rate (FPS):
A higher frame rate (FPS) results in smoother video quality. For most gaming streams, 60 FPS is ideal, but 30 FPS is sufficient for less dynamic content.
Set your FPS to 30 FPS for normal streams or 60 FPS for smooth gameplay.|
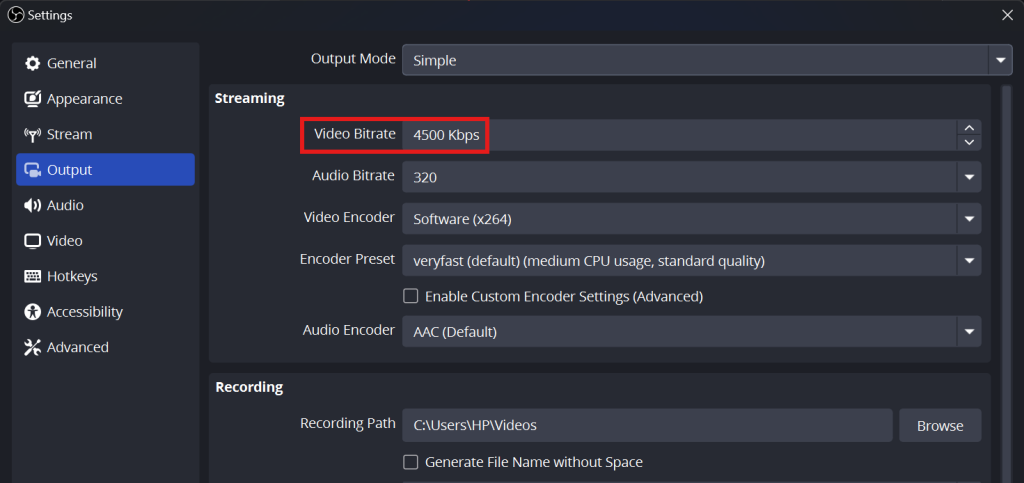
3. Video Bitrate:
For Full HD (1080p) streaming, set your video bitrate between 4,500–6,000 Kbps at 30 FPS or 6,000–9,000 Kbps for 60 FPS.
For 1440p, a bitrate range of 8,000–16,000 Kbps is recommended.
Audio Settings:
For a professional stream the audio quality is as important as video quality.
1. Audio Bitrate:
For high-quality audio, set your bitrate to 320 Kbps for music streams.
For non-music live streams, 160 Kbps is usually sufficient.
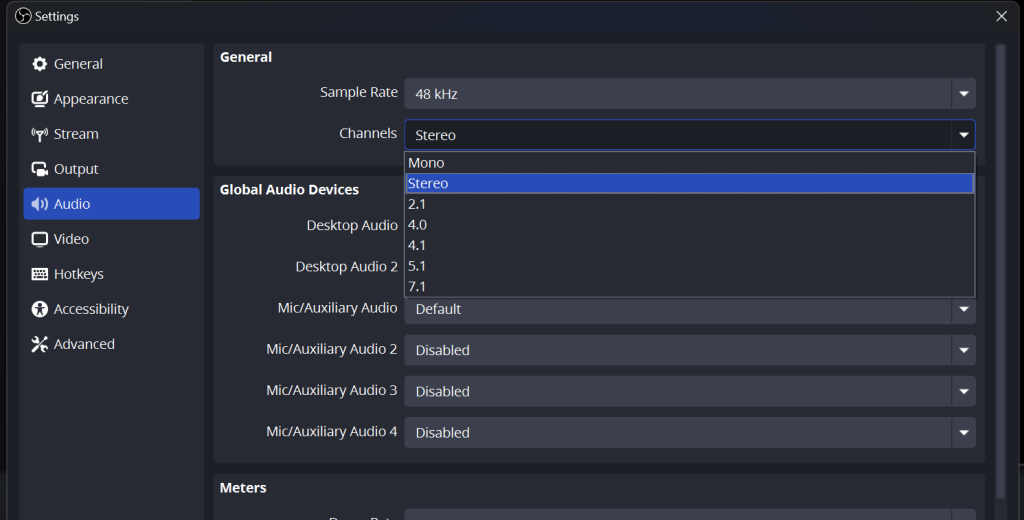
2. Sample Rate:
Set the sample rate to 48 kHz for compatibility with most professional audio gear.
3. Audio Channels:
Use Stereo audio for high quality sound.
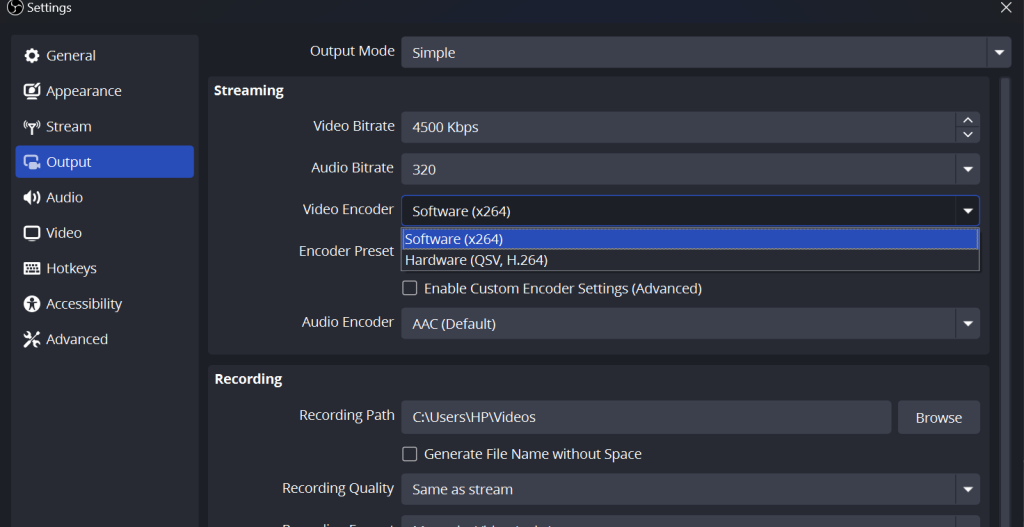
Encoder Settings:
OBS provides several encoder options depending on your hardware. These OBS recording encoder settings help determine the quality of your recordings.
1. x264 (CPU encoding): This option is ideal if you have a strong CPU and want high-quality video, but it can be taxing on your system, especially when streaming at high resolutions.
2. NVENC (NVIDIA GPU): Use this if you have an NVIDIA GPU. It offloads the encoding to the GPU which provides better performance and less strain on the CPU.
3. AMF (AMD GPU): Similar to NVENC, but for users with AMD GPUs.
Important Note: Recordings cannot be paused if the recording encoder is set to “(Use stream encoder).” This limitation appears when you use the same encoder for both live streaming and recording. To gain better control over your recordings, it is recommended to use a dedicated encoder like x264 for recording, while using a separate encoder for streaming if needed (such as NVENC or AMF for hardware encoding). By using this setting you can pause or stop your recordings without interrupting the live stream.
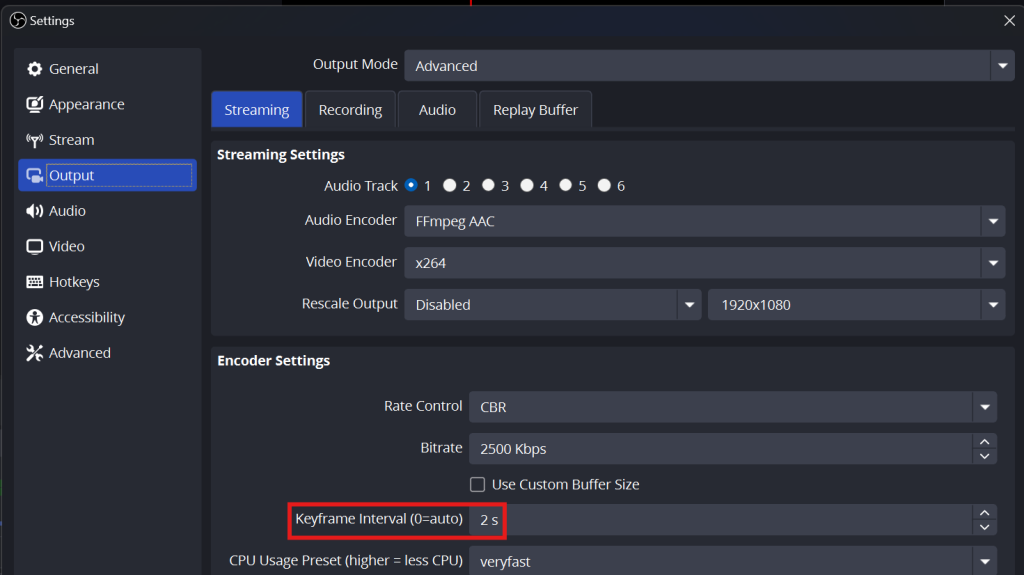
Keyframe Interval:
Set the keyframe interval to 2 seconds for optimal streaming performance. This keeps your stream smooth by sending a reference frame every two seconds.
Rate Control:
CBR (Constant Bitrate) is recommended for streaming. This makes sure a consistent bitrate throughout your stream.
CPU Usage Preset:
The slower this setting, the better the quality. However, higher settings will put more load on your CPU. If your system is not powerful enough, you may need to adjust this for smoother performance.
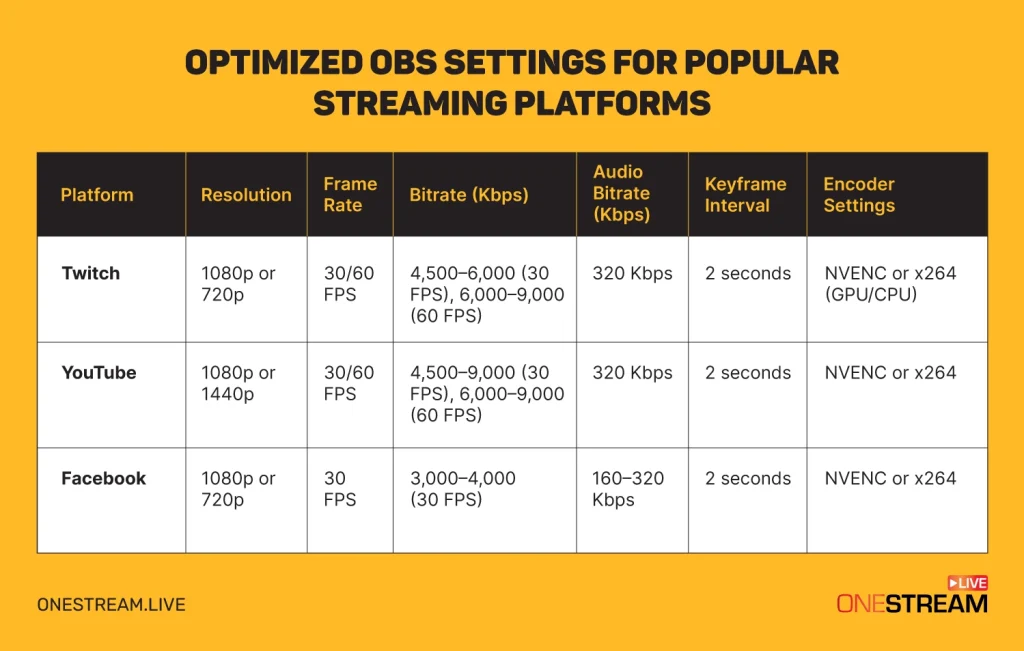
OBS Settings for Different Streaming Platforms
Twitch:
Here are the best OBS settings for Twitch.
Encoder: NVENC or x264 (depending on your system).
Resolution: 1080p or 720p.
Frame Rate: 60 FPS.
Bitrate: 4,500–6,000 Kbps for 1080p at 30 FPS, and 6,000–9,000 Kbps for 1080p at 60 FPS.
Keyframe Interval: 2 seconds.
YouTube:
Below are the best OBS settings for YouTube.
Encoder: NVENC or x264.
Resolution: 1080p or 1440p.
Frame Rate: 60 FPS.
Bitrate: 4,500–9,000 Kbps for 1080p at 30 FPS, and 6,000–9,000 Kbps for 60 FPS.
Facebook Live:
The OBS settings for Facebook Live are given below:
Encoder: NVENC or x264.
Resolution: 1080p or 720p.
Frame Rate: 30 FPS.
Bitrate: 3,000–4,000 Kbps for 1080p at 30 FPS.
Using OBS with OneStream Live for Multistreaming
OneStream Live allows you to stream to multiple platforms simultaneously which expands your reach and audience. Here’s how you can integrate OBS with OneStream Live:
1. Sign Up and Log In to OneStream Live:
VisitOneStream Live and log in to your account, or sign up if you don’t have one.
2. Get the RTMP Encoder Details:
On the OneStream Live dashboard, hover over RTMP Encoder and click on “Connect OBS & Go Live”.
Choose the social platforms you want to stream to (e.g., Twitch, YouTube, Facebook, etc.).
3. Set Up OBS Studio:
Open OBS Studio and go to Settings.
Click on Stream, then select Custom as the Service.
Paste the Server URL and Stream Key you copied from OneStream Live into the corresponding fields and click on Apply.
4. Start Multistreaming:
Once your OBS is set up, click Start Streaming in OBS.
OneStream Live will handle the multistreaming and broadcast to all your selected platforms.
Conclusion:
By setting up OBS Recording correctly, you improve the quality of your streams and recordings and make the experience smooth for both you and your audience. With the right encoder, bitrate, and video settings, you can achieve high-quality streams without losing performance.
Want to expand your reach? Use OneStream Live to stream to multiple platforms at once with OBS.
OneStream Live is a cloud-based live streaming solution to create, schedule, and multistream professional-looking live streams across 45+ social media platforms and the web simultaneously. For content-related queries and feedback, write to us at [email protected]. You’re also welcome to Write for Us!
Kalim is a Digital Content Writer at OneStream Live, dedicated to creating SEO-optimized content. When he's not writing, you can find him lost in his passion for music and singing.