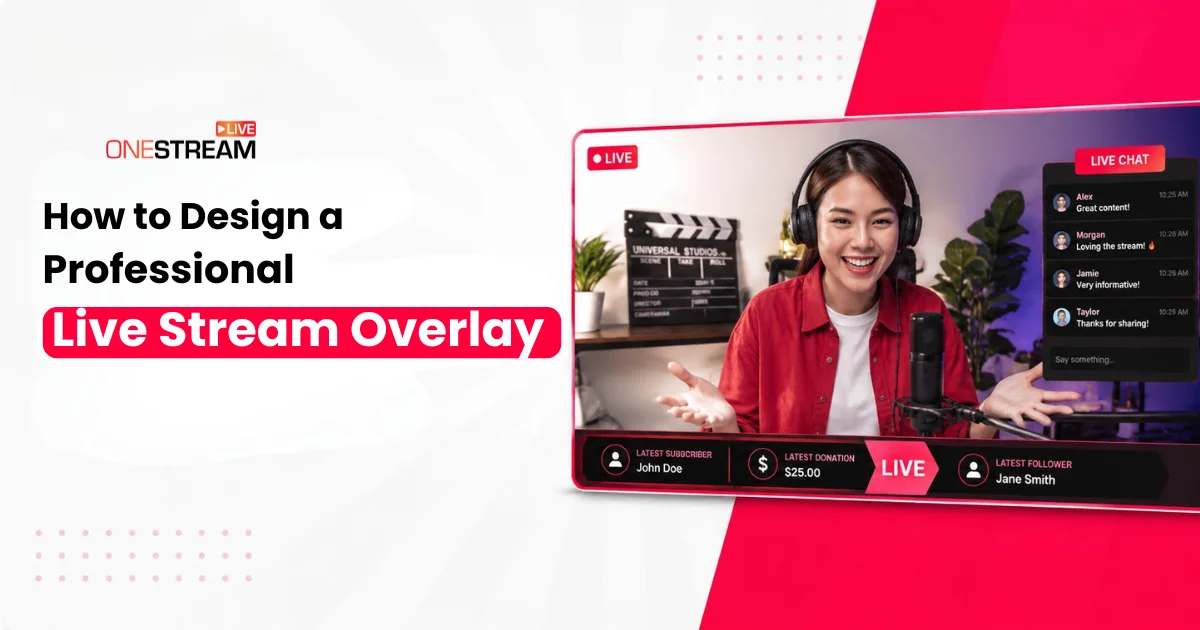

You have probably watched a TV news broadcast at some point. The host is visible on screen, the channel logo sits in the corner, news tickers scroll along the bottom, and breaking news banners pop up when something big happens. The host is not the only thing driving engagement. The entire screen is doing the work. It delivers information and keeps you locked in. All of those graphics are called overlays. The same idea applies to live streaming. A live stream overlay is what turns a plain webcam feed or gameplay screen into a polished broadcast that looks like it belongs on a real TV channel. It frames your content, shows your branding, and shares important information without saying a word.
In this blog, we are going to walk through how to design a professional live stream overlay in detail. We will also create one step by step using an easy tool like Canva, so you can follow along even if you have never designed anything before. Let’s get started.

A live stream overlay gives your stream that professional broadcast look, just like TV news graphics.
Viewers decide in the first 30 seconds whether to stay. A clean overlay helps you keep them.
Your overlay should support your content, never compete with it.
Stick to two to four colors and use clean, readable fonts.
Always export your overlay as a transparent PNG, or MP4 for animated ones.
Canva is the easiest way for beginners to design a stream overlay in just five steps.
OneStream Live comes with ready-made overlays, banners, and tickers built right in.
Why Your Stream Needs a Custom Overlay
People watch live streams, especially game live streaming, etc., for entertainment, so the look and feel of a stream is also very important now. Think about the last time you discovered a new streamer. Did a clean, professional look make you more likely to stick around? The attention span of the audience has reduced very low, and most viewers decide within the first 30 seconds whether to stay or move on. Your overlay plays a huge role in that decision.
A custom overlay does more than look pretty. It creates visual consistency across your streams. It communicates your brand identity at a glance. It displays information viewers need without cluttering your content. Most importantly, it makes your channel memorable in a sea of generic free templates that everyone else is using.
What Goes Into a Good Stream Layout
Before you start designing, you need to understand what makes up a professional stream layout. Most overlays include a few key components that work together to create a cohesive look.
Your webcam frame is usually the centerpiece. This border around your camera feed can be simple, or you can elaborate on it, depending on your style. Then you have your alert boxes where follower and subscription notifications appear. Many live streamers also include space for recent events, donation goals, or chat displays.
Your overlay should enhance your content without overwhelming it. If someone can’t see your gameplay or your face gets lost in busy graphics, you have gone too far.
How to Design a Professional Live Stream Overlay Step by Step
Creating your overlay becomes much easier when you break it down into manageable steps. Here’s exactly how to do it.
1. Plan Before You Design
Take time to look at streamers in your niche. What works for gaming overlays often looks wrong on talk shows, podcasts, educational streams, etc. Pay attention to color choices, element placement, and how much screen space the overlay actually takes up. Screenshot designs you like and note what specifically appeals to you.
Think about your brand colors and personality. Are you energetic and bold, or calm and professional? In simple terms, your overlay should reflect that vibe immediately.
2. Choose Your Design Tools Wisely
There are many tools in the market, and you will have plenty of options. Canva works great for beginners and offers drag-and-drop simplicity. You can create solid overlays without touching complicated software. For more control, try Photopea (it’s like Photoshop but runs in your browser for free). GIMP is another powerful free option if you don’t mind a learning curve.
If you are comfortable investing, Adobe Photoshop gives you complete creative freedom and professional-grade results.
3. Set Up Your Canvas Correctly
Open your chosen tool and create a new project at 1920×1080 pixels. This is the standard resolution for most streaming platforms. Make sure you’re working with a transparent background. This is important because you will be layering your overlay on top of your webcam feed or gameplay.
Save your work frequently. Nothing hurts worse than losing hours of design work to a crashed program.
4. Design With a Clear Hierarchy in Mind
Your content always comes first. Overlays frame and enhance what you are showing, but they should never compete for attention. Keep the center of your screen relatively clear, so gameplay or your webcam can be the focus.
Place your brand logo or watermark in a corner at 60-80% opacity. This keeps it visible without being distracting to the viewers. If you are adding a webcam frame, make it complement your content rather than overshadow it.
Text needs to be readable at a glance. Choose clean fonts and make sure there is enough contrast with the background. If you are putting text over video, add a semi-transparent panel behind it so it stays legible.
5. Keep Your Color Palette Simple
Select colors wisely. Pick two to four colors maximum. More than that starts looking chaotic. Use your brand colors as the foundation, then add neutrals like white, black, or gray for text and backgrounds.
Test your colors together before committing. What looks good in your design software might clash horribly when overlaid on your actual stream content.
6. Export in the Right Format
This step trips up a lot of new streamers. Save your overlay as a PNG file with transparency enabled. This is crucial. JPG files will not work because they don’t support transparent backgrounds, and you’ll end up with an ugly white rectangle blocking your content.
Keep your file size under 1 MB for static overlays. Anything larger can cause performance issues when you’re streaming.
7. Test Before You Go Live
Import your overlay into OBS or your streaming software of choice. Position it correctly and run a test recording. Watch the recording on your phone to make sure the text is readable on smaller screens. More than half your viewers are probably watching on mobile, so this matters.
Check that your overlay doesn’t block important game UI elements. Adjust placement as needed until everything looks right.
How to Make a Stream Overlay With Canva
Canva is one of the easiest stream overlay maker tools out there. You don’t need design experience or expensive software to get great results. Here’s how to create your overlay in Canva from start to finish.
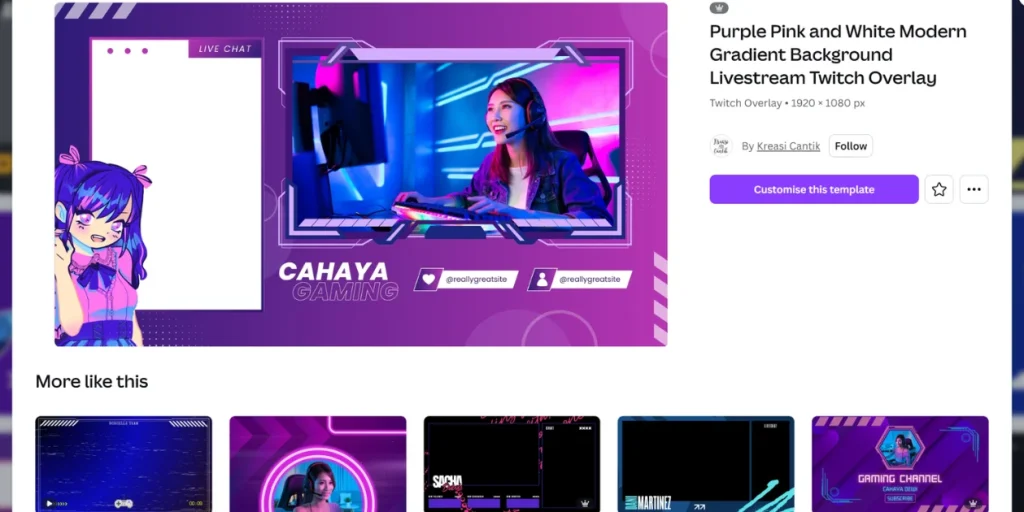
Step 1: Open Canva and search for “Twitch Overlay” or “Stream Overlay.” Pick a design theme that fits your channel.
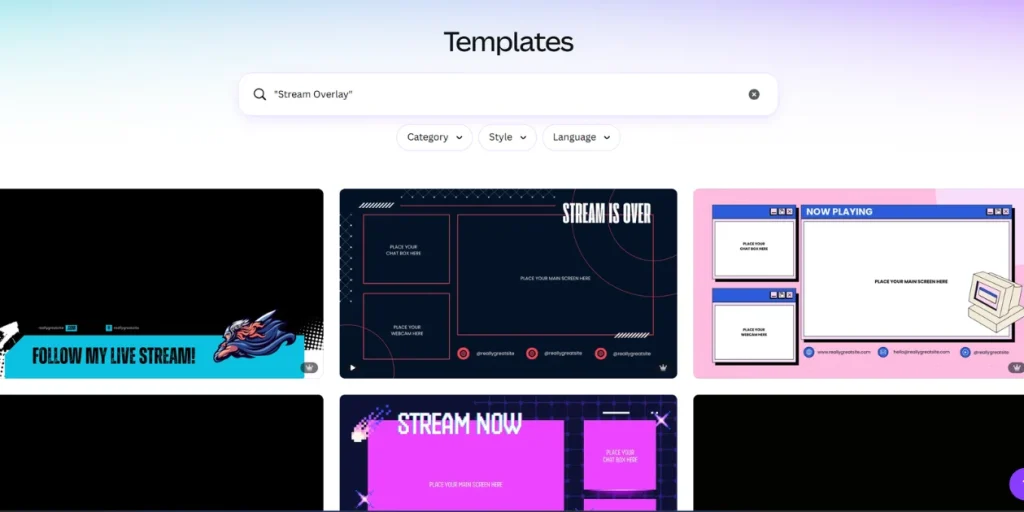
Step 2: Browse Canva’s free and paid templates, then choose the one that represents you best.
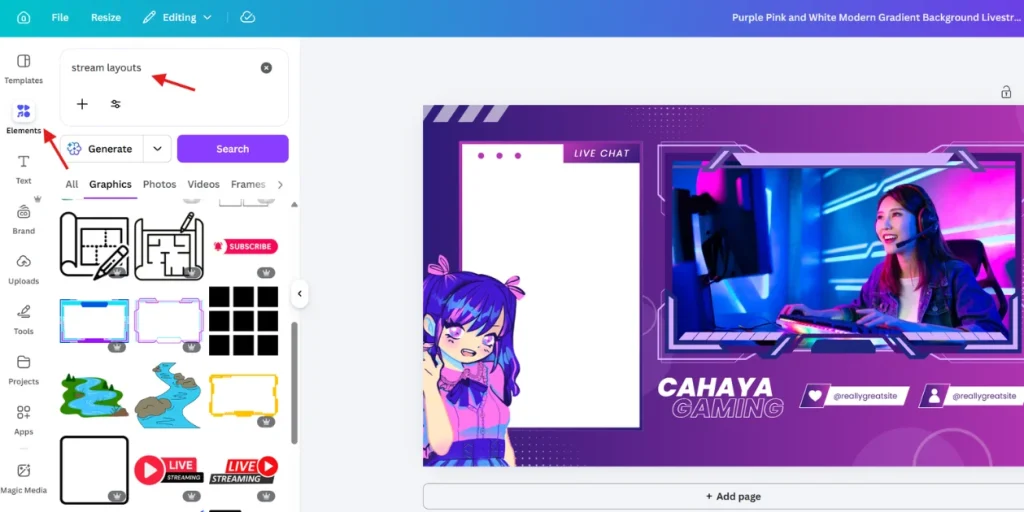
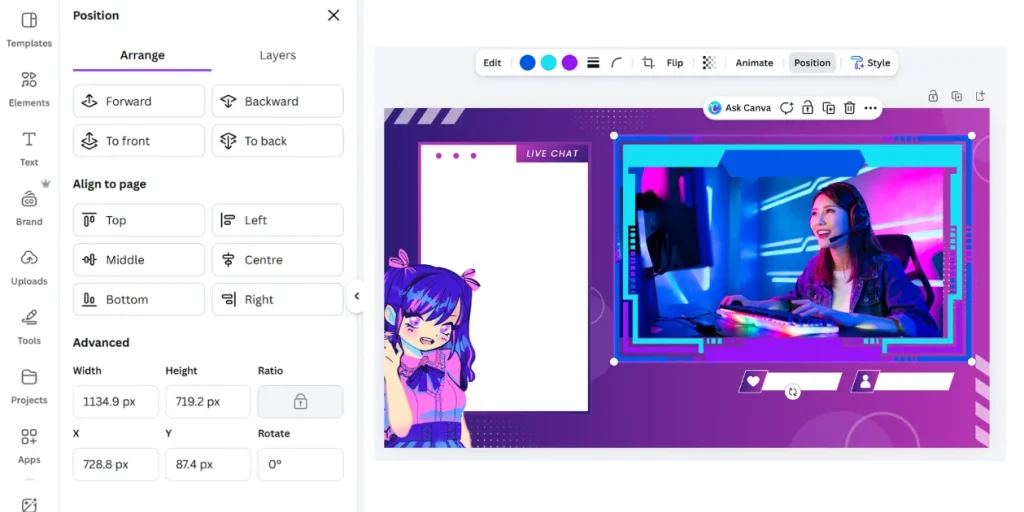
Step 3: Rearrange the elements to match your layout. Add your brand fonts and color scheme.
Step 4: Add effects to frames or full screens for new follows, intermissions, or donations.
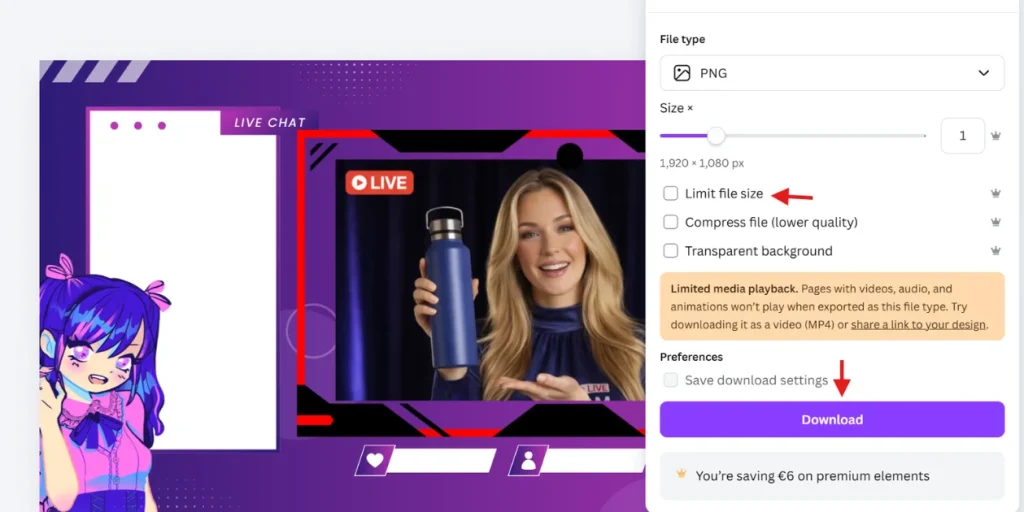
Step 5: Save your static or animated overlays as transparent PNGs or MP4s. Then import them into your streaming software like OneStream Live or OBS Studio.
Ready-Made Overlays in OneStream Live Studio
We understand that not everyone has time to design custom overlays from scratch. That’s why we have built ready-made overlays directly into our platform that you can start using right away.
OneStream Live Studio includes a Design panel where you can access provided templates for overlays, logos, and backgrounds. You get the professional look without spending hours in design software. Just select a template that fits your style, adjust it to match your branding, and you are ready to stream.
All the rendering happens in our cloud. That means adding overlays won’t slow down your computer or impact your stream quality. You can show or hide elements with a simple toggle during your live stream so that you have complete control without complicated setups.
If you do want to use custom designs, you can upload your own PNG overlays directly through the Studio. Position them with drag-and-drop simplicity, preview everything before going live, and switch between layouts whenever you need to. It also offers banners, tickers, custom backgrounds, and professional intro and outro capabilities that all work together to create a cohesive branded experience.
Read More: How to Add Overlays to your Live Streams

Common Mistakes to Avoid
Even with the best intentions, it’s easy to make mistakes that hurt rather than help your stream’s appearance.
Overcrowding your screen is the biggest problem. New streamers often try to pack in every widget and graphic they can find. The result looks cluttered and unprofessional. Stick to essential elements only. Less really is more here.
Another common issue is blocking important elements. For example, if you are streaming a game, then the most important thing is your game, which the audience wants to watch. Your overlay should never cover health bars, minimaps, or other important UI components that viewers need to see. Test with the actual games you play and adjust accordingly.
The texts on your overlays must be clearly readable. Fancy decorative fonts might look cool at first, but if viewers can not quickly read your information, they are useless. Choose clarity over style every single time.
Finally, too many animations cause problems. Constant movement distracts from your content and can cause viewer fatigue. Save animations for alerts and transitions. Keep your main overlay elements static.
Finding the Right Stream Overlay Maker for Your Needs
The tools you choose depend on your skill level and budget. For absolute beginners, start with Canva or similar drag-and-drop platforms. They limit your options but make the process straightforward.
As you get more comfortable, explore free tools like GIMP or Photopea. These give you much more control over your designs. You can create truly custom overlays that match your exact vision.
If you are serious about streaming and want professional results, investing in design software makes sense. Adobe Creative Cloud offers the most powerful tools available. After Effects lets you create animated overlays that really stand out.
Remember that you can always start with free options and upgrade later. Your first overlay doesn’t need to be perfect. It just needs to be better than having no overlay at all.
Keep Testing and Improving
Your overlay is not something you design once and forget about. As your channel grows and evolves, your overlays should too. Pay attention to viewer feedback. If people mention they can’t read something or an element blocks content, fix it.
Test different layouts for different types of streams. What works for gaming might not work for Just Chatting. Having a few variations ready gives you flexibility.
Consider seasonal updates or special event themes. Fresh overlays keep your stream feeling current and show viewers you are actively investing in your content.
Getting Started Today
Now you have learned what a live stream overlay is, why it matters, and how to design one that actually looks professional. You also have a clear step by step process to follow in Canva, plus the design rules and common mistakes to keep in mind. The rest comes down to action. Open your design tool, start with a simple layout, test it on a real stream, and improve it as you go. Every successful streamer started exactly where you are right now.
OneStream Live makes the whole process even easier. The live studio comes with ready-made overlays, custom backgrounds, banners, and tickers built right in, so you can have a professional-looking stream live in minutes. Sign up for OneStream Live today and give your stream the polished broadcast look it deserves.

Frequently Asked Questions
A live stream overlay is a set of visual elements like frames, graphics, and text that enhance the appearance and branding of your live stream.
Overlays are important because they make your stream look professional, reinforce your brand identity, and help keep viewers engaged.
A professional live stream overlay should include elements like a webcam frame, alerts, lower thirds, logos, and consistent brand colors.
You can design live stream overlays using tools like Adobe Photoshop, Canva, or Figma.
Yes, well-designed overlays can improve viewer engagement by making your content visually appealing and easier to follow.
OneStream Live is a cloud-based live streaming solution to create, schedule, and multistream professional-looking live streams across 45+ social media platforms and the web simultaneously. For content-related queries and feedback, write to us at [email protected]. You’re also welcome to Write for Us!