
Enjoy watching smooth, high-quality videos online? Love cheering for your favourite team during a live match? None of this would be possible without video encoding. But what is video encoding, and how does it really work? Every time you watch a video online, the raw file has been compressed using special encoding methods to make it easy to stream and fast to load. This means you can watch without long buffering or huge file sizes.
In this guide, we’ll explain how to encode a video, what a video encoder does, and why video encoding is so important today.
What Is Video Encoding?
Video encoding is the process of compressing raw video files into a smaller, usable format. It takes huge, uncompressed footage and converts it to a digital file that is easy to store and share. The encoded video is much smaller than the original, yet it looks almost as good. This compression is the reason that you can upload 4K videos or stream live without needing terabytes of data.
Think of a raw video as a massive bitmap and every frame loaded with detail. Encoding shrinks that data. It uses clever algorithms to remove redundant information and reduce file size while keeping visuals clear. The result is a video file that maintains quality but is efficient to transmit over the internet.
Why do we need video encoding?
Without encoding, online video sharing would be painfully slow or impossible. Uncompressed video is huge and even a few minutes can be gigabytes in size. Encoding slims it down so that videos stream smoothly on any device and don’t gobble up your storage. In short, video encoding makes modern streaming and video platforms feasible by balancing quality with file size.
Video Encoding vs. Video Decoding
Video encoding and decoding are two sides of the same coin. Encoding compresses video for storage or streaming; decoding does the opposite, and it uncompresses the video for playback. When you hit play on a YouTube video or join a live stream, your device’s video decoder is working to interpret (decode) the encoded stream and display it to you.
A helpful way to remember the difference: encoding prepares the video for travel, decoding delivers it to the viewer. Both rely on the same codec (coder-decoder) technology. A codec is a tool or algorithm that encodes and decodes video data.
For example, an H.264 codec will compress a video file during encoding and then your media player uses the same codec to decompress it during playback. Without decoding, encoded videos would just be unreadable files. And without encoding, videos would be too large to efficiently send or stream.
Note: Converting old analog footage to digital is a separate step (digitization). Video encoding typically refers to compressing already-digital video data into a chosen format.
How Does Video Encoding Work?
Video encoding might sound technical, but it is easier to understand step by step. The video encoding process can be described as saving a digital video in a specific file format through compression. In practice, several key stages are involved:
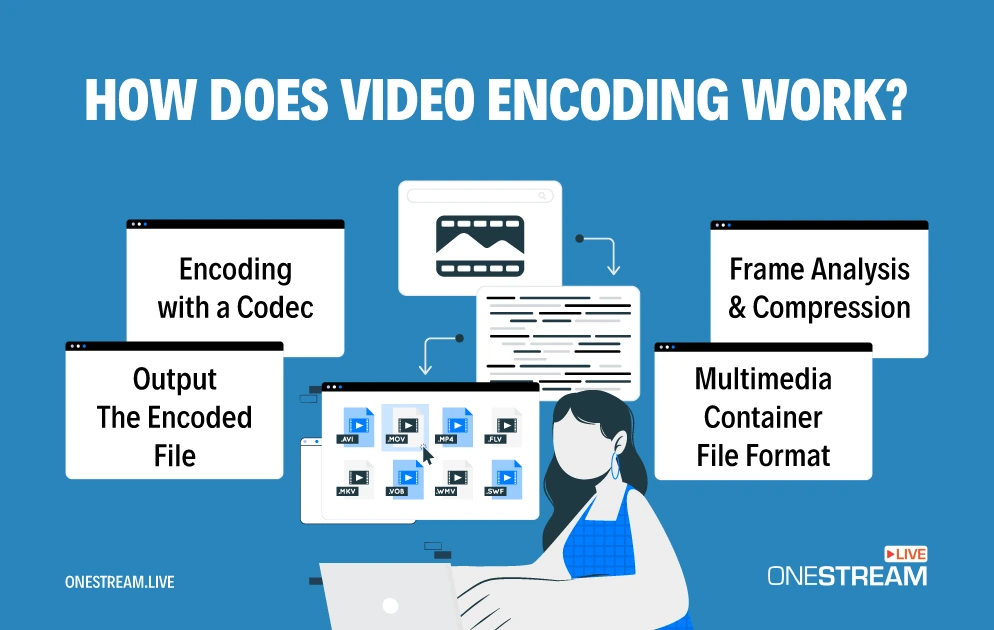
Frame Analysis & Compression
The raw video is split into frames. The encoder analyzes each frame and removes redundant or unnecessary information. This compression stage greatly reduces the video file size.
For example, if multiple frames have the same background, the encoder does not restore that data for every frame.
Encoding with a Codec
The cleaned, compressed frame data is then encoded using a specific codec. A codec (short for coder-decoder) applies complex algorithms to represent the video efficiently. It essentially translates visual data into coded data. Popular codecs include H.264, HEVC, etc. (we’ll cover these soon).
Multimedia Container File Format
The encoded video (and usually audio) data is bundled into a container file format (like MP4, MKV, AVI). The container holds the compressed video stream, audio stream, subtitles, and metadata in one file. Think of the container as a wrapper or box holding all the pieces together.
Output – The Encoded File
The end result is the final encoded video file. It’s much smaller than the raw footage and ready to be stored, uploaded, or streamed. At this stage, you have a video in a specific format (for example, an MP4 video using H.264 codec) that can play on various devices and platforms.
Each of these steps happens behind the scenes in milliseconds or minutes, depending on the video length and encoding speed. In essence, encoding works by discarding excess data and efficiently rewriting the necessary data.
This way, a video that originally might be too large to handle becomes a manageable file. The key is doing this without visibly degrading the picture. Modern codecs are incredibly good at this balancing act, which is why a streamed video can still look HD while being a fraction of the original size.
How to Encode a Video (Step by Step)
Even if “video encoding” sounds like something only techies do, you can also encode videos yourself with the right tools. Here is how to encode a video in few simple steps:
1. Choose an Encoding Tool
Pick software (or hardware) that will encode the video. This tool is your video encoder. Examples of encoding software include HandBrake, FFmpeg, or OBS Studio. There are also online video encoding services and built-in encoders in apps.
2. Set the Video Parameters
Configure the output format and quality. Select a codec (e.g., H.264), choose the resolution (720p, 1080p, etc.), and set a bitrate. These settings determine the balance between video quality and file size. Many tools offer presets (like “720p30” or “1080p high quality”) so you do not have to tweak every detail.
3. Start the Encoding Process
Begin the conversion. Hit the “Start,” “Export,” or “Encode” button. After that the software will then compress and convert the video according to your settings. This might take some time, especially if your video is long or of high resolution.
(For live streaming, this step happens continuously in real-time, which we will discuss later.)
4. Save & Test the Video
Once encoding is complete, save the encoded video file. Play it back on your device to ensure the quality is good and everything looks/sounds right. If something is off (maybe the quality is too low or the file is still too large), you can adjust your settings and encode again.
That’s it. You have successfully encoded a video! In day-to-day terms, whenever you convert a video or save it as a different format, you’re essentially encoding it.
Many apps make this easy, for instance, exporting a video from a video editor or converting with a mobile app uses encoding under the hood.
What Is a Video Encoder?
You might hear the term video encoder and wonder if it’s different from encoding. Simply put, a video encoder is the tool or device that does the video encoding. It can be software running on your computer or a dedicated hardware box. In other words, if video encoding is an action, the video encoder is the actor.
A video encoder takes your raw video input (from a camera or a file) and outputs an encoded stream or file. What does a video encoder do? It compresses and converts your video into a specific format suitable for streaming or storage.
For example, an encoder might take the HDMI feed from your camera and encode it in real time to H.264 video that can be live-streamed. Or it could take a high-quality video file and encode it to a smaller MP4 for uploading.
Video encoders come in two main types: software encoders and hardware encoders. Each serves the same purpose but in a different way:
Software Encoders
These are programs or apps that run on a general-purpose device (like a PC, Mac, or phone). They use the CPU of your device (or GPU) to process the video. Examples of software encoders are OBS Studio, vMix, Streamlab, Wirecast, HandBrake, and even Adobe Media Encoder. Software encoders are flexible and often cheaper (many are free).
Hardware Encoders
These are dedicated devices or chips built specifically for encoding video. A hardware encoder might be a stand-alone streaming box, a capture card, or a specialized chip in your GPU/graphics card. They offload the encoding work from your PC. For instance, modern NVIDIA graphics cards have NVENC, a hardware encoder that can encode video without much performance hit on your game.
Hardware encoders are fast and reliable, and they are crucial in professional live broadcasts where stability is key. The trade-off is cost and less flexibility (you can’t easily update a hardware encoder to a new format without buying a new device).
In summary, a video encoder (software or hardware) is what you use to encode videos. If you’re streaming, your encoder is your best friend, and it transforms your camera feed or screen output into a format that platforms like YouTube, Twitch, or OneStream Live can receive and play.
Choose one that fits your needs and budget. Steamers often start with software encoders (since they’re free) and then might add hardware encoding (via a better GPU or an external device) as they upscale their streaming setup.
Video Encoding for Streaming (Real-Time Encoding)
Encoding a video for upload is one thing; encoding video for streaming (live broadcasting) adds a new layer of challenge. In streaming, the encoding happens in real time. That means your encoder is working on-the-fly, compressing and sending out video continuously as you capture it. There’s no pause or second chance, and it must keep up with the live action.
Real-time video encoding is crucial for live broadcasts. It refers to compressing and transmitting the video almost instantly as it’s captured.
For example, when I stream a fast-paced game live, the encoder is constantly grabbing frames and compressing them, and uploading the stream with only a few seconds (or less) of delay. This is why having a robust encoder and proper settings matters so much in live streaming; any hiccup can cause your viewers to see stutter or buffering.
Here are some key points about video encoding in streaming:
Speed vs. Quality
In live streaming, speed is king. The encoder might not have time to do multi-pass analysis or heavy compression tricks. Thus, live encoders often use slightly lower compression settings to keep up speed, which can mean needing a higher bitrate for the same quality compared to offline encoding.
I’ve found it’s better to use a somewhat higher bitrate than to push an encoder preset that is too slow if you want zero lag. Many streaming software offer presets like “very fast” or “fast” for live encoding which use more bandwidth but ensure real-time performance.
Stable Bitrate
Streaming video encoding usually uses a constant bitrate (CBR). CBR means the encoder tries to send data at a fixed rate (e.g., 3000 kbps) consistently. This prevents sudden spikes that could overwhelm your upload bandwidth. It keeps the stream stable. Platforms often require CBR for live streams.
OneStream Live recommends using CBR with around 3000 kbps at 720p for smooth streams. Consistent bitrate helps avoid buffering.
Resolution and Framerate for Live
You might love 4K 60fps, but streaming is intense. Video encoding for streaming often involves picking a resolution and frame rate that your internet and encoder can handle. Common live stream specs are 720p at 30fps or 1080p at 60fps, depending on your upload speed.
It’s better to have a smooth 720p stream than a choppy 1080p one. I started streaming at 720p30 when my internet was weaker. After upgrading, I moved to 1080p60 for more clarity. Always test and choose what gives viewers the best experience without buffering.
Latency
A good encoder for live video minimizes latency (delay). Protocols like RTMP, combined with efficient encoding, can achieve only a few seconds of latency. This is why video streaming encoding often favors faster compression and sometimes larger file sizes to prioritize low delay. If you interact with your chat or play live events, low latency makes the experience feel real-time.
Real-Time Hardware Encoding
Modern GPUs and hardware encoders shine here. GPUs enable real-time video encoding by parallel processing which makes live streaming feasible at high quality.
For example, when I switched to using my NVIDIA card’s NVENC for encoding, my stream quality improved. Hardware encoders are optimized to handle multiple video frames simultaneously, which is perfect for live scenarios.
Online Video Encoding and Transcoding
Many streaming platforms do their own encoding once they receive your stream. For instance, you might send a 1080p stream, and the platform will transcode it to 720p, 480p, etc., for viewers on slower connections. This is why you sometimes see quality options on live streams. This cloud encoding is part of “online video encoding” – platforms encoding your video on their servers to various formats.
OneStream Live can take your single high-quality stream and redistribute it to multiple platforms, each possibly needing a specific format or bitrate. The process is done in the cloud so your viewers get the best possible stream for their device.

Bottom line for streamers: Make sure your encoding settings match your internet capability and the platform’s requirements. Use a reliable encoder (OBS, Wirecast, or a hardware encoder device) and test your stream. I always run a private test stream to check my bitrate and quality before going live. This way I know the encoding is solid. Good encoding = happy viewers.
Common Video Encoding Formats (Codecs)
When we talk about video encoding, we often refer to formats and codecs. A codec is the compression algorithm. The format or container is how it is stored.
Here are some of the most common video encoding formats and what they are used for:
H.264 (AVC)
This is the most widely used video codec today. It offers a great balance of quality and file size. H.264 (also known as AVC) is what powers a huge amount of online video, from YouTube streams to video conferences.
It’s efficient and supported almost everywhere. Streaming video encoding typically relies on H.264 because it performs well in real time and virtually all devices can decode it.
H.265 (HEVC)
This is the successor to H.264, often called HEVC (High Efficiency Video Coding). H.265 provides even better compression, roughly double the efficiency of H.264 in many cases (half the bitrate for the same quality). It’s ideal for 4K or 8K content and used in Ultra HD Blu-rays and some streaming (Netflix, etc.).
The downside is that it’s more demanding to encode/decode and not as universally supported on older devices. But if file size or bandwidth is a concern for high-res video, H.265 is a champion.
VP9
This is Google’s open-source codec (part of the WebM format family). It’s comparable in quality to H.265 in many cases, and it’s royalty-free. YouTube uses VP9 for a lot of its videos (especially in Chrome browser or Android devices).
VP9 is great for web streaming because it doesn’t require licensing fees, and it delivers high quality at lower bitrates. Many browsers support it, but not all hardware does as universally as H.264.
AV1
AV1 is the rising star of video codecs. It’s an open, next-generation codec developed by a consortium of tech companies (Alliance for Open Media). AV1 offers even better compression than H.265; in this way you can save 20-30% in bitrate for the same quality in some tests.
By 2025, AV1 is gaining adoption: YouTube, Netflix, and more are starting to stream with AV1 for users whose devices can decode it. The catch? It’s very CPU-intensive to encode, and older devices can’t play it. But new GPUs (and even smartphones) are adding AV1 support. It’s the future for efficient streaming once compatibility broadens.
MPEG-2
I’ll mention this legacy codec. It was the standard for DVDs and early digital TV. MPEG-2 is an older format that delivers bigger file sizes for the quality we get by today’s standards.
It’s largely been surpassed by H.264 for most uses. However, it’s a reminder of how far encoding has come. MPEG-2 needed much higher bitrates for what H.264 or others achieve at lower bitrates now.
There are many other codecs (like MPEG-4 Part 2, AVC-Intra, ProRes, etc.), but the ones above are the big names for most streaming and online video purposes.
Formats and Containers
When we say format, people might also mean the file extension like .mp4, .mov, .mkv, etc. These are containers. For example, an MP4 file usually contains video encoded with H.264 or H.265 plus audio (AAC commonly). MKV might contain a VP9 or AV1 video stream.
The container is important for compatibility but usually the codec determines the compression. Most modern containers (MP4, MKV) can hold various codecs. For streaming, protocols like HLS or DASH will deliver video in segments, but those segments are still encoded with these codecs.
In choosing a format for encoding, H.264 in MP4 is a safe bet for maximum compatibility. If you are aiming for the cutting edge and know your audience can handle it, H.265 or AV1 could cut your bandwidth costs or upload times, but make sure the devices/players support them.
Lossy vs. Lossless Encoding (Video Encoding Types)
When discussing video encoding types, we often categorize them into lossy and lossless compression. These terms describe how the encoder treats the data:
Lossy Encoding
This is by far the most common type for video. Lossy compression means the encoder discards some data to drastically reduce the file size. The goal is that the lost data isn’t very noticeable to our eyes.
For instance, an encoder might drop tiny color details or subtle texture in shadows that humans won’t easily see. By removing or simplifying data, lossy encoding can shrink a video to maybe 5-10% of its original size (or even smaller).
The downside is if you compress too much, you start seeing artifacts: blocky pixels, blurriness, or jitter. All the popular codecs we listed (H.264, H.265, VP9, AV1) are lossy codecs by default. They are designed to find that sweet spot where the video looks good with a much smaller file size.
In optimal cases, viewers can’t even tell it’s compressed. But if you’ve ever watched a low-bitrate stream and seen it turn into a pixelated mess during fast motion, that’s lossy compression struggling at too high a compression level.
Lossless Encoding
This method preserves all the original data, so the video after encoding can be reconstructed exactly to the original. Sounds great, right? The catch: the files are huge, often 10x or more larger than a lossy encode of the same content. Lossless video encoding is used in cases where quality is absolutely critical, like archiving master video files, or for editing workflows where you don’t want any generation loss.
Some codecs have a lossless mode (e.g., there’s a lossless profile of H.264, and codecs like Apple ProRes can be virtually lossless). For everyday streaming or sharing, lossless is impractical due to bandwidth.
To put it simply: lossy encoding = smaller file, some quality loss; lossless encoding = no quality loss, gigantic file. For streaming and online video, lossy is the way to go. The trick is tuning your lossy settings to get the best quality without hitting network or hardware limits. And modern encoders are very good at this, and a well-encoded lossy video can look virtually identical to the source to the average viewer.
Final Tips and Conclusion
By now, you should have a clear idea what video encoding is and how it works. To recap, video encoding is the art of packing video data into a smaller form so it can be stored, sent, and streamed efficiently. It uses codecs to compress the video, and every video you watch online has gone through this process.
Without encoding, we wouldn’t have the streaming revolution, no Twitch game streams, no Netflix marathons, no quick YouTube tutorials on your phone.
A few genuine tips from my journey: If you are creating content or streaming, pay attention to encoding settings. Experiment with different bitrates and resolutions to see what gives the best results for your setup. Don’t be afraid to start with recommended settings (like 720p at 3000 kbps for live streaming) and then tweak upward as your hardware and internet allow.
Also, keep your software encoders updated, as improvements in encoding (even small ones) can mean better quality or lower CPU usage.
And don’t limit yourself to one platform because streaming on different platforms can help you reach more people and grow faster.

Frequently Asked Questions About Video Encoding
It compresses raw video files using codecs like H.264, making them smaller and easier to stream without losing much quality.
It’s the process of converting raw video into a digital format for playback on any device. Without encoding, files would be too big to stream smoothly.
Raw video files are huge. Encoding shrinks them for faster streaming, smoother playback, and better compatibility.
Encoding removes duplicate and unnecessary data in videos to reduce file size without killing quality.
It means compressing and converting video into a format like MP4 so it can be stored, shared, or streamed easily.
It allows platforms to deliver videos in different qualities for all internet speeds, keeping streams smooth for everyone.
OneStream Live is a cloud-based live streaming solution to create, schedule, and multistream professional-looking live streams across 45+ social media platforms and the web simultaneously. For content-related queries and feedback, write to us at [email protected]. You’re also welcome to Write for Us!