
Every platform has a different audience. Content creators never want to miss their viewers. This challenge increases when these platforms do not support direct links with your live streaming tool. Well, now you have one less thing to worry about! With the custom RTMP streaming feature in OneStream Live, you can broadcast your video streams to other social networking platforms that are not directly integrated with OneStream Live.
All you need is a valid RTMP URL and Stream key of the desired destination platform. RTMP is the secret sauce behind real-time and on-demand streaming and the de facto standard for transporting videos over the internet.
RTMP streaming delivers fast and stable live video.
Custom RTMP streaming through OneStream Live lets you broadcast anywhere, including platforms not directly integrated with your streaming tool.
Platforms like Facebook, LinkedIn, Vimeo, DaCast and many others support RTMP.
Adding RTMP URLs and stream keys is quick and easy.
RTMP enables flexible, reliable streaming workflows for creators.
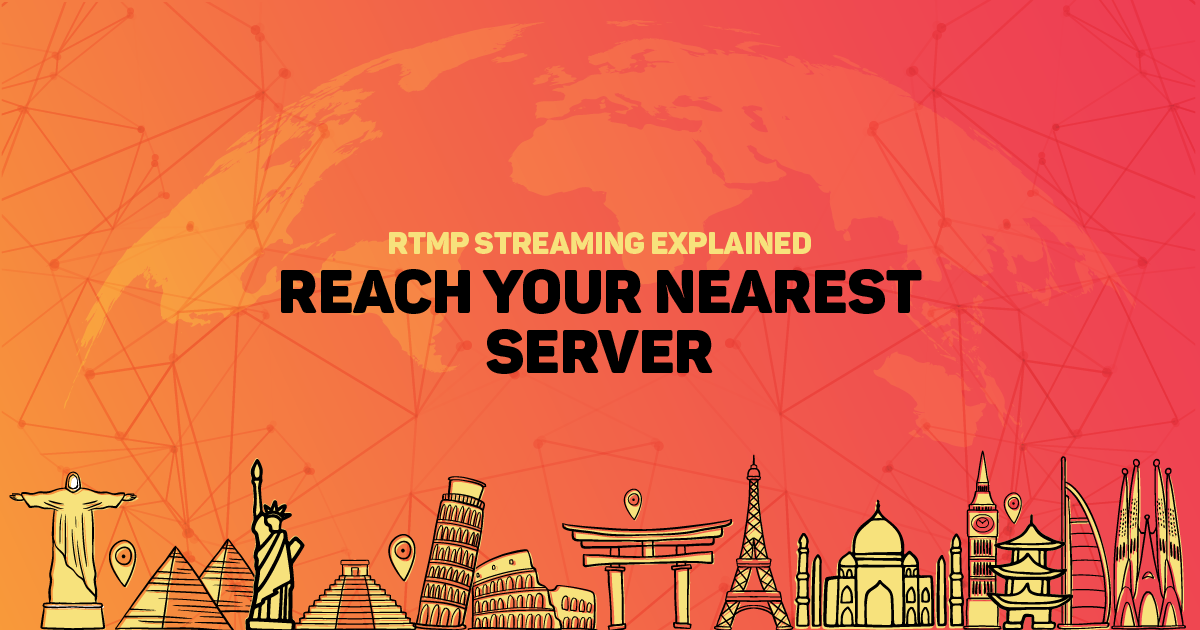
What is RTMP Streaming?
RTMP stands for Real-Time Messaging Protocol, a technology for live video streaming. RTMP streaming means sending your live video and audio over the internet through the RTMP protocol. It was originally developed by Macromedia (later Adobe) to transmit high-quality video, audio, and data with low delay.
RTMP establishes a constant connection between your source (a camera or an RTMP encoder like OBS Studio) and a streaming server to make sure a smooth, real-time data flow. This persistent connection minimizes lag and buffering for viewers. In fact, RTMP’s low latency typically delivers a delay of only about 3–5 seconds which enables near-real-time interaction during a live stream.
Originally, RTMP was used end-to-end for live broadcasts from broadcaster to server to the viewer’s RTMP player (often a Flash-based web player). Today, RTMP is mainly used as an ingest protocol. Your streaming software (encoder) sends an RTMP feed to the platform’s RTMP server, and then the platform converts it into viewer-friendly formats like HLS or DASH.
This workflow retains RTMP’s benefits (low latency, reliable transport) while using modern web players for playback. RTMP remains widely supported in 2025: it is still used by most streaming software and accepted by major platforms as a standard way to ingest live video.
In short, RTMP video streaming is the backbone for many live broadcasts online, valued for its speed and stability.
Key Benefits of RTMP for Live Streaming
- Low Latency: RTMP delivers live streams with minimal delay (just a few seconds). This makes live interactions (chat, Q&A, gaming streams) feel snappy and in sync.
- Reliable Quality: RTMP maintains a steady connection and adjusts to network conditions automatically. It splits the stream into small chunks and makes sure they arrive on time which prevents drops or buffering.
- Broad Compatibility: RTMP is an established standard. Virtually all RTMP encoders (OBS Studio, Wirecast, vMix, etc.) and streaming services support it. This widespread support means you can plug RTMP into almost any live streaming workflow without issues.
- Flexibility: An RTMP broadcast isn’t limited to video and audio; it can carry metadata, captions, and other data in the stream. RTMP also supports secure variants (like RTMPS) for encrypted streaming when needed. In short, it’s a mature protocol that covers many streaming needs.
How to Configure RTMP Streaming Settings with OneStream Dashboard
Here is a step-by-step process of setting up streaming for some popular live streaming destinations via OneStream Live:
- Open OneStream dashboard
- From the right side, click on the Add Social Platform button.
- Click on the Custom RTMP account.
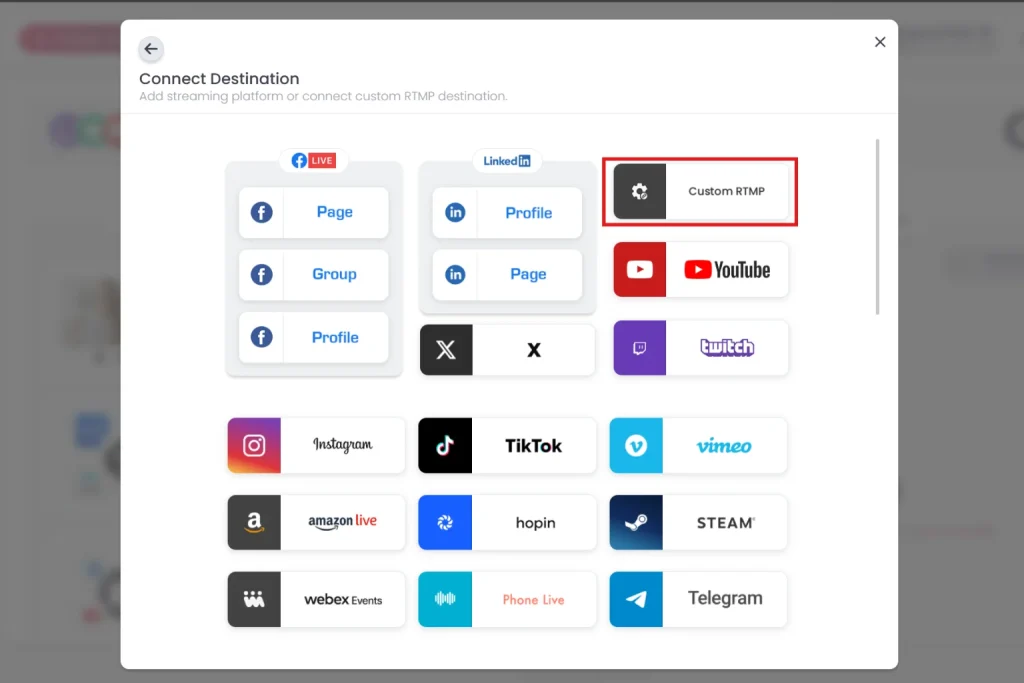
Add the following information:
- Social Account Name can be anything you choose
- Choose Platform can be anything you choose
- Server or RTMP URL starts with RTMP:// which can be obtained from the destination where you plan to stream. Check below to get RTMP URL for some popular platforms.
- Streaming Key from the respective social platform
Facebook Live Event (Custom RTMP)
Facebook doesn’t natively allow scheduling a stream from external tools without its API, but with RTMP you can stream to a Facebook Event easily. Here’s how to use OneStream Live for a Facebook Live event:
1. Create a Facebook Live Event: On Facebook, go to Live Producer. Choose where you want to go live (your profile, a Page, or a Group) and select Create live video event. Enter the event name, date/time, privacy, and description, then create the event.
2. Get the Stream Key: In Facebook Live Producer’s event settings, find Settings > Stream. Enable Use a persistent stream key, then copy the Persistent Stream Key provided by Facebook. (This is the RTMP stream key for your event. Facebook uses a fixed RTMP server URL that OneStream Live will handle automatically by selecting “Facebook” as the platform.)
3. Prepare Auto Start: Still in Live Producer, toggle Go Live automatically at scheduled start time ON and save the changes. This ensures Facebook will automatically begin the stream when OneStream Live sends it at the scheduled time.
4. Connect in OneStream Live: Open the OneStream Live dashboard. Click Add Social Platform, then choose Custom RTMP as the platform type. Give this destination a name (e.g. “Facebook Event Stream”) and select Facebook as the platform. Paste the Stream Key you copied from Facebook into the Stream Key field. (The Server URL will auto-fill for Facebook’s RTMP URL.) Click Connect to save this custom RTMP destination.
5. Schedule the Stream: Now schedule your stream on OneStream Live using this new Facebook RTMP destination. Set the stream to start one minute after your Facebook event’s start time (for example, if your event is 10:00, schedule OneStream for 10:01). OneStream will send the video stream to Facebook, and Facebook will automatically go live at the event time.
LinkedIn Live via RTMP
LinkedIn Live requires users to be approved for live streaming, but once you have access, you can use OneStream Live to stream to LinkedIn. LinkedIn now offers its own Live Producer, but you can also connect via RTMP. Here’s how:
1. Get LinkedIn RTMP Details: Log on to your LinkedIn account and go to the custom stream page at https://www.linkedin.com/video/golive/now/. Under New stream, select Go Live Now. Under Create a post select the LinkedIn Profile or Page you want to stream to. Add a title for your stream under your stream details. In the Stream settings tab, pick your region, then click Get URL. Copy both the URL and the key.
Pro Tip: Not all regions have a dedicated source for streaming on LinkedIn. If your region is not in the Region dropdown list you can still go live by selecting the region closest to you.
2. Add LinkedIn RTMP in OneStream: In OneStream Live, click Add Social Platform and select Custom RTMP. Name the destination (e.g. “LinkedIn Live”) and choose LinkedIn as the platform if available. Paste the LinkedIn Server URL and Stream Key into the fields. Click Connect to OneStream.
3. Go Live: Schedule your stream on the newly added LinkedIn RTMP destination or go live in real-time. Once OneStream begins streaming, return to LinkedIn’s Live Producer page. You should see a preview of your stream. When you’re ready, click Go Live on LinkedIn (unless it’s set to auto-start). Your content will now be live on LinkedIn.
Note: OneStream Live also offers direct LinkedIn integration via OAuth if you prefer to connect your account, but the RTMP method works for any custom setup.
WOWZA
Wowza is a professional streaming service that can act as your own RTMP streaming server. To send a stream from OneStream Live to Wowza:
1. Create a Live Stream in Wowza: Log in to your Wowza Streaming Cloud account. Click Add Live Stream and configure a new stream (name, closest data center location, etc.). In the encoder setup, choose RTMP as the encoder type and Push Stream as the method. Complete the setup with default settings or your preferences, then finish creating the live stream.
2. Get Wowza RTMP Credentials: Once the stream is created, Wowza will display Source Connection Information. Copy the Primary Server URL (this is the RTMP URL) and the Stream Name (which serves as the stream key).
3. Add Wowza in OneStream Live: In OneStream Live, go to Add Social Platform and click Custom RTMP. Name it (e.g. “Wowza Stream”) and choose Wowza as the platform. Paste the Wowza Server URL and Stream Name/Key into the fields. Click Connect.
Vimeo
Vimeo allows RTMP ingestion for live events on its platform. You can use OneStream Live to stream to Vimeo by obtaining the RTMP details from Vimeo:
1. Create a Vimeo Event: Log in to your Vimeo account. Go to the Live Events section on your dashboard and click Create Event. Choose Create Live Broadcast. Once the page loads, Select Manage Production. Click on Stream with an encoder. Vimeo will generate a unique RTMPS URL and Stream Key for this event. Copy both.
2. Add Vimeo in OneStream Live: In OneStream Live, add a new Custom RTMP destination. Name it “Vimeo Live Event” (for example) and choose Vimeo as the platform. For the Server URL, paste the RTMPS URL from Vimeo and paste the Vimeo Stream Key into the Stream Key field. Click Connect.
3. Go Live: Schedule or start your stream on the Vimeo RTMP destination in OneStream Live. If you left Vimeo in preview mode, you’ll need to click Go Live on Vimeo when you see the preview feed. Otherwise, if auto-start was enabled, Vimeo will automatically begin the stream when OneStream Live sends data.
Pro Tip: You can check the Preview stream before going live button to preview the live stream beforehand, and in this case, you will need to click “Go Live” from Vimeo. If you do not check this button then the stream will go live automatically.
DaCast
DaCast is a streaming service that provides an online video platform and CDN. You can stream to DaCast using OneStream Live as follows:
1. Create a Live Channel on DaCast: Log in to your DaCast account. Click Add and choose to create a Live Stream. Select the type (e.g. Standard live channel) and configure basic settings (title, resolution, etc.). Create the channel.
2. Retrieve RTMP Info: In your DaCast live channel settings (under Encoder Setup), you’ll find theStream URL and the Stream NameorStream Key. Typically, DaCast provides a URL like rtmp://p.ep**.dacast.com/live and a stream key (often a long alphanumeric code). Copy the URL and key. If DaCast shows an encoder username and password, note those as well.
3. Add DaCast in OneStream: In OneStream Live, click Add Social Platform and click DaCast. Paste the DaCast RTMP URL and Stream Key into OneStream Live. Connect the account.
4. Start the Stream: In OneStream, launch a stream to the DaCast RTMP destination. Once live, you can go to your DaCast channel page or Preview in DaCast to ensure the stream is coming through. DaCast will then broadcast the stream to your viewers via its platform. (DaCast provides an embed player and link for each channel, which you can share or embed on your site.)
Final Thoughts
Although RTMP might sound like a mere technical protocol, it has magical applications in the live streaming industry. The greatest advantage is that it is universal across several destinations, including unlimited social networking platforms, allowing streamers to broadcast their video content anywhere and everywhere.
Learn how to configure other popular social media with OneStream Live through custom RTMP settings via our HelpDesk articles: All you need to know about Custom RTMP usage with OneStream.
With the right tools and a bit of setup, RTMP streaming can open doors to limitless streaming opportunities. Happy streaming!

Frequently Asked Questions
RTMP streaming sends a video feed from your encoder to a server, allowing you to broadcast live to any platform that supports RTMP.
For RTMP streaming, you need an encoder (hardware or software), a stable internet connection, and a streaming platform that supports RTMP.
With OneStream Live, you can easily set up RTMP streaming by entering the provided stream key and server URL into your encoder to broadcast to multiple platforms.
Yes, RTMP allows you to stream to multiple platforms simultaneously, depending on the capabilities of your encoder and the streaming service.
Yes, OneStream Live supports RTMP streaming to over 45 platforms, making it easy to reach a broad audience.
OneStream Live is a cloud-based live streaming solution to create, schedule, and multistream professional-looking live streams across 45+ social media platforms and the web simultaneously. For content-related queries and feedback, write to us at [email protected]. You’re also welcome to Write for Us!