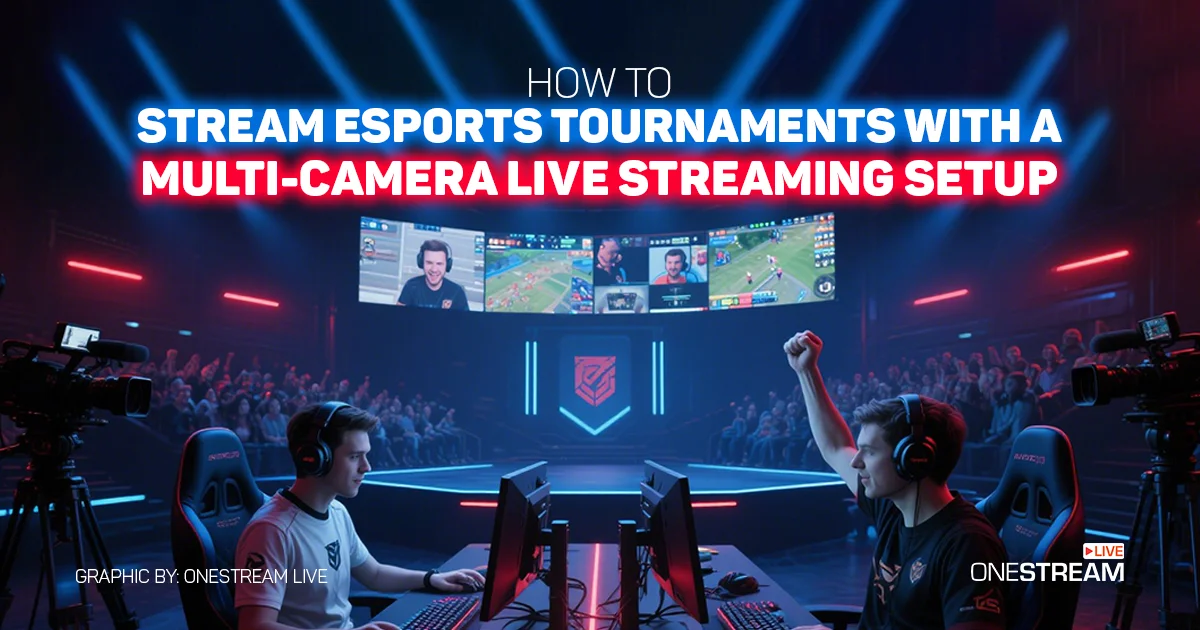

Sports become great because of their fans. Football is loved around the world because millions of people watch it. Today, digital life has changed how we enjoy sports. Many prefer staying at home instead of going outside to play or watch. This is where esports grows. Indoor esports games give people a way to stay involved and spend their time doing what they enjoy. Esports has built a huge audience. The tournaments bring in large numbers of viewers who watch every match closely. In this blog, we’ll learn how to stream esports tournaments using a multi-camera setup to make the audience more engaged and enjoy the experience even more.
Benefits of Streaming Esports Tournaments
Live streaming your esports tournaments is not just about the entertainment. It also delivers tangible benefits for event organizers, teams, and sponsors.
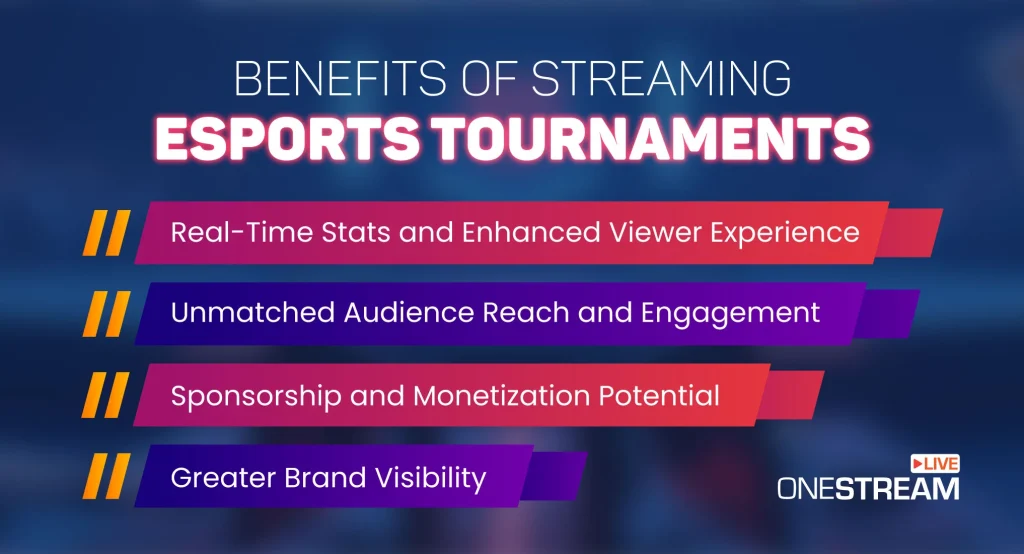
Unmatched Audience Reach and Engagement
Streaming your esports tournaments enables a global audience to tune in far beyond the physical venue. Esports viewership is in millions and live streaming lets fans from anywhere join in the excitement.
On top esports streaming platforms like Twitch and YouTube, viewers don’t just watch, they interact through live chat, polls, and reactions in real time, which drives next-level engagement. An esports live streams turns passive spectators into active participants, which builds a vibrant community around your event.
Greater Brand Visibility
An esports live tournament is a magnet for eyeballs which offers brand exposure on par with major sports events. For instance, the 2023 League of Legends World Championship final drew over 5.1 million concurrent viewers. Streaming your tournament live means team brands, event organizers, and sponsors get visible to this massive audience.
Logos on player jerseys, on-screen overlays, and sponsor shout-outs during the broadcast all translate into increased brand awareness. Sponsors and partners love esports streams because they tap into a highly engaged, young demographic, which increases the sponsor’s reach and credibility in the gaming community.
Sponsorship and Monetization Potential
High viewership and engagement make esports streams ripe for monetization. Sponsorship potential is huge. A well-produced live stream can attract sponsors who want their name in front of enthusiastic fans through branded segments, product placements, or sponsored prize pools.
Additionally, streaming opens up revenue streams like ads, subscription or donation support from viewers, and Pay-Per-View options for premium content. In simple terms, the more polished and far-reaching your stream is, the more value you can offer to sponsors and partners.
Real-Time Stats and Enhanced Viewer Experience
One of the big advantages of digital broadcasts is that you can integrate esports live stats and overlays that enrich the viewing experience. Live streaming software allows you to display real-time game data, player scores, health bars, timers, or team statistics on the screen, which gives online viewers instant context that even in-person spectators might miss.
Modern esports streams often incorporate live scoreboards and data-driven graphics, which keep audiences informed and invested in the competition. This not only satisfies hardcore fans’ appetite for information but also opens other opportunities for sponsored info segments (for example, a “powered by [Brand] Live Stats” graphic).
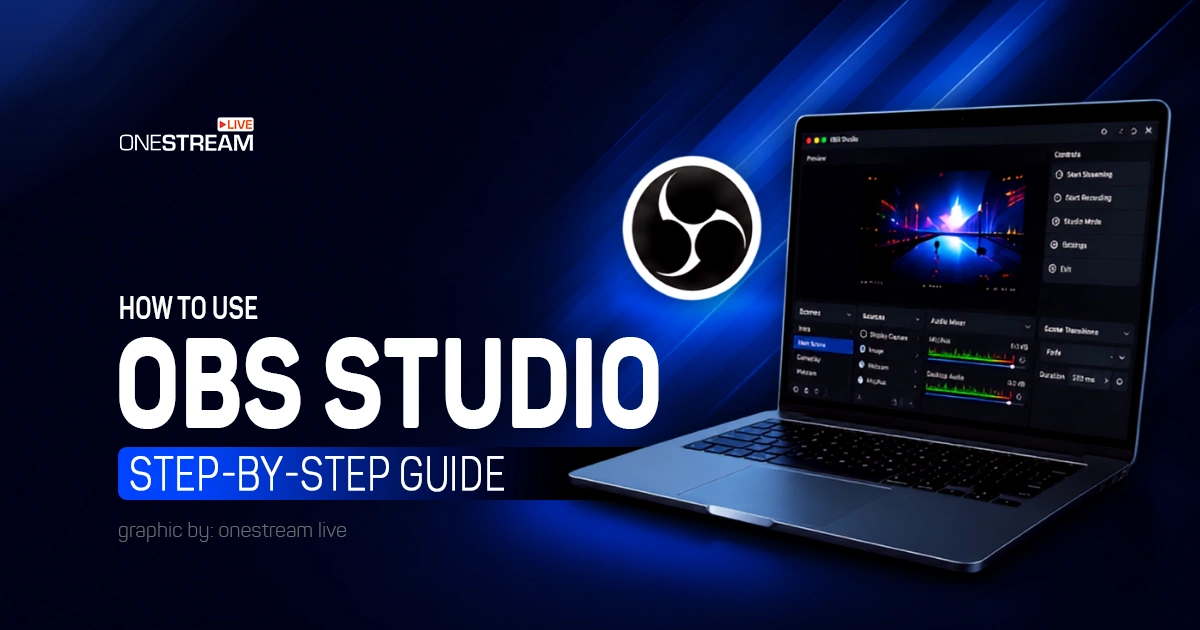
How to Stream Esports Tournaments Using OneStream Live
Successfully streaming an esports tournament with multiple cameras may sound complex, but it can be broken down into clear steps. Below is a step-by-step guide to plan and execute your esports setup for a multi-camera live stream using multi camera streaming software, OneStream Live:
Step 1: Prepare Your Multi-Camera Equipment
Start by assembling the basic equipment for your multi-camera esports stream. You will need at least two cameras to get a dynamic multi-angle view. These can be as simple as a USB webcam and a smartphone, or more professional cameras like DSLRs or camcorders (with capture cards if necessary).
The key is to have multiple viewpoints. This forms the base of a complete live multi camera video solution that helps you cover every part of the tournament.
- Main Camera: Focused on the gameplay screen or the stage where the esports action is shown.
- Secondary Camera(s): Aimed at players’ reactions, casters/hosts, or the audience. Even a basic two-camera setup will make your stream more engaging, since you can switch views in real time and highlight key moments
Make sure you also have a good microphone or headset for clear audio commentary, since great sound is important for esports commentary.
Step 2: Set Up OneStream Live’s Cloud Studio
Before the event, create a OneStream Live account and familiarize yourself with the dashboard. OneStream Live operates through a cloud-based live studio that runs in your web browser, meaning you don’t need to install any heavy software on your computer.
Simply log in and launch the OneStream Studio from the dashboard.
Once in OneStream Live Studio, configure your stream’s basic details:
- Title and Description: Give your esports tournament stream a clear title and a brief description so viewers know what to expect.
- Video Settings: Choose your stream resolution and orientation. OneStream supports HD streaming, so you can showcase your tournament in high quality. If you prefer a portrait or landscape mode, you can adjust that with one click in the studio settings.
- Layout and Branding: You can customize the layout by adding your tournament logo, overlays for team names or scores, and any sponsor graphics to give a professional look. OneStream Live lets you add logos and overlays easily for branding your stream. You can also prepare any intro countdown or outro screens within the studio.
Because the studio is cloud-based, all these settings are saved online. This means you can use any computer with a browser to run the stream. OneStream Live is designed to be straightforward so setting up the stream is smooth even if you’re not a technical expert.
Step 3: Add Multiple Cameras in OneStream Live Studio
Now comes the most important part connecting your multiple cameras in OneStream Live Studio. OneStream Live works as a multi camera live streaming software that lets you plug in and use up to four camera sources at the same time.
Here’s how to add your cameras in the studio session:
1. In your OneStream Studio, at the bottom of the studio panel, click the Share button. A menu will appear – choose Extra Cameras. OneStream Live will display a list of all camera devices connected to your computer.
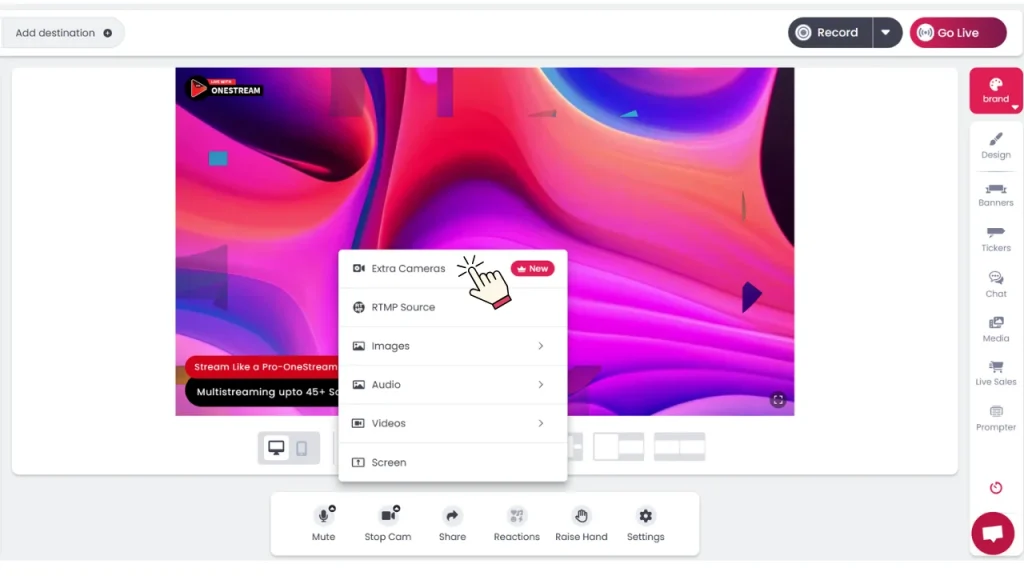
Need Help? Read: How to Add Multiple Cameras to OneStream Live Studio
2. Enable the Cameras: Toggle on the cameras you want to use from the list. For example, turn on your primary webcam and then your secondary camera. Once toggled, these cameras will become available as additional inputs in the studio.
3. Add to Stream: Look at the left side of the studio interface (this is where your sources and scenes are shown). You should see your extra camera feeds listed there. Click on each extra camera and then click “Add to stream” to bring that camera feed into the live layout. You can add one camera at a time or set up a multi-view layout if needed.
4. Verify Feeds: You’ll now see the video feed from each camera in the OneStream Studio. Arrange them as needed. Typically, you might have one on the main screen at a time and others ready to switch to. You can click on any camera feed to make it the active view for the audience.
OneStream Live Studio makes it easy to switch between your connected cameras during the broadcast. With multiple angles connected, you can capture every viewpoint seamlessly, which will keep your audience engaged from all perspectives.
For instance, you might show the gameplay feed most of the time, then switch to a camera capturing the players’ reaction after a big play, or cut to a wide shot of the audience cheering during a break.
Step 4: Configure Streaming Destinations (Multistreaming)
One of the biggest advantages of using OneStream Live for esports tournaments is the built-in multistreaming capability. Esports audiences are scattered across platforms – some prefer Twitch, others YouTube, Facebook Gaming, or even Twitter. With OneStream Live, you can broadcast your tournament to all of these platforms simultaneously which will increase your reach without extra effort.
To set up your streaming destinations, follow these steps in the OneStream Live dashboard or Studio settings:
1. Connect Platforms: In the Onestream Studio, go to the Add Destinations and connect your social platforms. You can link accounts like Twitch, YouTube, Facebook, Twitter, Trovo, or any platform you plan to stream on.
OneStream supports 45+ social media platforms and even custom RTMP endpoints. This means if your tournament has a website with a player or another platform, you can stream there too.
2. Select Destinations for the Stream: Once your accounts are linked, choose which ones you want to go live on for this event. For example, select your Twitch channel, YouTube channel, and Facebook page. You can pick multiple destinations; OneStream will broadcast your single stream to all selected platforms at once.
3. Stream Key/RTMP (if needed): For any platform that isn’t directly integrated, you can use OneStream’s custom RTMP feature. Copy the stream URL/key from the platform and add it in OneStream. But for most major platforms, OneStream Live handles the connection without manual RTMP setup.
4. Notifications and Scheduling: If you want, schedule your stream in advance so followers get notified (e.g., schedule an event on YouTube or Facebook). OneStream allows scheduling events ahead of time to create hype among your audience. This is great for esports tournaments, and you can announce when the stream will start on all platforms.
Take a moment to double-check your stream title and game category on each platform. By multistreaming to every major platform, you ensure no fan misses out. You’ll be live on Facebook, YouTube, Twitch, and many other channels all at once, all managed from the OneStream Live interface.
Step 5: Go Live and Manage Your Broadcast
With your cameras set up and destinations configured, it’s showtime! Before you hit the “Go Live” button, do a final check and make sure all camera feeds are working, audio levels are good (test your mic and in-game sound), and your internet connection is stable.
When ready, start the live stream. With OneStream Live, going live is as simple as clicking a button on the studio interface. Your video game streaming setup is in full action and it delivers the tournament experience to your audience in real time. Here are some tips for managing it:
Switch Camera Angles Actively: Don’t leave the view on one camera for too long. Use the OneStream Studio controls to switch between your game feed, player cam, and other angles at appropriate times (for example, show the players or commentators during breaks or between matches, then switch to full game footage during play). This keeps the presentation dynamic and engaging and will help your viewers stay glued to the action.
Engage with the Audience: OneStream Live aggregates comments from multiple platforms into one unified chat interface. Assign someone on your team to monitor the chat and pick out interesting questions or reactions to mention on stream. Engaging with viewers makes the audience feel involved.
Team Collaboration: If you have a production team or even a couple of friends helping, take advantage of OneStream’s team collaboration features. You can invite team members to your OneStream Live account with roles like admin or manager. This means a teammate can help control the stream – for example, one person can handle switching cameras and graphics, while another manages the audio or engages with chat.
Use Overlays and Replays: During the live stream, you might incorporate overlays for scores, player names, or sponsor logos. OneStream Studio lets you add custom text or image overlays on the fly. If your tournament setup allows, you could even play short highlight replays or between-match video content by using the media sharing feature. These enhancements keep the broadcast professional and entertaining.
Finally, keep an eye on your stream health indicators (OneStream Live will show if your connection drops or any platform has an issue). If you see any warnings, address them as soon as possible (for example, pause unnecessary internet use on the network if bandwidth dips). Generally, if you have tested everything beforehand the live stream should run smoothly.
Final Thoughts
By following these steps, you can confidently stream esports tournaments using a multi-camera setup on OneStream Live. You’ve seen how to connect multiple cameras in the cloud-based studio, stream to all major platforms at once, and collaborate with a team to manage the broadcast.
Now, it’s game on – set up that multi-camera rig, hit the “Go Live” button, and let the digital arenas erupt in excitement!
Set up your cameras. Go live with OneStream Live, and your esports tournaments will reach every viewer exactly as they should.

OneStream Live is a cloud-based live streaming solution to create, schedule, and multistream professional-looking live streams across 45+ social media platforms and the web simultaneously. For content-related queries and feedback, write to us at [email protected]. You’re also welcome to Write for Us!