
Launching a podcast show in 2025 is both exhilarating and overwhelming. Therefore, it is essential to truly understand what podcast equipment you need.
Great podcasts begin with great podcast equipment. Microphones, interfaces, lighting, studio software, distribution…it can feel like you’re wiring a recording truck instead of chasing a story.
As many podcasters like to say, “People will forgive poor video, but no one will forgive poor audio.” In this comprehensive guide, we’ll answer the most burning questions around podcast gear, recommend the best equipment for content creators, and show you how to streamline your podcast setup using the powerful features of OneStream Live.
So, grab a coffee, plug in those headphones, and let’s dig deep into the ultimate podcasting equipment list that can take your content from basic to viral.
Why Obsess Over Podcast Equipment?
- 504.9 million people will listen to podcasts worldwide in 2025, up 9.6 % YoY. (Podcast Statistics)
- 41 % of global consumers already spend at least an hour a week with podcasts. (YouGov)
- YouTube alone delivers 1 billion podcast video views every month. (The Verge)
What Do You Need To Start A Podcast In 2025?
At the most basic level, what do you need to start a podcast? You don’t need a ton of gear to begin – in fact, basic podcast equipment can be quite simple. Here’s a quick podcast equipment list to get you started:
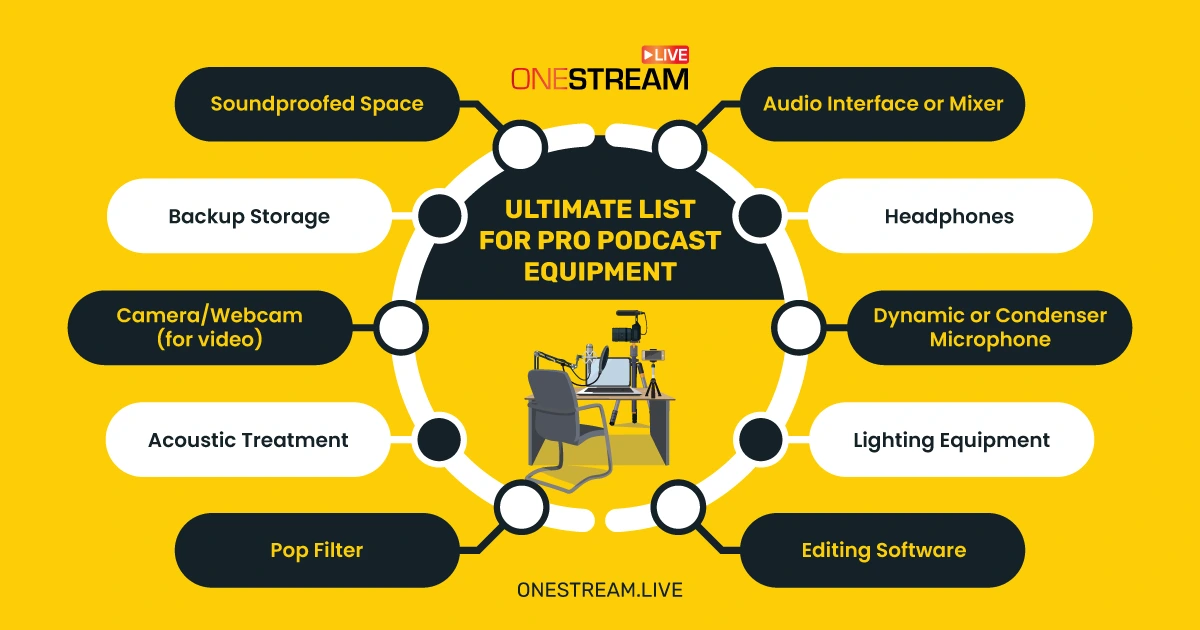
- Microphone (Dynamic or Condenser)
- Headphones
- Audio Interface or Mixer
- Pop Filter
- Recording & Editing Software
- Camera or Webcam (if recording video)
- Lighting
- Soundproofing / Acoustic Treatment
- Backup Storage
If you’re on a low budget, don’t panic. You can start small and scale your podcast setup as your content—and audience—grows.
Pro Tip: “You don’t need a fancy studio to start a podcast. Just a mic, your voice, and a story that matters,” says Elizabeth McCravy in her popular episode on podcast tech.
What Is the Best Podcast Microphone: Dynamic or Condenser?
The microphone is arguably the most important piece of podcast recording equipment – it’s the tool that captures your voice. There are two main types of mics to consider: dynamic and condenser.
A dynamic microphone is typically more rugged and less sensitive to background noise. It’s great for live settings or less treated rooms because it naturally rejects a lot of room echo and ambient noise. If you’re recording in a bedroom or an office with minimal sound treatment, a dynamic mic (like the famous Shure SM58 or Shure SM7B) can be very forgiving.
In contrast, a condenser microphone is more sensitive and can capture more detail and clarity in your voice – but it will also pick up more of your room’s acoustics (and any noisy neighbors or air conditioners!). Condensers, such as the Audio-Technica AT2020 or Blue Yeti, shine in a controlled, quiet space where you want that crisp, broadcast-quality vocal sound.
So which should you choose for your podcast mic setup? It depends on your environment and budget. For many beginners without a treated studio, a dynamic mic is the safer bet to get clean audio. If you do have a soundproofed space or plan to treat your room (discussed later), a condenser can deliver a rich sound that’s hard to beat.
| Mic Type | Best For | Pros | Cons | Examples |
|---|---|---|---|---|
| Dynamic Microphone | Untreated or noisy rooms | Durable, low background noise, great for live use | Less sensitive to vocal detail | Shure SM58, Shure SM7B |
| Condenser Microphone | Sound-treated studios or quiet spaces | Captures crisp, detailed audio; studio quality | Picks up room noise easily | Audio-Technica AT2020, Blue Yeti |
Is an Audio Interface or Mixer an Important Podcast Equipment?
If you’re using a USB microphone, you can plug directly into your computer and may not need additional gear to capture audio. However, if you opt for XLR microphones (the kind with a three-pronged cable), you will need an audio interface or mixer to connect the mic to your computer.
So let’s break down these pieces of equipment for podcast recording:
1. Audio Interface
This is a device that converts the analog signal from your mic into digital data for your computer. Think of it as a high-quality external sound card.
For a solo or two-person podcast, a simple two-channel interface like the Focusrite Scarlett 2i2 is a popular choice in many podcast equipment bundles. An interface ensures you get clean, high-fidelity recordings and often has preamps to boost your mic’s signal.
2. Mixer
A mixer allows you to adjust levels, EQ, and mix multiple audio inputs in real time. Some mixers also function as an interface (outputting a digital signal to your computer).
If you have multiple hosts/guests in person or plan to do live shows with sound effects, a mixer can be incredibly useful. Dedicated podcast mixers like the Rodecaster Pro combine multiple mic inputs, sound pads for effects, phone/bluetooth input for calls, and multi-track recording.
They streamline complex podcast set ups into one console. A mixer isn’t strictly required for a basic show, but it adds a level of control and podcast tools for producing a polished, live-mixed program.
| Device | Purpose | Best For | Popular Example | Do You Need It? |
|---|---|---|---|---|
| Audio Interface | Converts analog mic signal to digital; boosts signal with preamps | Solo or 2-person podcasts with XLR mics | Focusrite Scarlett 2i2 | Yes, if using XLR mics and want high audio quality |
| Mixer | Mixes multiple audio sources in real-time, with level & EQ control | Multi-host shows, live sound effects, phone guests | Rodecaster Pro | Optional; ideal for complex or live productions |
For most beginners, an interface is the first thing to get once you move beyond a USB mic. It’s simple and relatively affordable.
A full mixer might come later if you expand your format. Keep in mind, many mixers nowadays are hybrid, meaning they connect via USB and act as an interface too – so you don’t necessarily need both separately.
It really comes down to your show’s needs: Are you a solo podcaster recording into software (interface is enough)? Or are you juggling multiple mics, maybe playing audio clips live, or planning to mix minus a remote guest on a call (a mixer could be worth it)?
Why Are Headphones Essential in a Podcasting Equipment Kit?
It’s tempting to focus only on microphones and forget about monitoring, but headphones are truly a podcast essential. Here’s why you should always have a quality pair of closed-back headphones in your podcast gear:
| Reason | Why It Matters | Pro Tip |
|---|---|---|
| Live Monitoring | Hear mic input in real time; catch issues early (plosives, hum, drifting off mic) | Always wear headphones while recording—even solo |
| Prevent Echo/Feedback | Avoid mic picking up guest voices from speakers; reduces feedback loops | Closed-back headphones are essential for multi-person setups |
| Editing & Mixing | Hear audio details clearly; balance levels, EQ, and detect subtle noise | Use studio headphones like ATH-M50x or Sony MDR-7506 |
1. Live Monitoring
When you record, you (and your co-hosts/guests) should ideally wear headphones to monitor the audio. This lets you hear exactly what the microphone is picking up in real time.
You’ll catch problems like background hum, plosives, or if you accidentally drift away from the mic. It’s much better to notice and fix those during recording than to discover them later in editing.
2. Preventing Echo/Feedback
If you have a guest on Skype/Zoom or even sitting across the table, headphones prevent your microphone from picking up the sound of their voice coming from your speakers. This avoids creating an echo loop or feedback.
In a podcast set with multiple people, everyone wearing headphones is standard practice for this reason.
3. Editing and Mixing
After recording, when you move to the editing phase, good headphones allow you to hear details in the audio. You’ll be able to equalize voices, remove noise, and mix intro music at proper levels more accurately.
Consumer earbuds or laptop speakers might not reveal issues like subtle hiss or uneven levels. A pair of studio monitor headphones (e.g., Audio-Technica ATH-M50x or Sony MDR-7506) is great for this task.
In your podcast equipment kit, look for closed-back headphones (these reduce sound leakage so your mic won’t pick up the audio bleeding out of your headphones). Comfort is also key – you might be wearing them for an hour or more at a time.
Do You Really Need a Pop Filter for Your Microphone?
Ever hear a recording with disturbing “booms” or thumps when someone says words starting with P or B? That’s caused by plosives – bursts of air from our speech hitting the mic.
A pop filter (or windscreen) is a simple piece of podcast equipment that tamps down those plosives and protects your audio from that harsh distortion. In a proper podcast mic setup, a pop filter (a circular screen of mesh or foam that you place a couple of inches in front of the mic) is highly recommended.
Here’s why you should have one:
- Cleaner Sound: The pop filter’s mesh disperses the rush of air from “p” and “b” sounds so they don’t hit the microphone capsule directly. This results in a smoother sound with fewer sudden bassy pops.
- Protects the Mic: Over time, speaking closely into a mic without a filter can allow saliva moisture to reach the mic element (yuck). A pop filter acts as a shield to keep your microphone cleaner and potentially extend its life.
- Improves Consistency: A pop filter can also serve as a gentle reminder for you to keep the proper distance from the mic. You’ll often position your mouth 2–4 inches from the filter, and the filter maybe 2 inches from the mic. This spacing helps maintain a consistent sound.
| Reason to Use | Why It Matters | Pro Tip |
|---|---|---|
| Cleaner Sound | Reduces plosives from “p” and “b” sounds by diffusing bursts of air | Use mesh filters for vocals; foam windscreens for outdoor or dynamic mics |
| Mic Protection | Shields mic from moisture and spit, helping extend mic lifespan | Clean pop filters regularly to prevent buildup over time |
| Improved Mic Technique | Encourages consistent mic distance for balanced recording levels | Place filter ~2 inches from mic; speak 2–4 inches from filter |
The good news is pop filters are inexpensive. They are often included in podcast equipment bundles or you can buy one for under $20. There are also foam windscreen covers that fit over the mic (common with dynamic mics like the Shure SM7B or broadcast mics).
How Can Acoustic Treatment Improve Your Recording Quality?
Once you have the main hardware like a mic and headphones sorted, the recording environment becomes the next critical factor. Acoustic treatment refers to using materials (like foam panels, bass traps, diffusers) to control the sound reflections in your room.
While it’s sometimes seen as “advanced,” even a basic podcast setup benefits hugely from a little acoustic TLC. Acoustic treatment is about adding just enough softness and irregular surfaces to your recording space so that your microphone picks up you, and not a chorus of reflections of you.
Here’s how to consider treating your space for podcast recording equipment to shine:
| Treatment Type | Purpose | Best Practices | Budget Tip |
|---|---|---|---|
| Reflection Filters & Panels | Reduce echo and reverb from voice bouncing off walls | Treat wall in front of mic; use portable filters behind mic if needed | Use foam panels, thick blankets, or comforters on reflective surfaces |
| Bass Traps | Absorb low-end boominess from corners of the room | Place thick traps in corners if bass resonance is noticeable | Optional for small rooms, but useful in echo-prone spaces |
| Furniture & DIY Solutions | Diffuse or absorb sound using household items | Use bookshelves, curtains, and rugs to improve sound quality | Podcast on a carpeted floor near soft surfaces—it works wonders |
1. Reflection Filters and Panels
If you can’t treat a whole room, a portable reflection filter that sits behind your mic can help. However, for a room approach, placing acoustic foam or panels on the walls (especially directly in front of you, and on any large flat surfaces that reflect your voice back to the mic) will reduce reverb.
A common hack is to put foam or thick blankets on the wall you face while recording. This prevents your voice from hitting that wall and bouncing right back into the mic.
2. Bass Traps
Low-frequency sounds can cause a boomy room tone. Bass traps (thicker corner acoustic panels) absorb those.
In a small podcast room, this might be overkill, but if you notice a lot of bass resonance, it’s worth looking into.
3. Furniture and DIY Solutions
You don’t have to spend a fortune; bookshelves filled with books, heavy curtains over windows, and rugs on hardwood floors all count as acoustic treatment. They break up sound waves or absorb them.
Many podcast equipment for beginners guides forget to mention this, but the environment is as much “equipment” as any gadget. In fact, if someone asks what equipment is needed for a podcast, a smart answer includes a good recording space setup as well!
By improving your room acoustics, your recordings will instantly sound more professional, even with the same mic. Your voice will come through more directly, with less “roomy” aftereffect.
This also makes editing easier (you won’t need as much noise reduction or EQ to fix room issues).
Do You Need a Soundproofed Space for Pro-Level Audio?
Acoustic treatment (discussed above) is about improving sound inside the room. Soundproofing, on the other hand, is about isolating your room from outside noise (and keeping your sound from leaking out).
To produce pro-level content, do you need a completely soundproof studio? Not necessarily – but you do need a quiet recording environment.
Here’s the breakdown: A fully soundproofed studio involves construction (think: dense walls, insulated doors, no windows, floated floors) and is often beyond the scope of a home podcaster’s budget. The good news is you can achieve excellent results without a perfectly soundproof room by taking some practical steps:
- Choose the Right Time and Place: Record at a quiet time of day when external noise is minimal. If you live by a busy street, late at night or early morning might be quieter. Find the quietest room in your home – interior rooms away from traffic noise or humming appliances work best. This might even be a big closet or a corner of a basement.
- Reduce Noise Sources: Turn off AC units or heaters temporarily (if possible) while recording to avoid HVAC noise. Put your phone on silent. If your computer fan is loud, position the mic away from it or even record on a laptop/tablet that makes less noise.
- Soundproofing Quick Hacks: Use weather stripping to seal door gaps – a lot of sound enters through the cracks around doors and windows. Put a rolled-up towel at the bottom of the door. Closed windows (with heavy drapes) can block some outside noise.
| Strategy | Purpose | Action Tips | Budget Hack |
|---|---|---|---|
| Choose Quiet Time & Place | Minimize external noise during recording | Record early/late; pick interior rooms or large closets | Use a basement corner or closet with blankets |
| Reduce Noise Sources | Eliminate internal distractions and mechanical noise | Turn off AC; silence phones; isolate loud devices | Record on a fanless laptop or tablet |
| Soundproofing Hacks | Block noise from entering or escaping the room | Seal doors with weather stripping; cover windows with thick curtains | Use towels at door base and drapes as insulation |
| Advanced Soundproofing (Optional) | Full isolation for pro studios or noisy environments | Add mass-loaded vinyl, build isolation booth, upgrade doors | Use layered curtains or closet booths before renovating |
Now, if you have the means and need, gradually soundproofing your podcast set (studio) can be worth it. For instance, if you’re in an apartment with noisy neighbors or in a city center, adding mass-loaded vinyl to walls or using a soundproof booth might be a game changer.
But many podcasts are recorded in ordinary homes without complete sound isolation – the key is controlling noise as much as possible at the source.
One more tip: Always have a backup recording or use noise reduction plugins during editing for any unexpected noises. And remember, a dynamic mic as mentioned earlier can help in less-than-silent rooms because it will naturally pick up less far-off noise than a condenser.
Should You Add a Camera for a Video Podcast?
Audio is king in podcasting, but video is the rising queen. Many content creators are now filming their podcast sessions to publish on YouTube or other video platforms.
If you want to produce pro-level content and expand your reach, adding a camera can be a great idea. Let’s talk camera/webcam options and considerations for a podcast set up with video:
If you decide to go the video route, you have a few choices:
| Camera Option | Best For | Pros | Considerations |
|---|---|---|---|
| Webcam | Solo or two-person setups; beginner-friendly | Plug-and-play; affordable; up to 4K video (e.g., Logitech Brio) | Limited depth of field; less cinematic |
| DSLR/Mirrorless Camera | High-end video production; cinematic look | Great image quality; bokeh; versatile in lighting (e.g., Sony A6400) | Requires capture card or SD card recording; more expensive |
| Multi-Camera Setup | Multi-host panels, interviews, live shows | Dynamic visuals; wide & close-up angles; supported by OneStream Studio | More setup; switching software or support required |
1. Webcams
A high-quality webcam is a simple way to get started with video. Modern webcams (like the Logitech Brio) can shoot in 1080p or even 4K and have decent auto settings.
They’re easy to mount on top of your monitor and connect via USB. For a solo host or two people sitting close, a webcam might suffice. It keeps things simple and often relatively affordable.
2. DSLRs/Mirrorless Cameras
For truly top-notch video quality, many podcasters use a DSLR or mirrorless camera with a clean HDMI output. Cameras like the Sony A6400 or Canon EOS M50 are popular for podcasting and streaming.
They provide excellent image quality, depth of field (that blurry background look), and perform well in various lighting. Using these requires either a capture card to feed the HDMI into your computer, or some can record to SD cards for editing later.
3. Multi-Camera Setups
If you have two or three people, you might use multiple cameras – one on each person and maybe a wide shot. This is where multicamera support becomes valuable.
OneStream Live Studio supports multi-camera inputs virtually, allowing you to connect and switch cameras easily during a live recording or stream.
How to Use Multiple Cameras for Shooting in OneStream Live Studio? Read Now!
Now, do you need video? Not for a successful podcast – many top podcasts are audio-only. But video can broaden your audience (YouTube’s huge, and people love watching podcast clips on social media).
It also allows you to repurpose content – a great tip for content creators is to take interesting video snippets from your podcast and share them as promo clips on Instagram, TikTok, etc. This is part of using the best equipment for content creators – using your gear to produce content that can be sliced and diced for multiple platforms.
What Lighting Gear Will Make Your Video Podcast Look Professional?
If you decide to film your podcast, lighting is crucial. Good lighting can make even a modest camera look great, while poor lighting will make a $2000 camera look bad. Think of lighting as an integral part of your podcast equipment kit when you venture into video.
Here are some lighting tips and gear suggestions for a podcast set:
| Lighting Type | Purpose | Pros | Notes |
|---|---|---|---|
| Three-Point Lighting | Creates depth and flattering highlights/shadows | Professional, balanced look with separation from background | Use softboxes/LEDs for key & fill; lamp or small light as back light |
| Soft/Diffused Light | Softens harsh shadows; creates natural skin tones | Flattering for faces; reduces shine | Use softboxes, umbrellas, or ring lights for solo setups |
| LED Panel Lights | Provides adjustable, cool-running lighting | Dimmable; fits small rooms; customizable color temp | Ideal for budget-friendly pro setups; two-light kits are common |
1. Three-Point Lighting Basics
The classic setup is key light, fill light, and back light. The key light is your main light on your face (or subject).
The fill light is a softer light on the opposite side to fill in shadows. The back light (or hair light) is behind you aimed at your back/head to separate you from the background.
For a podcast, you can achieve this with a couple of softboxes or LED panel lights for key/fill, and maybe a smaller light or even a practical lamp in the background as a back light.
2. Soft, Diffused Lighting
Harsh lighting can create sharp shadows and shiny foreheads. Soft lighting (through a softbox, umbrella, or diffusers) wraps gently around the face and looks more natural.
Ring lights are popular for single-person setups because they provide an even, soft light (and the circular catchlight in the eyes). However, ring lights can be a bit flat; sometimes a softbox at a slight angle is more flattering.
3. LED Panels
There are many affordable LED video lights now that are great for podcasts. They’re often dimmable and color-adjustable. You might get a kit with two LED panels on tripod stands – one as key, one as fill. They don’t get hot and can fit in small rooms.
What Software and Tools Will You Need for Recording and Editing?
With all this talk of hardware, let’s not forget the software side of production. Your microphone captures the sound, but you’ll need software to record, edit, and finalize your episodes.
Plus, if you’re doing video or live streaming, some additional tools come into play. Let’s break down the key podcast tools on the software front:
| Tool Category | Purpose | Examples | Notes |
|---|---|---|---|
| Audio Recording & Editing (DAWs) | Record, edit, clean up your podcast audio | Audacity, GarageBand, Reaper, Adobe Audition, Pro Tools | Start with free tools like Audacity; upgrade as needed |
| Video Editing Software | Edit video podcast footage, add visuals, overlays | DaVinci Resolve, Premiere Pro, iMovie, Windows Video Editor | DaVinci Resolve has a powerful free version |
| Live Streaming/Recording Studio | Stream and record podcasts with remote guests | OneStream Live Studio | Supports teleprompter, multicam, HD recording, multistreaming |
| Publishing & Repurposing | Distribute, schedule, or re-stream your episodes | Libsyn, Podbean, Spotify for Podcasters, OneStream Live | Embed livestreams on your site, schedule pre-recorded videos |
1. Recording & Editing Software (DAWs)
For audio-only podcasts, a Digital Audio Workstation (DAW) is where you’ll record and edit your content. Popular choices include Audacity (free, open-source, great for beginners), GarageBand on Mac (free, user-friendly), Adobe Audition (paid, more advanced editing capabilities), Reaper (affordable, very powerful), and Pro Tools (industry standard for audio, but overkill for most podcasters).
The basic podcast equipment list should always include some editing software – even if minimal – because virtually every episode will need a bit of trimming, noise reduction, or adding intro music. Choose one that fits your budget and comfort level. If you’re new, Audacity is a fantastic starting point (it covers multitrack editing, noise reduction, etc., without cost).
2. Video Editing Software
If you’re doing video podcasts, you’ll also need video editing capabilities. DaVinci Resolve offers a powerful free version and is great for editing and color correcting video podcast footage.
Other options include Adobe Premiere Pro or even iMovie/Windows Video Editor for very basic splicing.
3. Live Streaming / Recording Studio Software
If you plan on live streaming your podcast or recording remote interviews, consider tools like OneStream Live Studio. This tool allow you to record high-quality video and audio from multiple participants over the internet.
For instance, OneStream Live’s Studio not only lets you invite remote guests easily, but also provides features like a built-in teleprompter (handy if you have an intro script or ad reads), multicamera support (to switch between different camera angles or screenshares), and HD recording of the session. OneStream Live can also stream your podcast live to multiple platforms at once (a process known as multistreaming) if you want to broadcast in real time.
Interested in live streaming your podcast session to 45+ social destinations at the same time?

3. Scheduling & Publishing Tools
Once your episode (audio or video) is edited, you’ll need to publish it. Podcast hosting services (like Libsyn, Anchor/Spotify for Podcasters, Podbean, etc.) will store your files and generate an RSS feed for distribution to podcast directories.
Some content creators also use scheduling tools to repurpose content – for example, you might record a video podcast, then use a tool like OneStream Live to schedule a re-stream of that video as a “live” broadcast on YouTube or Facebook later (which can attract a live audience engagement even though the content is pre-recorded).
Additionally, OneStream Live offers a feature to embed a player of your live stream on your own website, meaning you could host a live video podcast on your site without worrying about heavy lifting – a nice touch for audience engagement.
Can You Live Stream Your Podcast or Record Remote Guests Easily?
Absolutely! In fact, live streaming and remote interviews have become very common in the podcast world, especially after 2020 when everyone got comfortable with video calls.
The key is having the right setup and software to make it smooth. This is where a platform like OneStream Live can be a game-changer for podcasters.
Here are a few scenarios and how OneStream Live can help:
1. Live Streaming Video Podcasts
Suppose you want to do a live show where viewers can watch you record your podcast in real time (and maybe interact via comments). OneStream Live Studio allows you to broadcast live to over 40+ social platforms simultaneously – YouTube, Facebook, Twitter, you name it – so your live podcast recording can reach your audience everywhere.
You can use multiple cameras (thanks to its multicam support) to keep the stream visually interesting. OneStream Live also provides an embed player, so you could even have a “Live Now” page on your website where the stream plays for your site visitors.
During the stream, you can stay on cue with their teleprompter feature if you have talking points or quotes you want to get right. And don’t worry, even if you’re live, you can record in HD to have a pristine copy for editing and releasing as the polished podcast episode later on.
2. Remote Guest Interviews
Got a guest who lives across the country? No problem – OneStream Live Studio lets you invite guests with a simple link. Your guest just needs a device with a camera and mic; the platform will handle capturing their video and audio in high quality.
Each guest’s feed can be recorded separately in HD. This means when you edit, you have the flexibility to clean up or re-sync as needed.
Read Blog to Learn How to Add Guests to your Live Streams using OneStream Studio
3. Repurposing Pre-Recorded Content
Maybe you prefer not to actually go live, but you want the benefits of live (like visibility and immediacy). One neat trick is to schedule a pre-recorded video (your finished podcast episode) to stream “live.”
OneStream Live is known for this capability – you upload your finished video and set a time for it to broadcast as if it were live. Viewers can tune in and you, as the host, can even join the chat to interact, all while the perfectly edited episode plays out.
This also helps in reaching audiences in different time zones or on platforms where pre-recorded uploads might not get as much traction as a “live” event. In essence, you’re making your content work harder for you by repurposing it in multiple formats.
For audio-only podcasters, live streaming might simply be broadcasting an audio stream or doing an Instagram Live Q&A while recording. But video podcasts lend themselves well to live streaming. It creates an event around your content.
Key Takeaways: You can easily live stream or include remote guests in your podcast – you just need the right platform. OneStream Live’s features are tailor-made for video podcasters who want to level up. Even if you’re an audio-first creator, consider doing an occasional live stream or using such tools for guest interviews to save time and get great quality. It’s all about making your podcasting equipment (both hardware and software) work together to expand what your show can do.
Why Is Backup Storage Part of the Best Podcast Equipment Setup?
Imagine this nightmare scenario: You’ve just wrapped an incredible 1-hour interview with a dream guest. It went great.
But then your computer crashes and the file corrupts – or you realize you saved it to a drive that just died. This is where backup storage swoops in like a superhero. Any creator producing pro-level content needs a plan for backups, because tech failures can and do happen at the worst times.
Here’s how to integrate backup strategies into your podcast equipment list:
| Backup Method | Why It Matters | Examples & Tips |
|---|---|---|
| External Drives | Physical backup in case of system failure or loss | Use SSDs for durability; store copies offsite or in a fire-safe box |
| Cloud Storage | Remote access and protection from hardware failure | Dropbox, Google Drive, OneStream cloud recording (up to 500GB) |
| Dual Recording | Capture audio in two places simultaneously | Use Rodecaster Pro, Zoom H4n, or record to SD + computer at once |
1. External Hard Drives or SSDs
Keep your raw recordings and edited masters on an external drive (or at least copy them there after each session). Ideally, use drives known for reliability.
Many podcasters archive episodes on multiple drives – for instance, one that stays at home and another that maybe is kept in a safe or offsite. This way, if one drive fails or something like theft or fire happens, the other copy survives.
External SSDs are faster and more shock-proof than spinning hard drives, though a bit pricier per GB.
2. Cloud Storage
Storing copies of your podcast files in the cloud is great insurance. You can use general services like Google Drive, Dropbox, OneDrive, or specialized backup services.
A cool angle here: if you’re using a platform like OneStream Live Studio to record, they often provide cloud storage for your recordings automatically. For example, OneStream offers up to 500 GB of secure cloud storage for recordings on certain plans.
That means your raw video/audio from a session is instantly backed up online, without you having to upload it manually – a very handy feature.
Read Helpdesk Article on How to Use Cloud Storage Feature for Uploading Videos to OneStream Live
3. Redundancy During Recording
Some mixers or recorders allow dual recording (e.g., the Rodecaster Pro can record to a microSD card internally while also sending audio to your computer). If you have this capability, use it!
Recording in two places at once means even if one fails, the other is there. Even Zoom H4n handheld recorders can serve as a primary or secondary recorder for a podcast set – you could feed your mic into the Zoom recorder as a backup track while also sending it into your computer via an interface. Pros often do this belt-and-suspenders approach.
Remember that content creator equipment isn’t just about creation, but also preservation. If you’re creating an ongoing show, your recordings are assets.
You may want to revisit them, remaster an old episode, or just keep them as part of your body of work. Having backups ensures they’re there when needed.
One more aspect of backup: project files and assets. If you edit in Audition or Premiere, for example, backup your project files and any intro/outro music files too. A great practice is after finishing an episode, export a copy of the final mix and then compress a zip of the project file and raw tracks, and store that on a backup drive or cloud. This way you could recreate or re-export the episode later if needed.
Wrapping Up – Bringing It All Together
We’ve covered a podcast equipment list that spans from microphones and mixers to cameras and software. Producing pro-level content means thinking holistically: great audio (thanks to the right mic and a bit of acoustic love), potentially great video (with cameras and lights if you choose), and a smooth production workflow (with editing tools and streaming platforms working in harmony).
Finally, remember not to get too lost in the gear rabbit hole. It’s possible to start a podcast with minimal equipment – even as little as a smartphone and a cheap lapel mic.
Ready to take the next step? Do an honest audit of your current setup and identify one upgrade that will most improve your production quality.
Maybe it’s adding that pop filter you kept postponing, or finally trying out a platform like OneStream Live to record your next remote interview in studio quality.
Try OneStream Live for your next episode and hear (or see) the difference. Your future self – and your audience – will thank you!

Common Questions About Podcast Equipment
At minimum, you need a microphone, headphones, a computer, and recording software. That’s the core equipment needed to start a podcast.
As you aim for higher quality, you might add an audio interface (if using XLR mics), a pop filter, and some acoustic treatment for your room. Our guide above details each of these.
Essentially, a basic podcast setup = mic + way to record + quiet space. Everything else builds on that.
If you’re starting from scratch and money is tight, you can absolutely launch with budget gear. Basic podcast equipment for beginners could be a USB mic like the Samson Q2U (often recommended for its quality-to-price ratio), free editing software (Audacity), and whatever computer you have.
Use a closet or put blankets around to simulate a studio. This podcast equipment for beginners won’t be fancy, but it can sound surprisingly good. As you grow, you can then upgrade one piece at a time.
A podcast equipment bundle (or podcast starter kit) is a package sold (often by audio companies or retailers) that includes several items you need to start a podcast. For example, a kit might include a microphone, a small audio interface, headphones, and a pop filter, all in one box.
These can be convenient and sometimes cost-effective. However, always check the quality of each component; some bundles cut corners.
To start a podcast for free, use what you already have. Most smartphones have a decent microphone – you could record using a free app.
Or use your laptop’s built-in mic (not the best quality, but it works to begin). Software-wise, use Audacity or GarageBand (free). For hosting the podcast, platforms like Anchor (now Spotify for Podcasters) have free hosting.
How to start a podcast for free comes down to being resourceful: quiet room, free tools, and your creativity. However, if you can spend even a tiny bit, a basic USB mic (~$50) will dramatically improve sound over built-in mics.
Many successful podcasters started with extremely humble setups – the important thing is to get started and improve as you go.
OneStream Live is a cloud-based live streaming solution to create, schedule, and multistream professional-looking live streams across 45+ social media platforms and the web simultaneously. For content-related queries and feedback, write to us at [email protected]. You’re also welcome to Write for Us!