How to record on Google Meet? Can you do it natively? Yes, if you are on a paid Workspace plan. No, if you are on a free plan, you have two choices: Upgrade, or use the free workarounds we detail below. So, how can you record on Google Meet?
In this guide, we break down how to bypass the ‘Premium’ wall using free tools like OBS and how to turn those recordings into live content streams.
In this Article:
Understanding Recording Options in Google Meet
Let’s look at the possible options you have to record Google Meet sessions.
Google Workspace
If you have Google Workspace (Business Standard, Business Plus or Enterprise), you can record all your meetings. It’s a simple option that records and automatically saves to Google Drive.
Free Gmail Account
With a free Gmail account, you can’t record natively. You will be using screen recording software instead, and they often turn out better in terms of quality and control.
Recording as a Participant
Even if you have the Workspace account, you still can’t record unless you are the meeting host or one of the designated co-hosts. This means regular participants will still need screen recording tools regardless of their account type. Your admin might have disabled recording or turned it off for specific participants; in this case, you won’t be able to record.
Note on AI: Google’s Gemini AI can now ‘Take notes for me’ and generate transcripts. However, AI text cannot capture the emotion or visuals of a webinar. For that, you still need raw video recording.”
Two Ways to Record Google Meet Recordings for Live Streaming
Now that we know we have two main ways for recording on Google Meet, let’s understand how each method works with step-by-step instructions.
Method 1: Using Google Meet Recording Feature (Workspace Users)
Before you start, make sure your organization’s admin hasn’t disabled recording. Some companies turn this off for security or compliance reasons.
Note: Breakout rooms cannot be recorded; only the main meeting session is captured, even if recording was started before breakout rooms opened
Step 1: Start your Google Meet session. Once participants begin joining, you’ll see the three-dot menu (called “Activities” in the bottom right corner of your screen.
Step 2: Click the three-dot menu and select “Record Meeting.” Google Meet will ask you to confirm, and when you confirm, it will send a notification that the recording has started to all the participants.
Step 3: A red recording indicator will appear on your screen; this is visible to both you and participants. The recording continues until you stop it or the meeting ends.
All set, that’s how easy it is with a Google Workspace account.
What Gets Captured During Recording and What Doesn’t?
It captures the active speaker’s view, which means it shows whoever is talking at any given moment. Screen shares are also included in the recording, and all the audio from participants is captured. Live captions can optionally be included in recordings. As of February 2023, before the recording starts, you can choose if you want to exclude or include the captions in your recordings..
Chat messages are saved separately as an SBV file, but don’t appear in the video itself. Virtual backgrounds are recorded, but their render quality depends on the device you’re recording in. Notifications, other windows or apps that are outside the Meet window aren’t captured.
Where Does Your Recording Go?
The record doesn’t appear immediately; Google takes 10 minutes to several hours, depending on the recording length. You will receive an email when processing completes. The file is saved in the meeting organizer’s Google Drive folder called “Meet Recordings.”
Method 2: Google Meet Screen Recording with Third-Party Tools (Free Gmail Users)
Most people, even with Google Workspace accounts, prefer to use third-party recording tools because they often produce superior results.
Option A: Recording Via OBS Studio
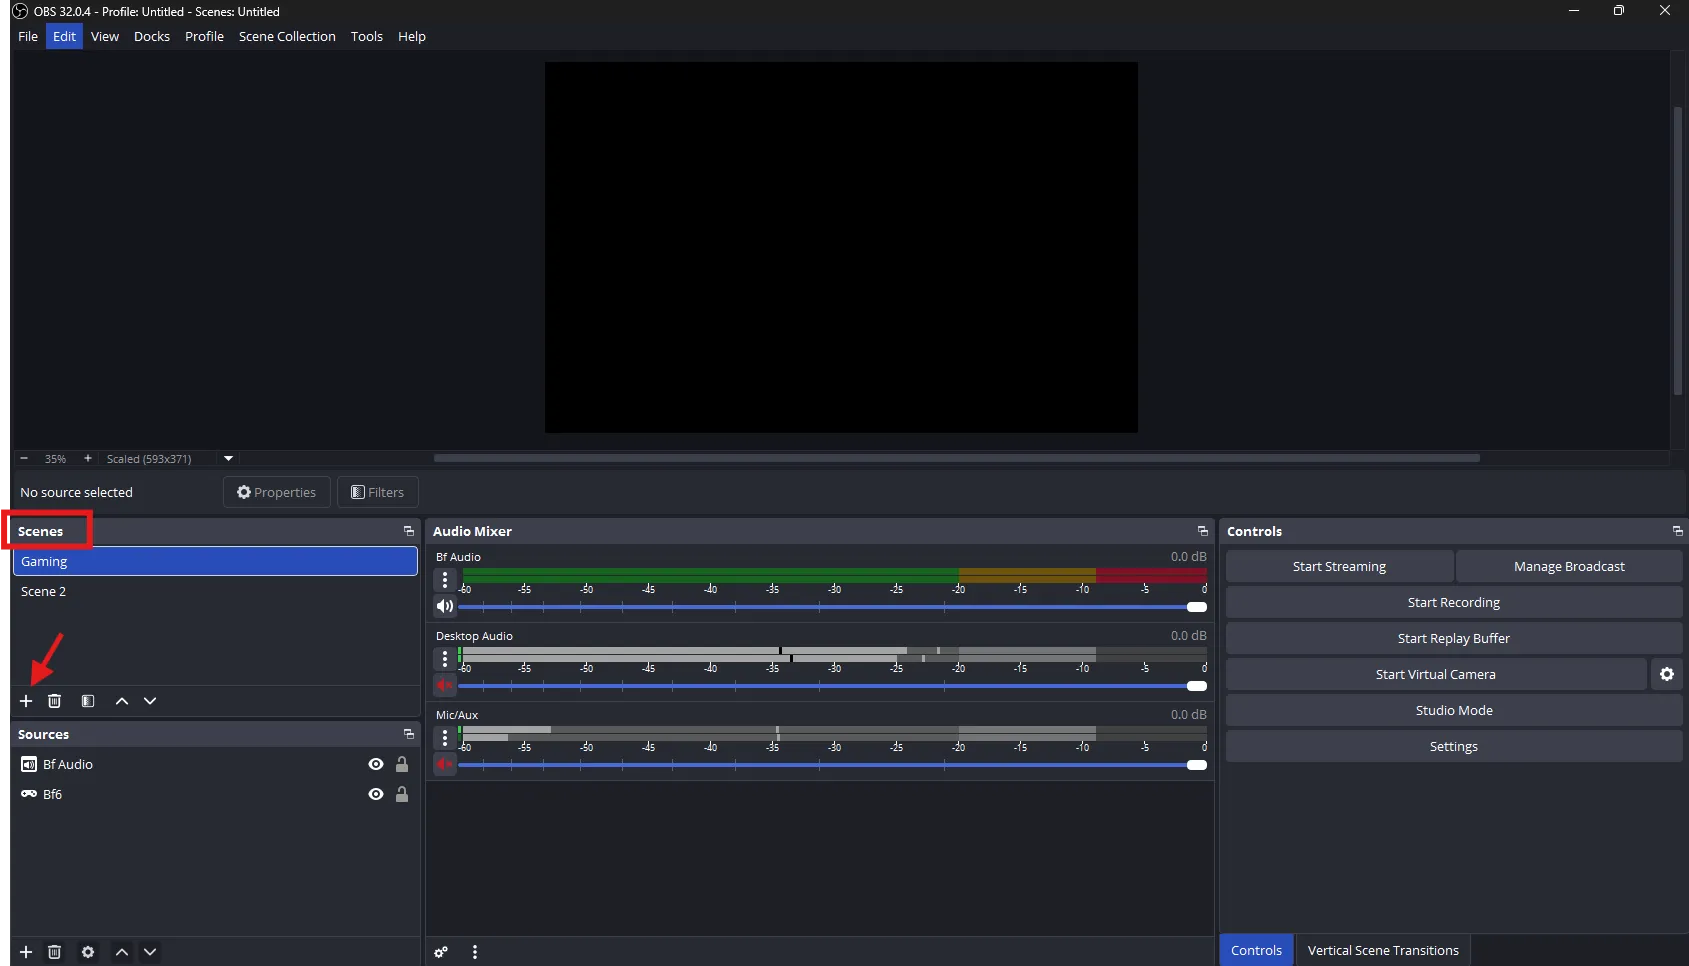
Step 1 – Setting up the Scene: Open OBS and create a new scene for Google Meet recording from here:
Name the scene anything like “Google Meet.”
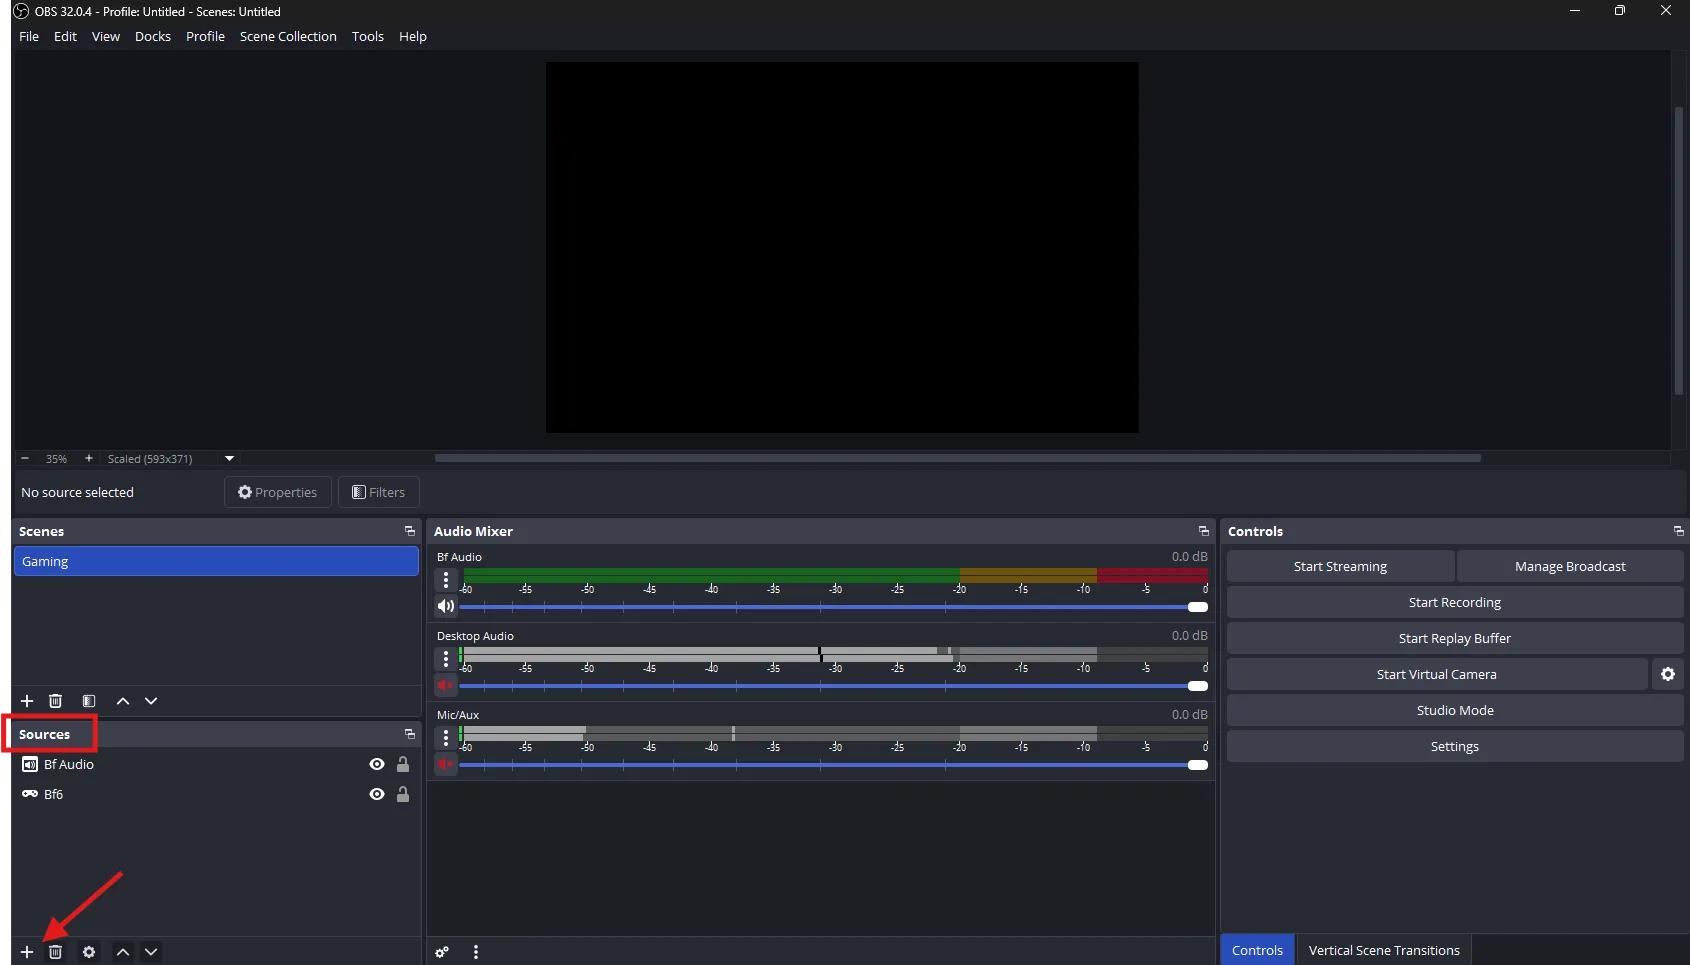
Step 2 – Adding the Source: Add a capture source for the scene you just created from here:
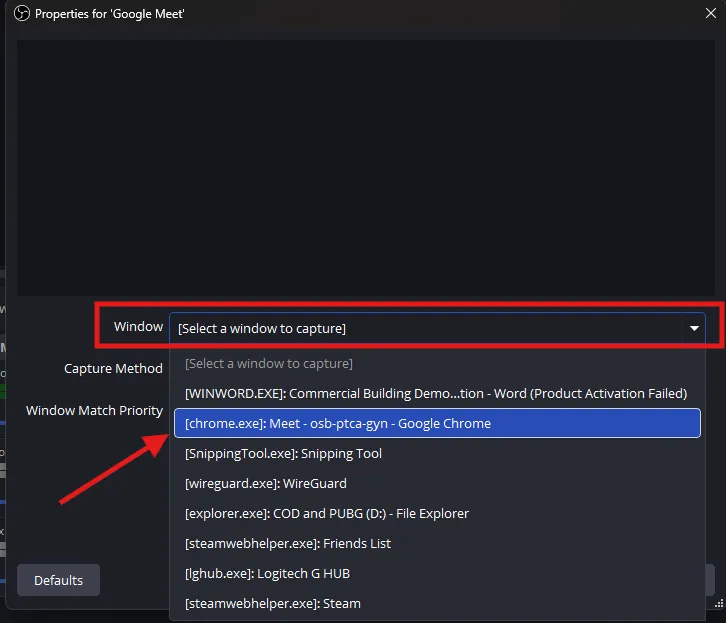
After you name the source, you’ll get a dropdown list like this:
Select “Chrome.exe” if you’re running Google Meet on the Chrome browser. For other browsers, the name will be different.
Note: OBS will only capture the currently open tab in your Chrome window, so make sure you have the Google meeting tab open.
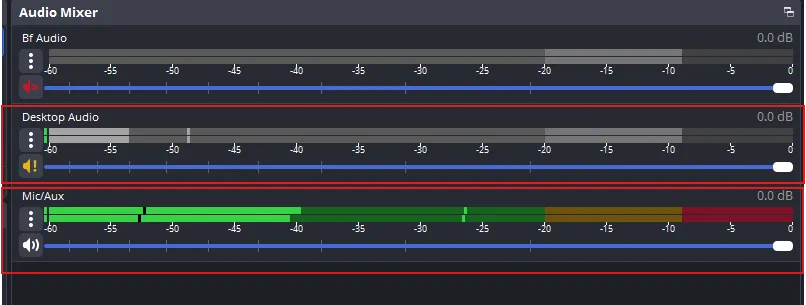
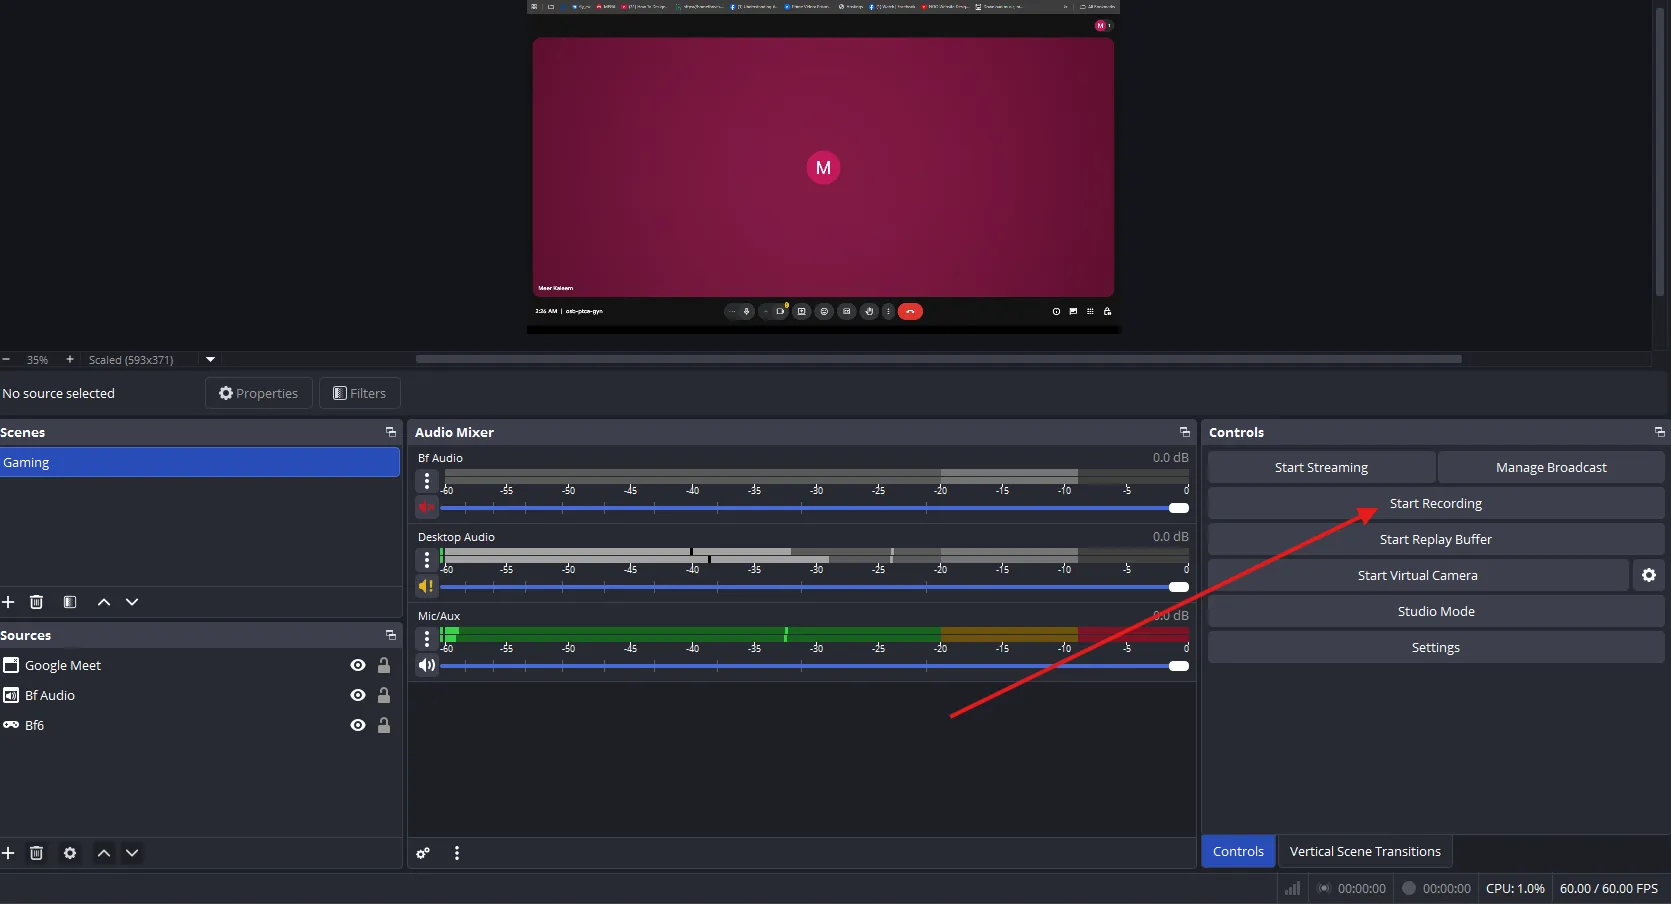
Step 3 – Audio Settings: To ensure you record Google Meet with audio, check that “Desktop” and “Mic/Aux” options are enabled in “Audio Mixer” like this:
Warning: You MUST wear headphones when recording with both the microphone and desktop audio enabled. If you use speakers, your microphone will pick up the sound from the speakers and create a screeching feedback loop.
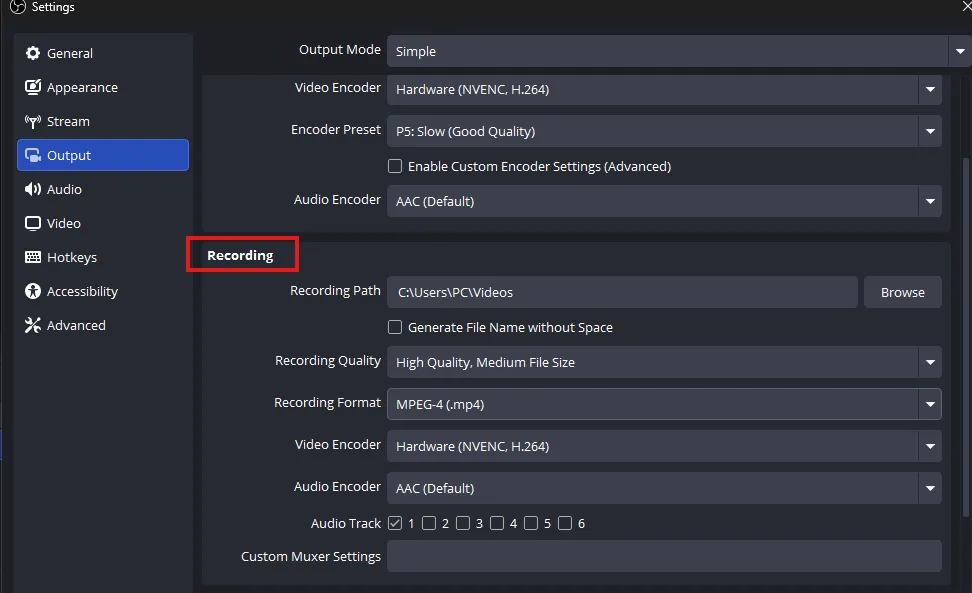
Step 4 – Set Your Recording Quality: Go to Settings>Output>Recording, and you’ll see these options:
Adjust these settings:
Set Recording Quality to “High Quality, Medium File Size” or higher (the higher the quality, the larger the recording size)
Encoder: H.264 if you don’t have a Graphic Card installed. If you have an NVIDIA GPU, choose NVENC.
Choose recording format as “MPEG-4 (.mp4) because it works better if you’re intending to edit the recording later.
Step 5 – Start Recording: Take a final look at your preview window and make sure everything looks perfect. Then start recording by clicking the button on the bottom right, like:
Option B: Windows Snipping Tool (Video Mode)
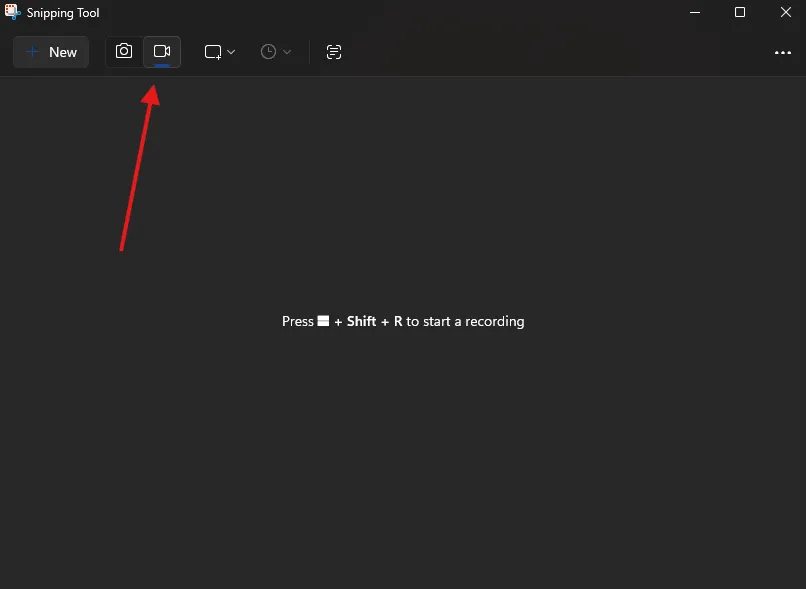
Step 1: Open Windows Snipping Tool and select the capture mode as “Video Record” like this;
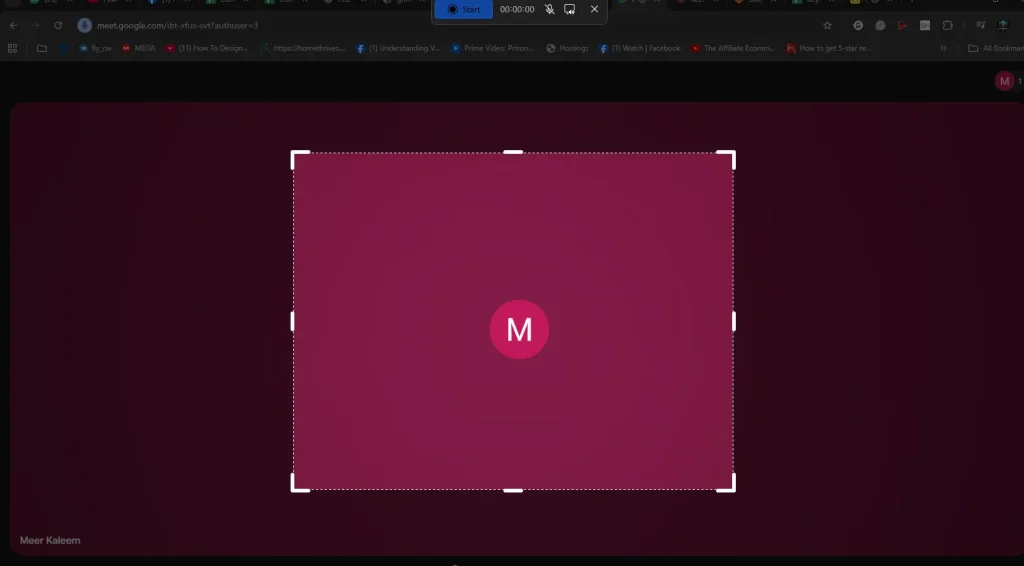
Step 2: Click the “+ New” button and select the area for recording on your screen, like this:
Step 3: Start recording from here:
Note:The Windows Snipping Tool captures only the selected area of your screen. Anything that happens within that area gets recorded, so avoid switching tabs or applications during the recording—otherwise, those switches will appear in your video.
Option C: Win + G (Xbox Game Bar)
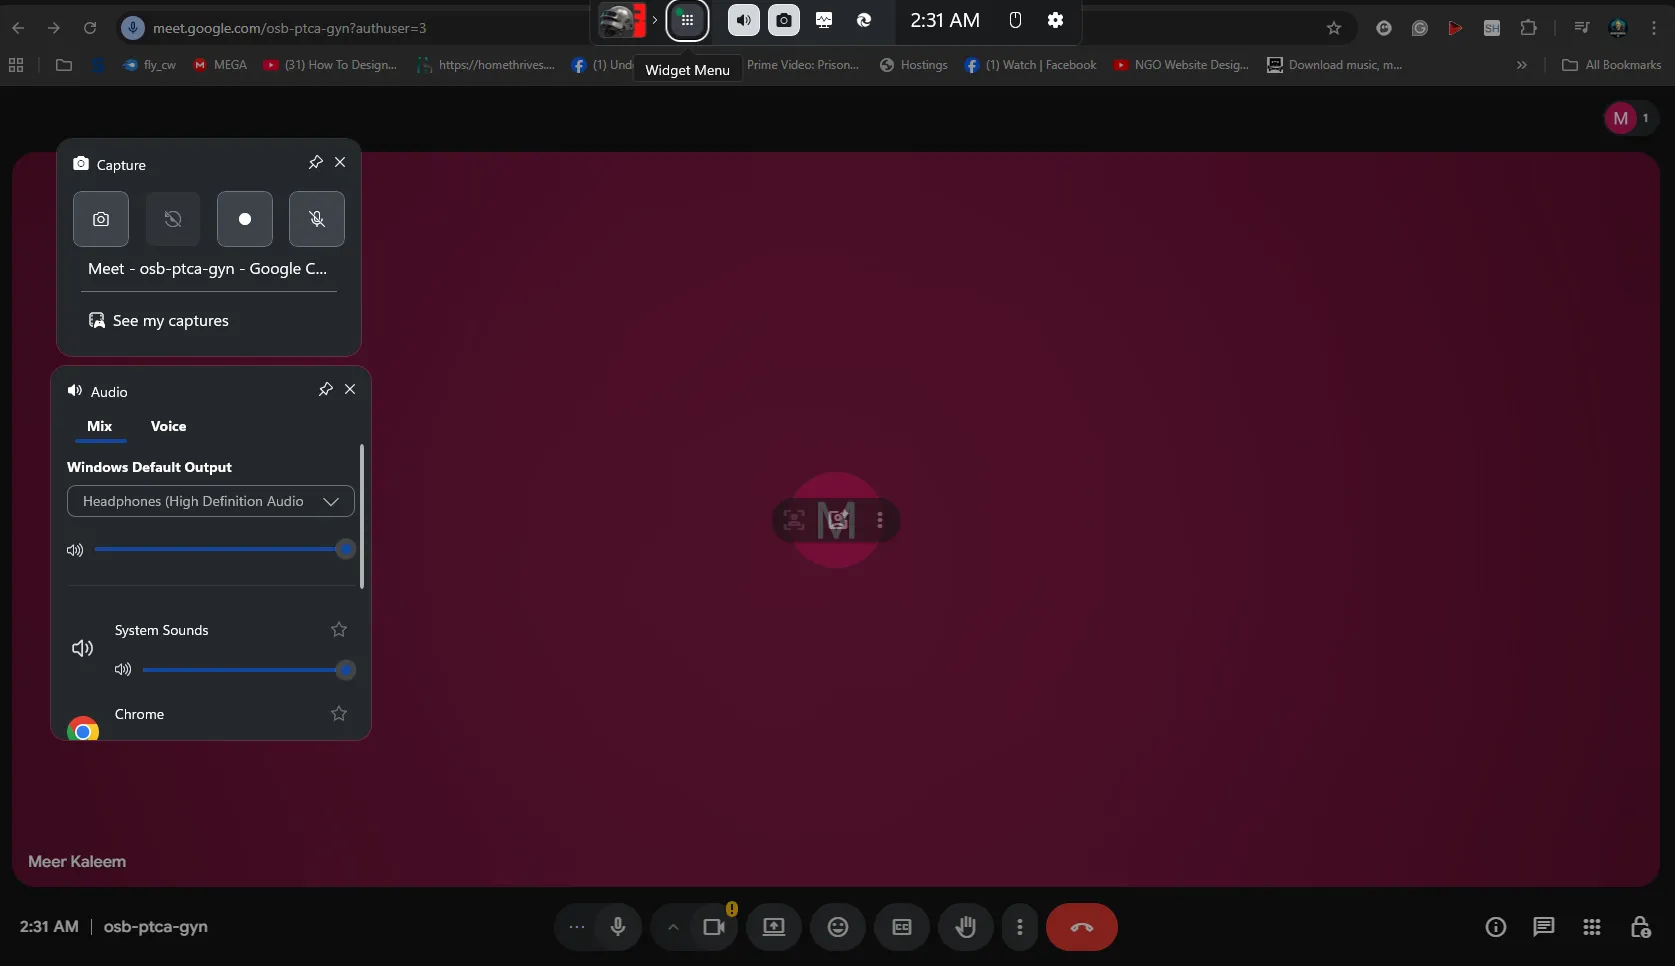
Step 1: Open the Xbox Game Bar by pressing Windows Key + G while keeping your Google Meet tab open. Once you press the button, an overlay like this should appear on your screen:
If it does not appear, make sure it’s enabled. To enable, open Settings > Gaming > Xbox Game Bar and ensure the toggle is set to “On.”
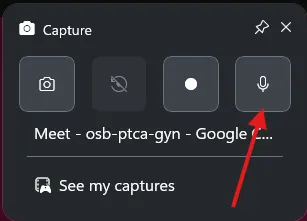
Step 2 – Capture and Audio Settings: Make sure your mic isn’t muted in the capture window:
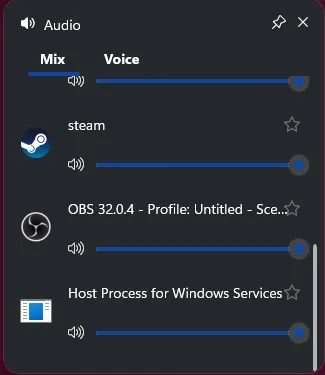
You can mute the audio of any application running in the background that you don’t want in your recording from here:
Step 3 – Start Recording: Click the recording button from here:
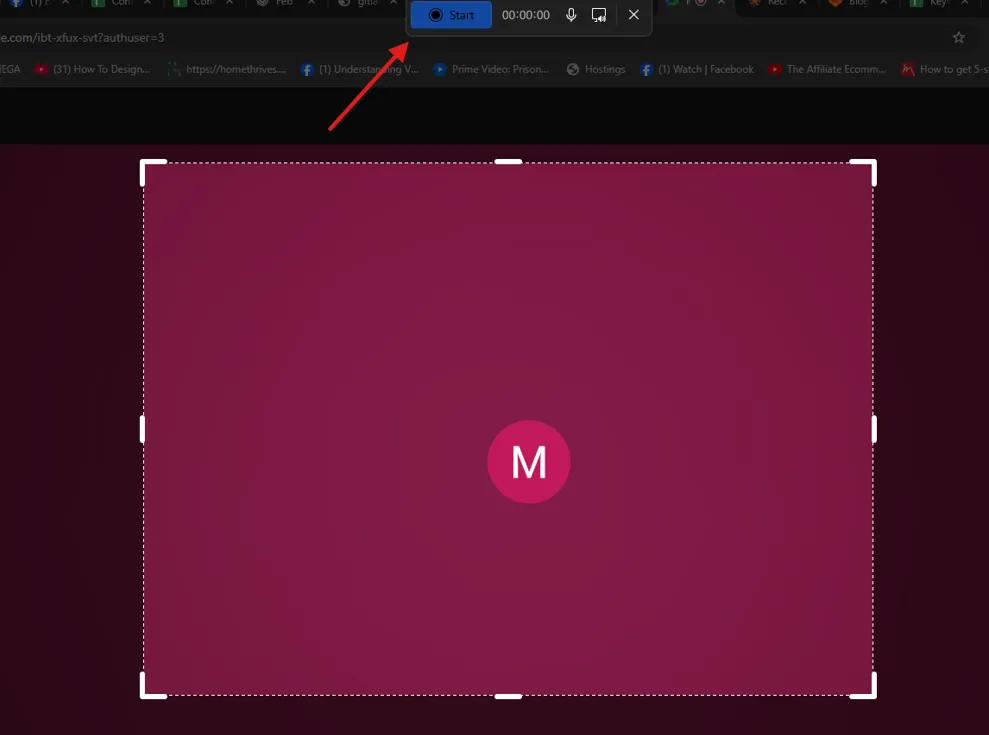
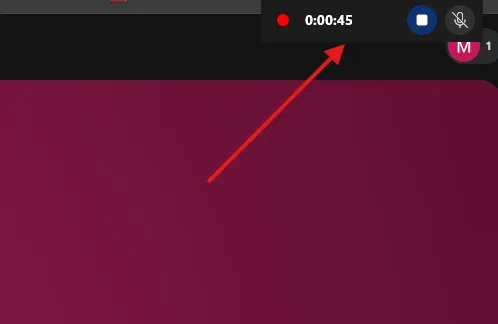
Or, you can press Windows Key + Alt + R to start the recording. Once you start recording, you’ll see a “recording” option appear on the top right like this:
Optional: “Botless” Recording Solutions
New AI-powered tools are also popular in 2026 because they can record your meetings as a visible participant. Unlike the traditional assistants like Fireflies.Ai or Otter.Ai that join as a bot participant, botless tools are integrated directly in your browser to record discreetly.
Note: In many jurisdictions (GDPR, CCPA), secretly recording is illegal, so make sure you take permission and announce that you’re recording.
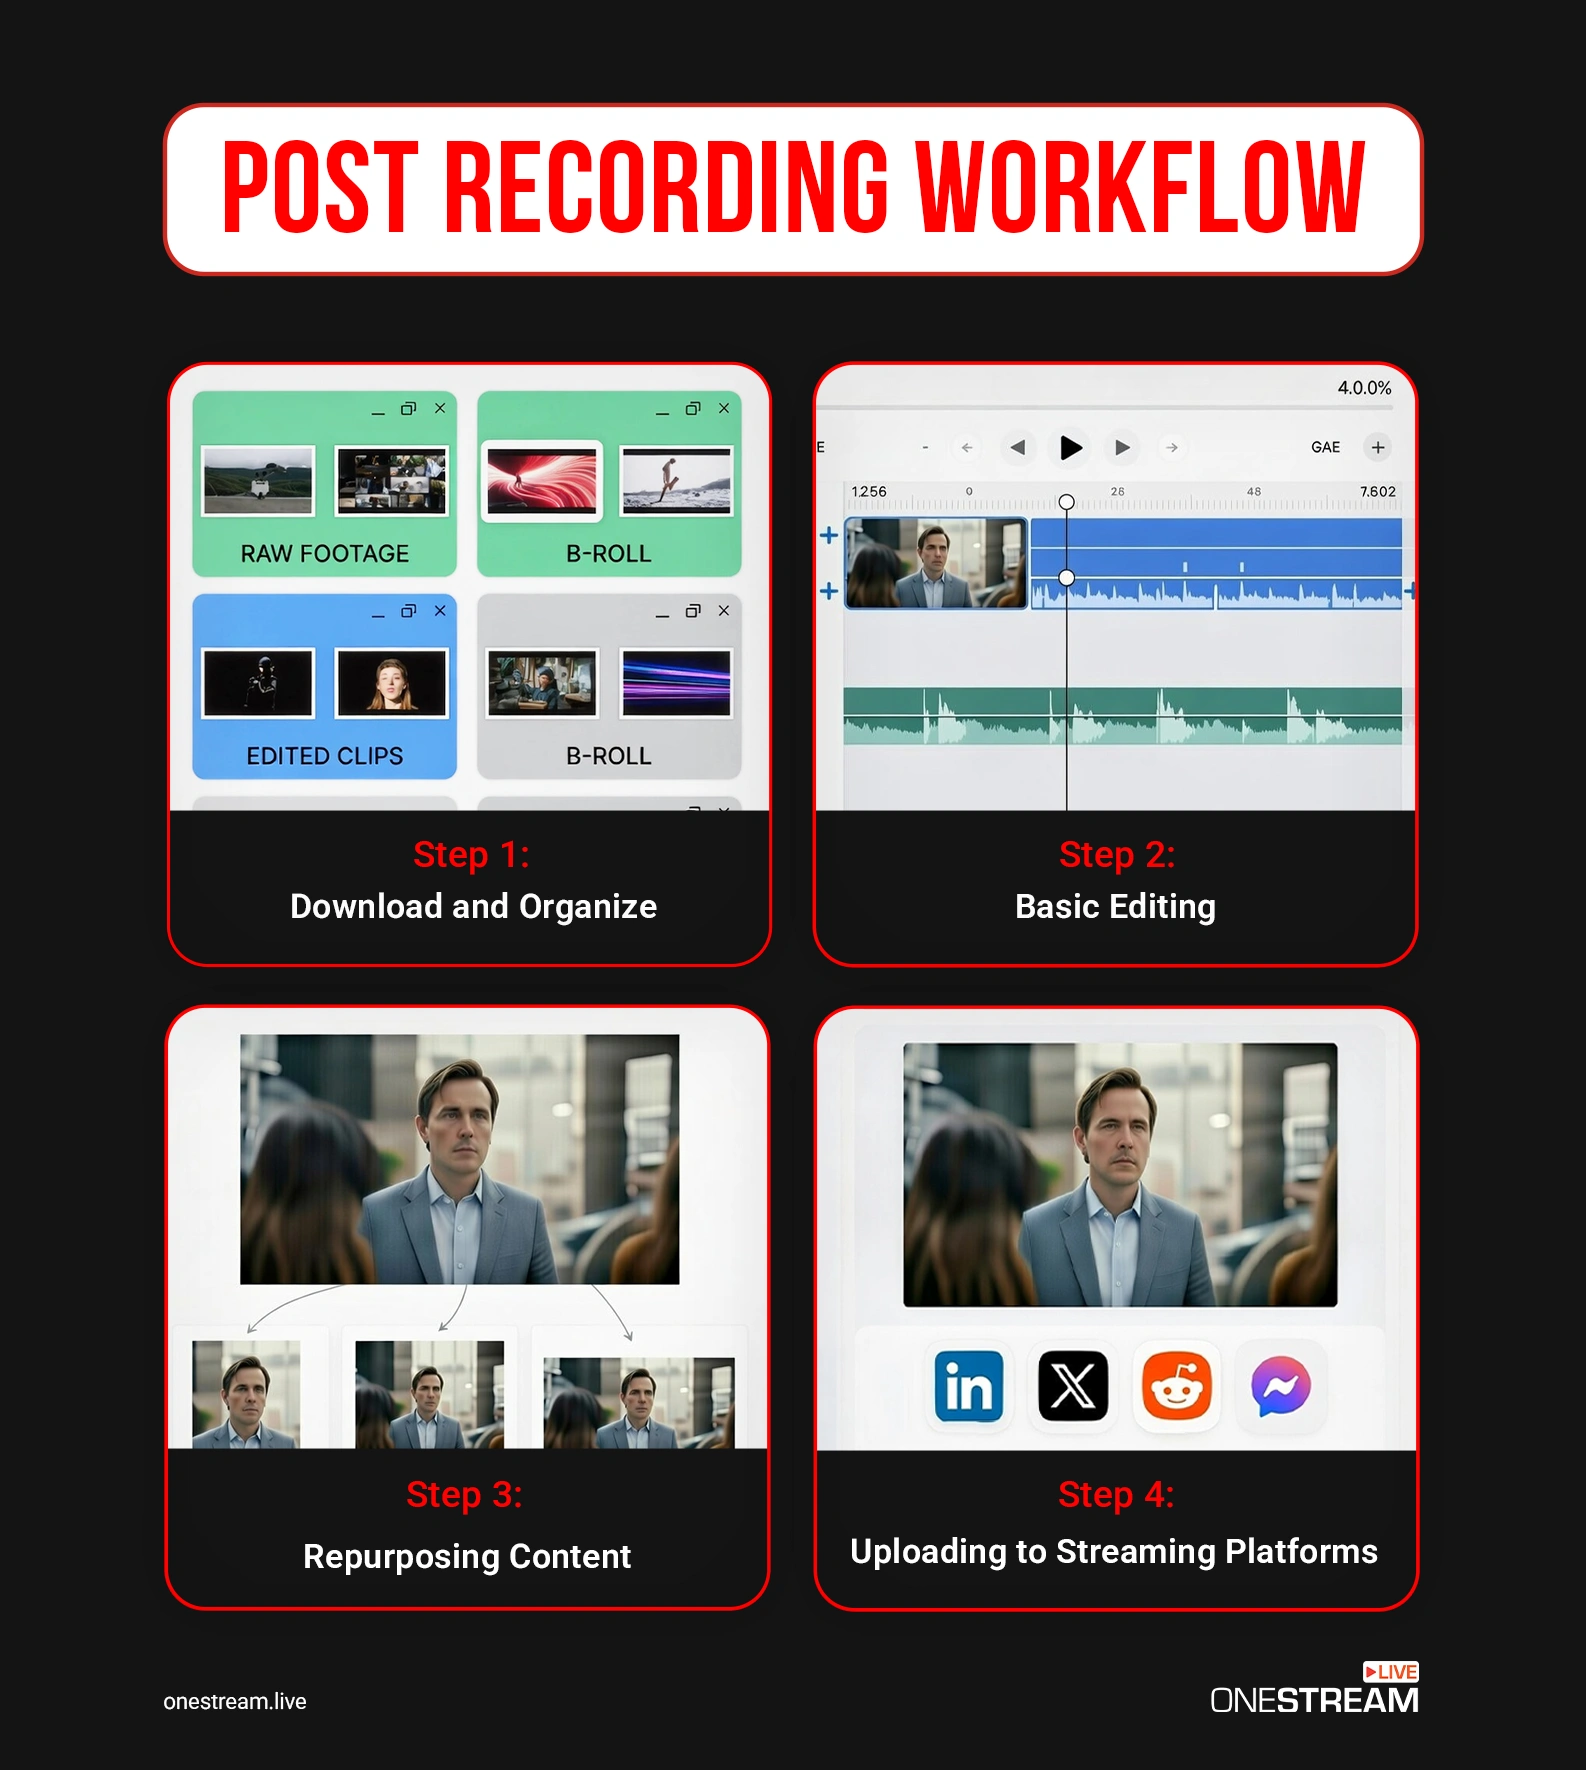
Post-Recording Workflow: From Meeting to Streaming Platform
Once you have your recordings saved, you may need to tweak them before you stream them as pre-recorded or scheduled events to platforms like YouTube. Here’s a guide on how to do this properly.
If you used Google Meet’s built-in feature, download recordings from Google Drive under “Meet Recordings.” If you used screen recording software, check your Videos folder or the app’s library.
Step 2: Basic Editing
Meetings aren’t scripted or structured, and therefore, they might have awkward starts or ends. That’s what you can exclude with basic editing. Here are some tips to polish your recordings for streaming:
Remove long pauses
Cut the technical difficulties
Remove the off-topic conversations
Normalize audio levels
Add title slide, transitions, or captions to improve the overall quality
Expert using the target platform-recommended settings.
Creating multiple versions from one recording can help you create a playlist that provides viewers with categorized content. For example, if you recorded a whole webinar, you can separate segments and create a playlist. You can then schedule a pre-recorded event on YouTube with OneStream Live by uploading the playlist you just created. Here’s how to do this:
Step 4: Uploading to Streaming Platforms
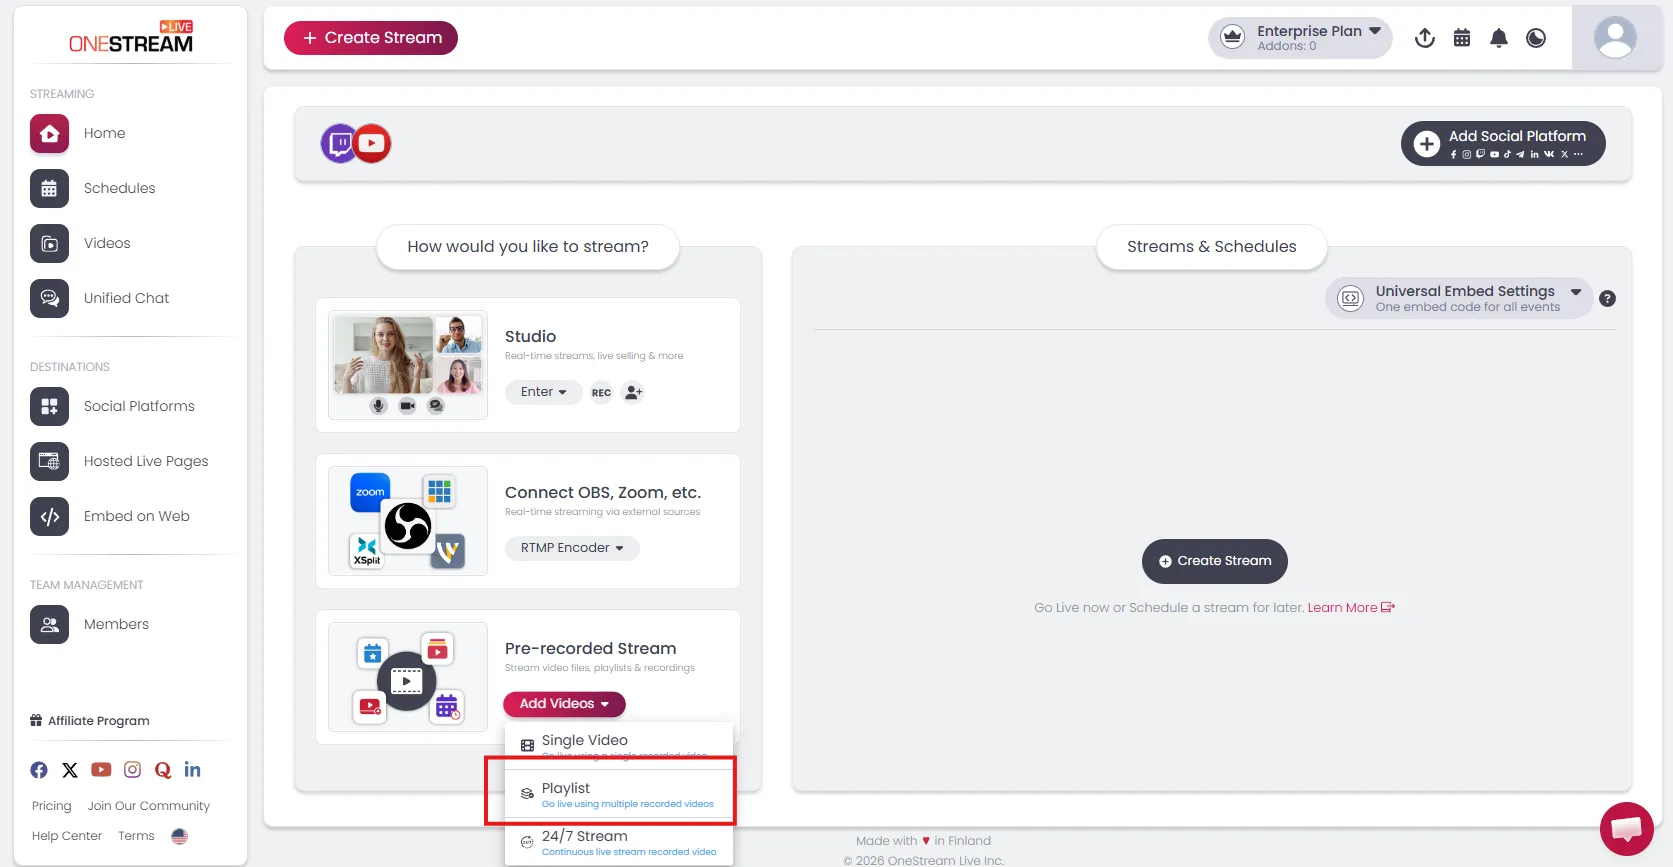
Head to OneStream Live studio
From the bottom left, under the “Pre-Recorded Stream” option, choose “Playlist” like this:
3. Select all the videos, select the date of your event, and you’re done.
Through this, you can create a buzz about your content by streaming pre-recorded videos in real-time.
Pro Tip: OneStream Live supports Google Drive integration to pull your recordings directly to the studio without going through all that download and re-upload hassle.
Step 4: Uploading to Streaming Platforms
There is no single platform to upload valuable, lessons-packed content. The more platforms you post to, the more viewers you attract. With OneStream Live, you can stream the same video to over 45+ platforms, which you would have probably uploaded to YouTube only. The good part? The content is streamed live, and all the conversations from the meeting feel just like a live broadcast.
How to Record Google Meet on Phone
Google Meet’s mobile app does not support native recording at all, not even for Workspace accounts. If you’re a host, participant, free user, or premium subscriber, and you want to record on mobile, you must use your phone’s built-in screen recorder or third-party screen recording apps.
Recording on iPhone or iPad
Step 1: First, add screen recording to your Control Center if you haven’t already. Go to Settings > Control Center > Customize Controls. Scroll to “Screen Recording” and tap the green plus button to add it.
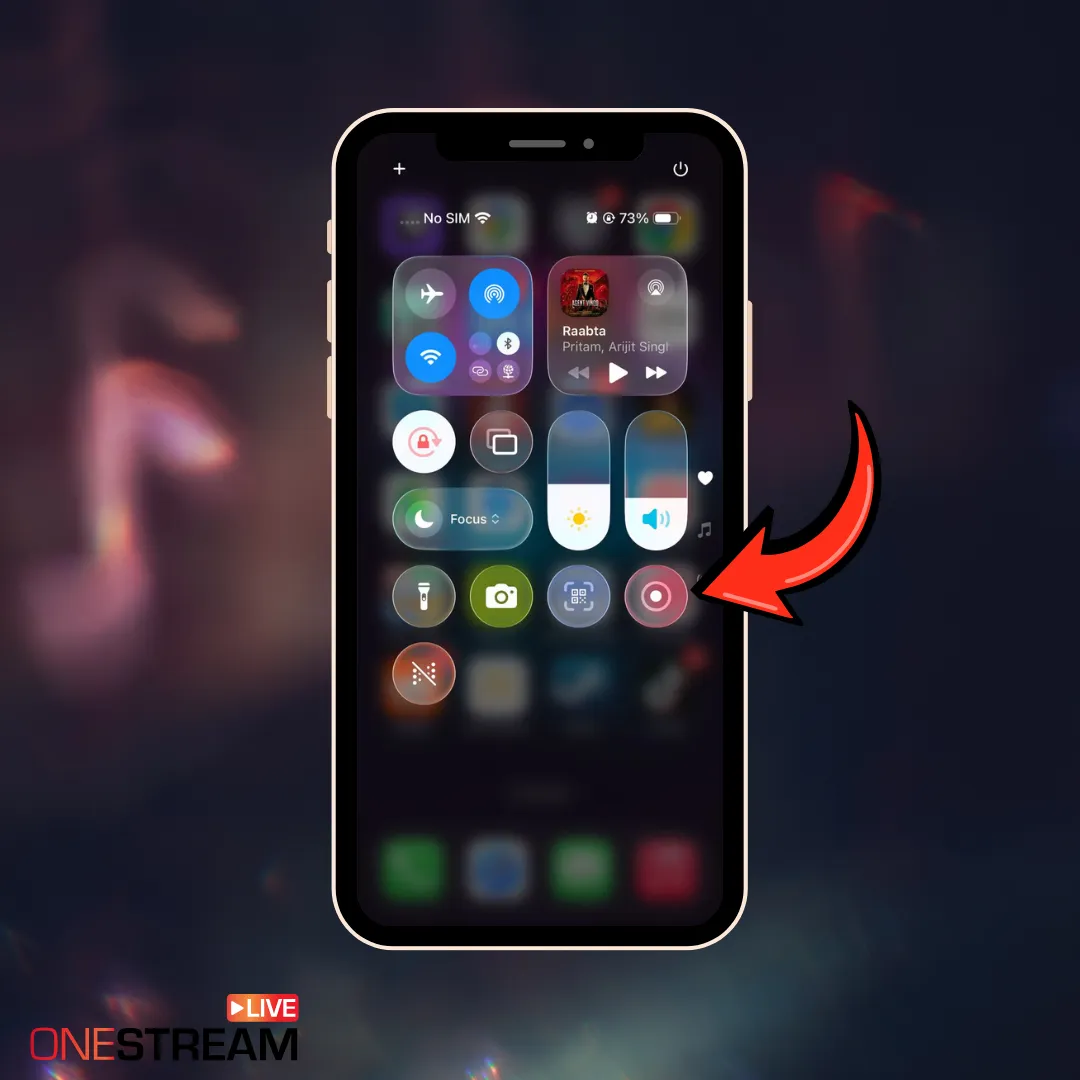
Step 2: Then, when you swipe down from the top, you should see this recording icon:
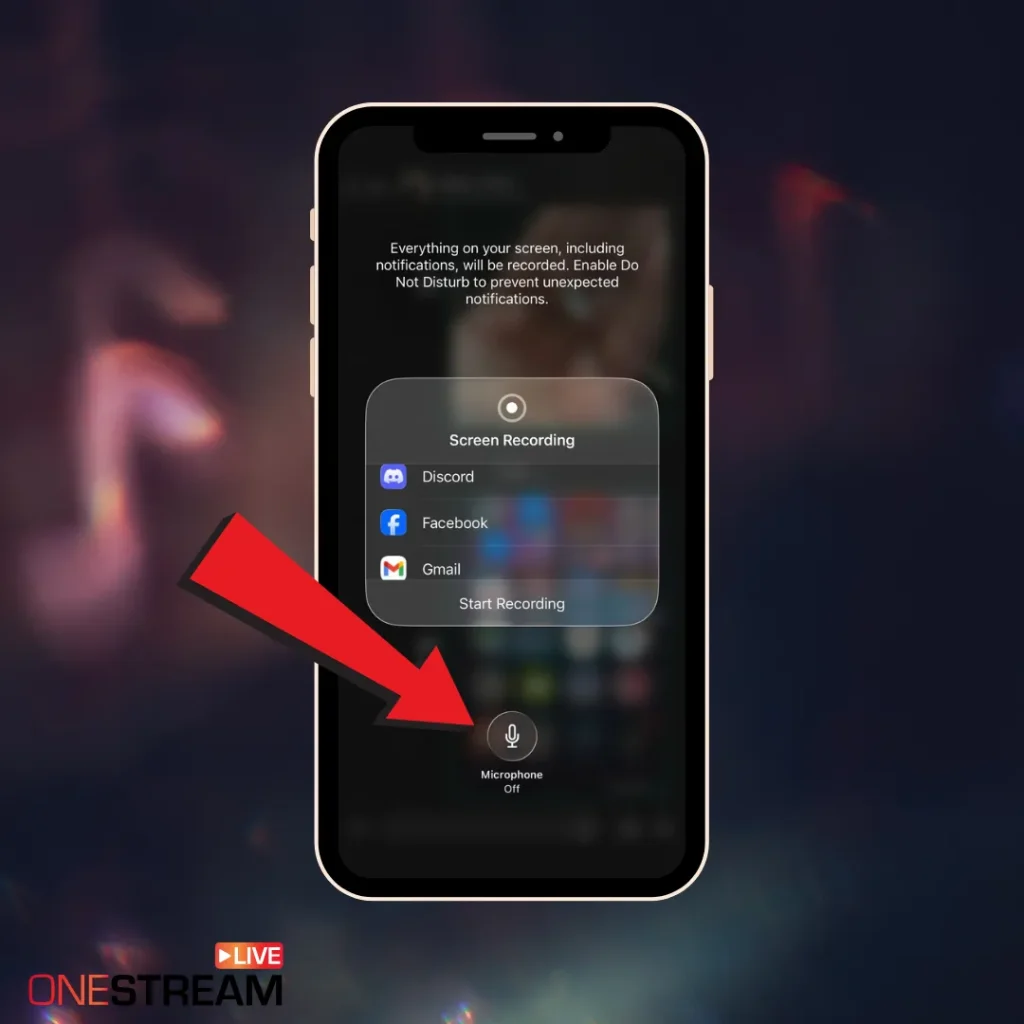
Step 3: Long-press the screen recording button instead of just tapping it. This reveals the option to enable microphone audio like this:
Tap the microphone icon and turn it on, or you’ll be recording the meeting with no audio.
Step 4: Press “start recording” and you’ll see a three-second countdown.
Recording on Android
Open Quick Settings by swiping down from the top of your screen.
Look for “Screen Recorder” in your Quick Settings tiles. If you don’t see it, tap the pencil icon or three-dot menu to customize your Quick Settings and add Screen Recorder.
Tap the Screen Recorder icon. A settings menu appears with options for recording.
Enable “Record audio” and select “Microphone” as the audio source. This captures your voice and the voices from Google Meet.
Tap “Start,” and the recording begins after a short countdown.
A persistent notification shows that the recording is active. Join or continue your Google Meet call.
If your phone doesn’t have a screen recorder feature, you can download third-party apps to record a meeting in Google Meet.
Here are some commonly used:
AZ Screen Recorder is popular because it has no watermark on free recordings and reliably captures internal audio.
XRecorder offers a facecam overlay option, letting you record both the screen and your face simultaneously.
Mobizen Screen Recorder even supports live streaming capabilities if you want to broadcast your Meet session in real-time.
Conclusion
Meetings are everyone’s daily routine; it’s always good to go in prepared. You can choose any type of method that you’re most comfortable with and record all your future Google Meet sessions.
Legal Warning: Third-party tools (like OBS) do not notify participants they are being recorded. In many jurisdictions (GDPR, CCPA), secretly recording is illegal. Always announce: ‘This meeting is being recorded’ before you hit start.
Once you have your recordings and you’re done with editing, it’s now time to stream them as live events. Use OneStream Live to minimize the hassle of uploading manually to YouTube, then Facebook, then LinkedIn, then Twitter. OneStream Live lets you broadcast to all these platforms at once so your content reaches your entire audience simultaneously, regardless of which platform they prefer.
Use Google Meet’s built-in recording if available, or record with OBS/your screen recorder, setting your resolution to 1080p and using a stable mic setup.
Google Meet recordings are saved to the meeting organizer’s Google Drive (usually in a folder called Meet Recordings), and a link is also shared via email.
Recording on a laptop is the same as recording on a desktop. Use Google Meet’s built-in recording if you have Workspace, or use your laptop’s screen recorder (Windows + G on Windows, Shift + Command + 5 on Mac) for free accounts.
Trim dead time, check audio levels, blur sensitive details if needed, and export in a streaming-friendly format, such as MP4.
OneStream Live is a cloud-based live streaming solution to create, schedule, and multistream professional-looking live streams across 45+ social media platforms and the web simultaneously. For content-related queries and feedback, write to us at [email protected]. You’re also welcome to Write for Us!
Meer is a tech enthusiast and writer who’s been exploring the digital world for over four years. He loves diving into how technology shapes our online presence. He’s worked with a range of clients and platforms around the globe, helping brands communicate complex ideas in a clear, relatable way. Outside of writing, you'll find him hiking or streaming his favorite video games.


![How to Record Google Meet [2026 Complete Guide]](https://onestream.live/wp-content/uploads/2026/02/how-to-record-google-meet-sessions-for-live-streaming.webp)