
This OneStream Live Studio walkthrough covers a full session, from opening Studio to ending the broadcast. Studio is where you go live from your browser, with guests, branding and several destinations at once. There is a lot on screen the first time you open it. The guide below explains each part, in the order you will actually use them.
- Studio lets you go live from your browser to 45+ social platforms and your own webpage at the same time.
- Instant Studio gives you a permanent link. A Studio Livestream gives you a fresh link for each session.
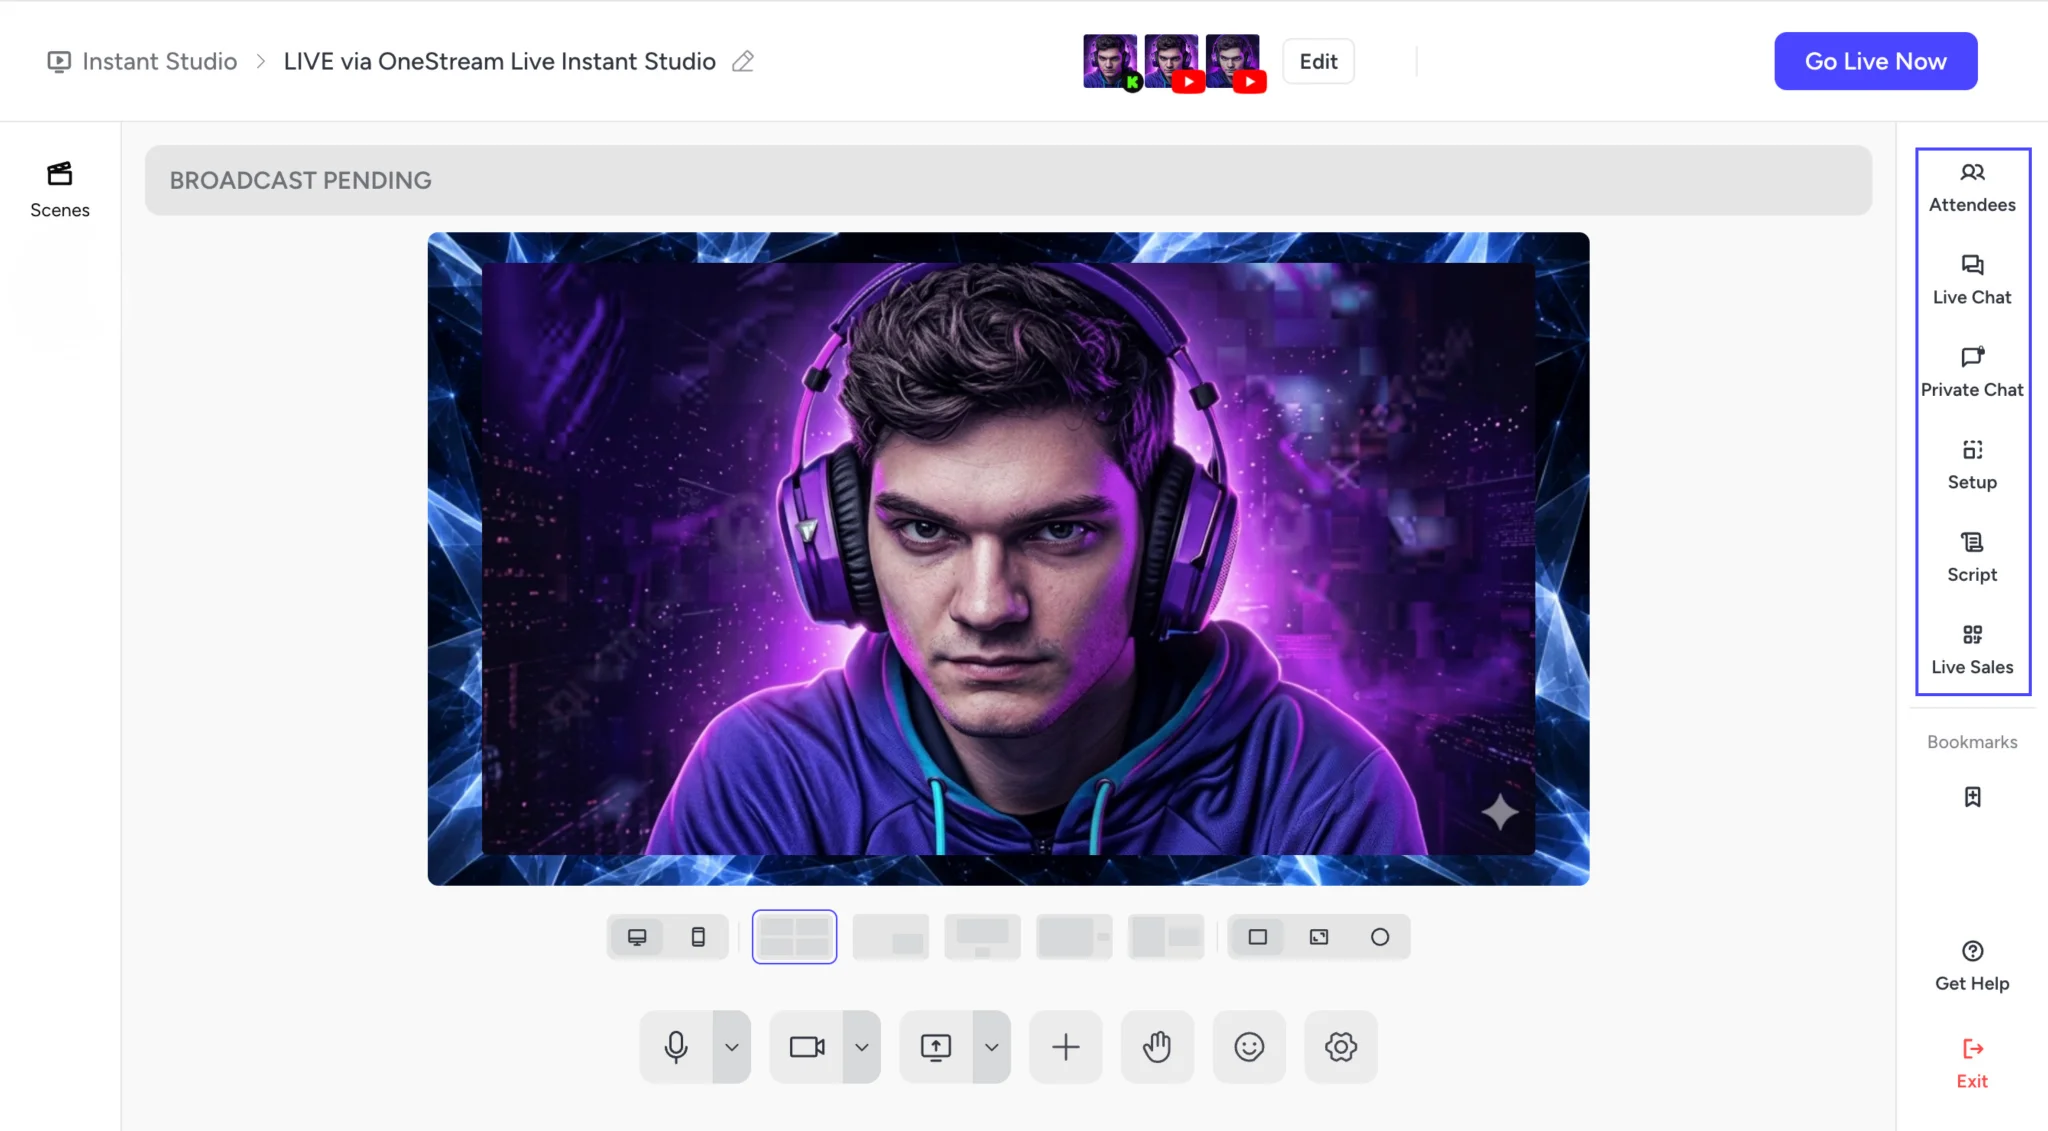
- The right rail holds Attendees, Live Chat, Private Chat, Setup, Script and Live Sales.
- Setup carries your whole look, so your colors, backgrounds, banners and tickers load in one click.
- One toggle in Set Destinations decides whether the session records, streams, or does both.
How to Start a Studio Session
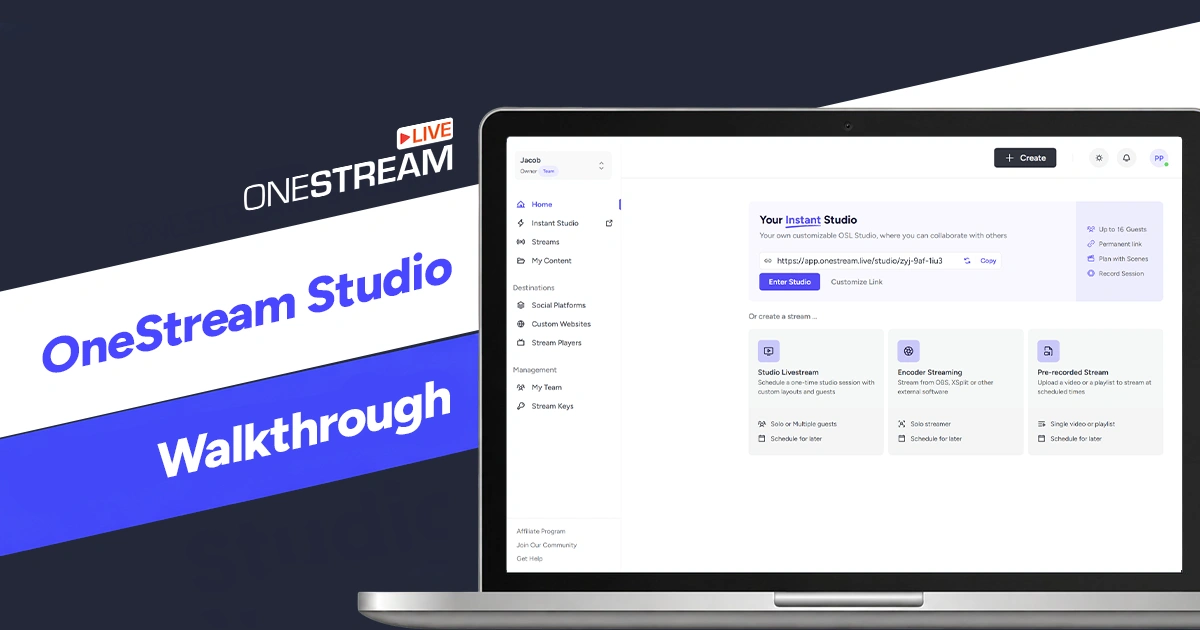
Log in to OneStream Live, and the dashboard gives you two ways into Studio. Both open the same interface. The difference is the link.
Instant Studio
Instant Studio uses the same link forever, so it suits regular shows and last-minute streams. Click Copy to share the link, or Customize Link to make it easier to read. Click Enter Studio to open the session.
Studio Livestream
A Studio Livestream creates a new link for each session. Lock in a time, invite your guests, and pick your layout beforehand. This is the better choice for one-off events where you do not want an old link still working.
Both can be scheduled for later rather than started right away. The dashboard also offers Encoder Stream for OBS and XSplit, and Pre-recorded Stream for uploaded videos and playlists. Neither one opens Studio, so they sit outside this walkthrough.
Understand Your Studio Interface
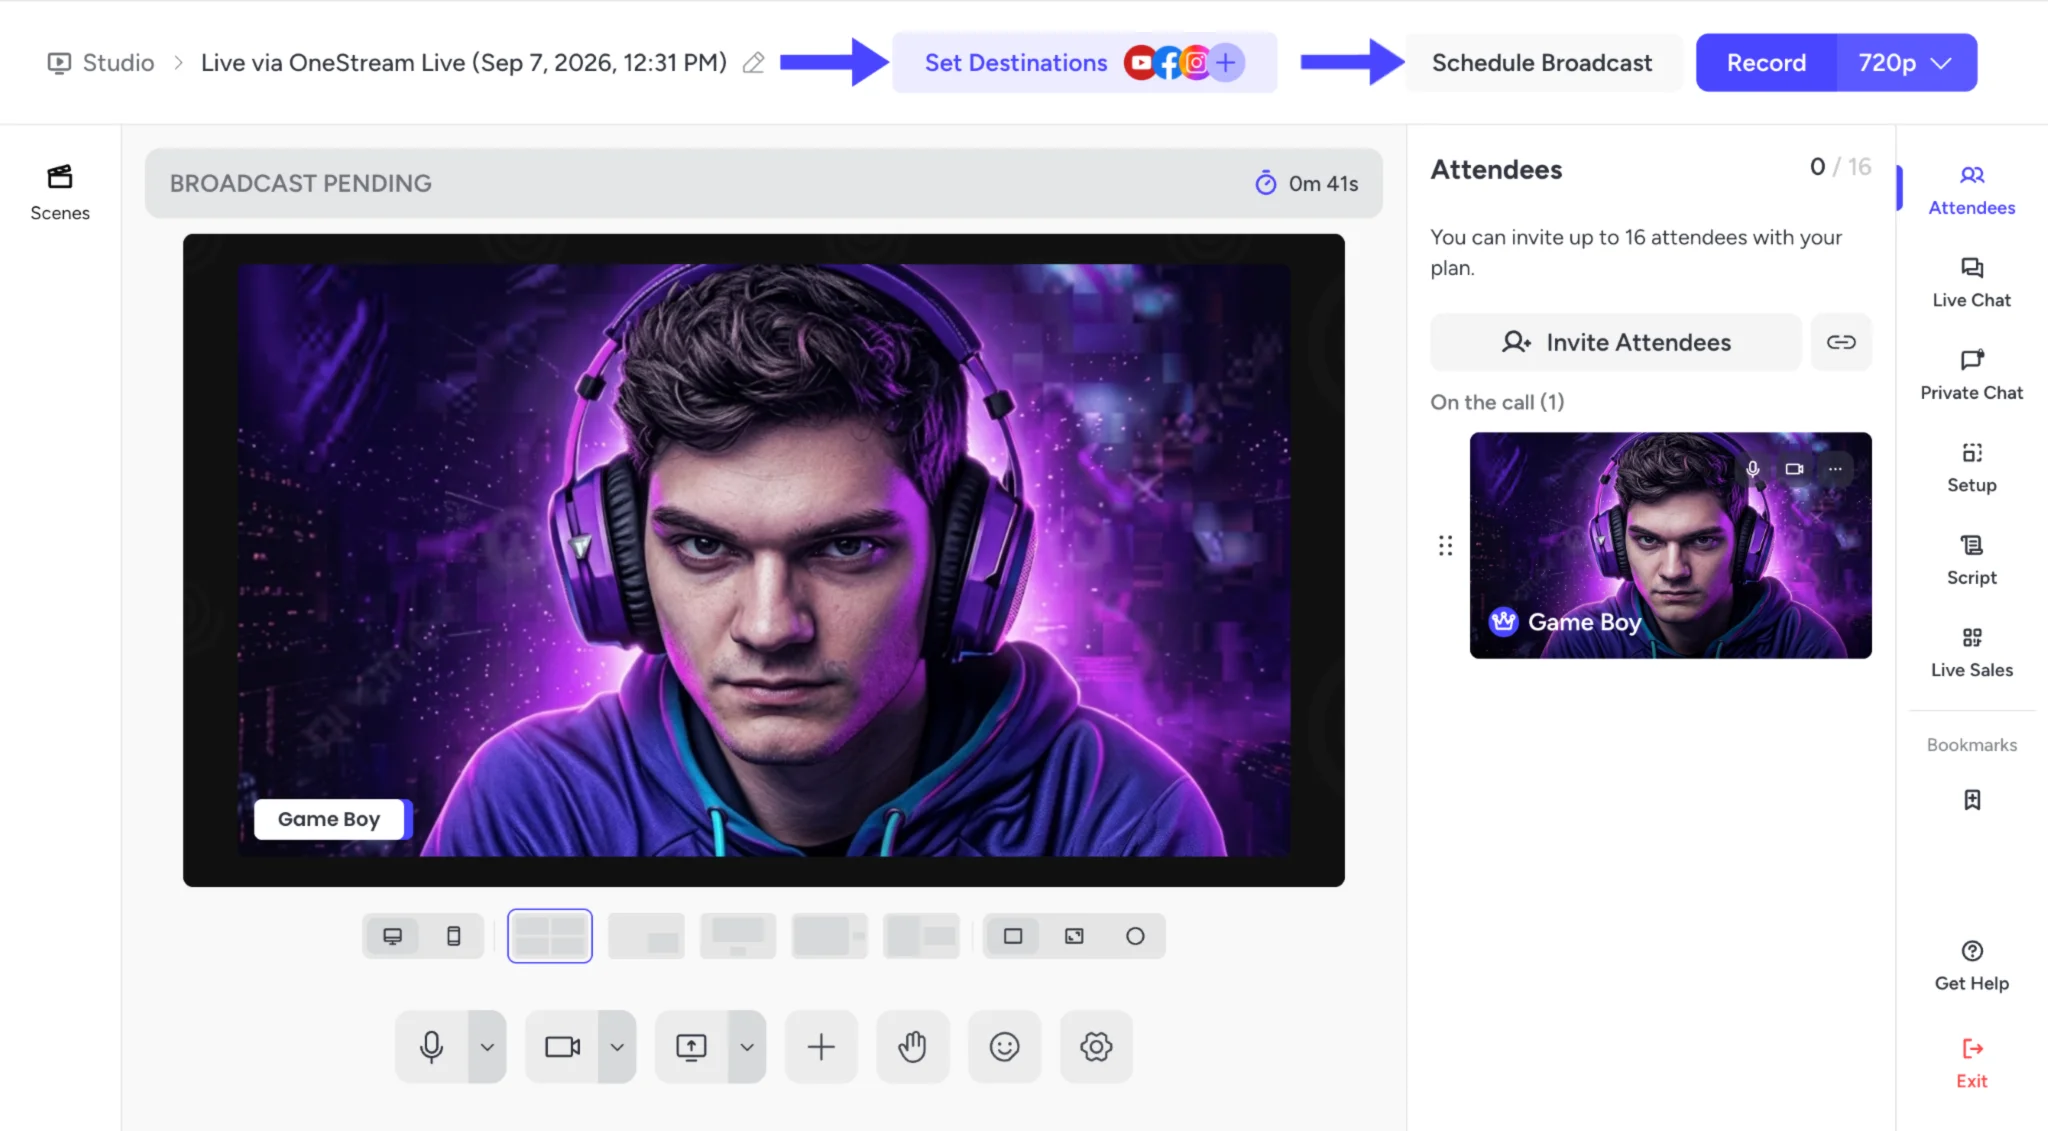
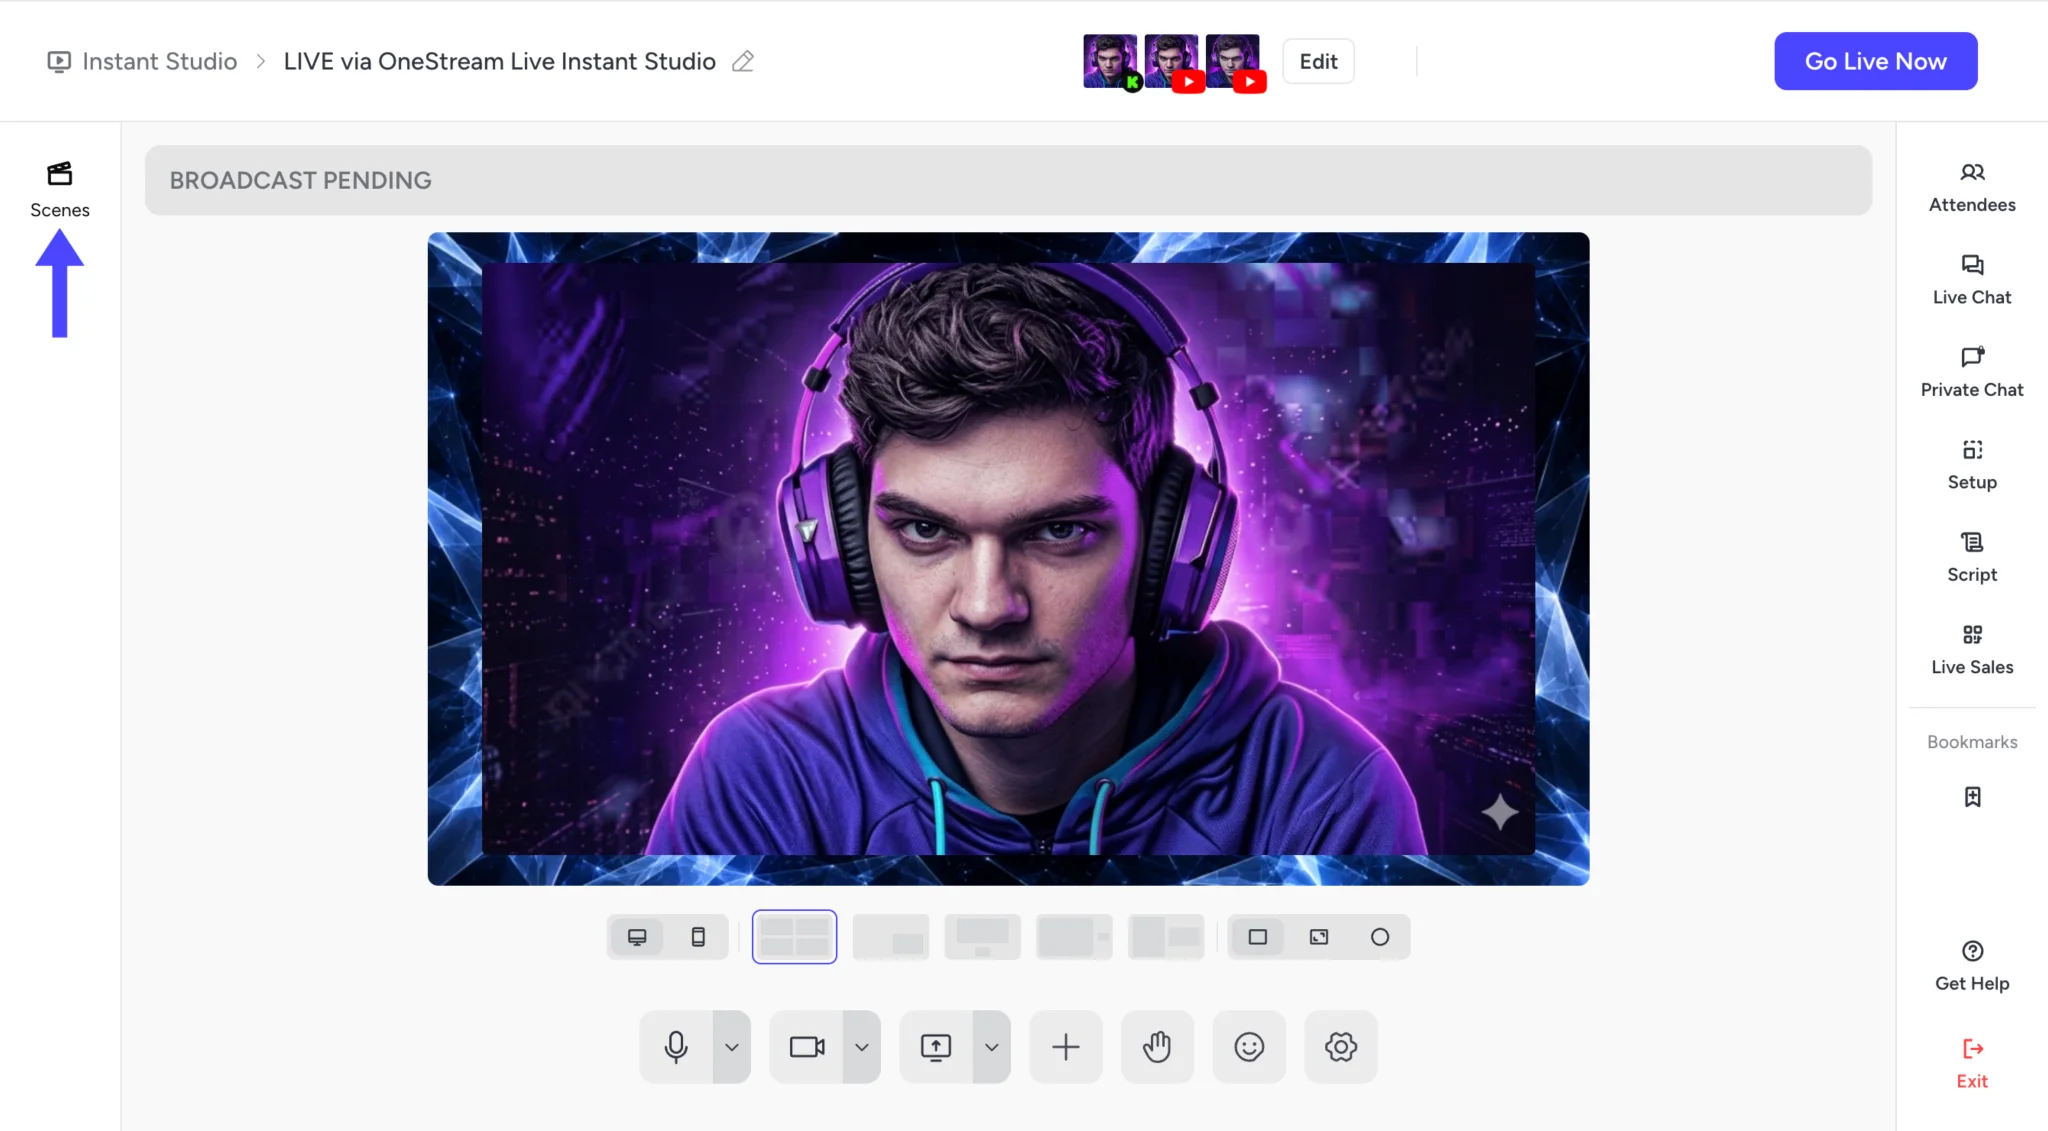
Studio splits into five areas. The top bar controls the broadcast, the left panel holds your scenes, the stage shows what viewers see, the bottom bar controls your audio and video, and the right rail holds everything else.
Here is what each one does.
The Top Bar
Your session name sits top left, next to a pencil for renaming it. Naming it properly matters later, because recordings are saved under that name.
Set Destinations opens the panel where you choose where the stream goes. Schedule Broadcast books it for a later time. Go Live starts it, and the dropdown beside it sets your quality at Standard (720p) or Highest (1080p).
Once you are live, the bar changes. A LIVE indicator appears, along with a Recording indicator if recording is on, and Go Live becomes End Broadcast.
The Scenes Panel
The left panel is where you plan the running order. Set Intro and Set Outro sit at the top and bottom, and you can choose from built-in visuals or you can upload yours, so your session can open and close with something prepared.
Between them sit your scenes, grouped into a folder. Click Add Scene to build another. Instant Overlay gives you quick graphics for live moments, including Welcome, Q & A, Breaking News and Like & Subscribe.
The Stage and Layouts
The stage shows exactly what your viewers see. Below it, a row of controls changes how it is arranged.
The first two icons switch between desktop and vertical mobile framing, which is useful for Instagram and TikTok. The next five set the layout as your guest count changes. The last three change the shape of the participant frames, including a circular option.
The Control Bar
The bottom bar handles your own audio and video. Mute and Camera each have a chevron for picking a different device. Share Screen puts your screen on the stage.
Add brings other sources in, each with its own limit. You get extra cameras, audio files, images, videos and an RTMP source, plus media and participant placeholders for layouts you want to prepare in advance.
Raise Hand, React and Settings finish the row.
The Right Rail
Six panels sit down the right side.
Attendees shows who is on the call and how many seats your plan allows. Live Chat collects viewer comments from your platforms in one place. Private Chat keeps a separate conversation with your guests, away from the audience.
Setup holds your whole visual identity. Script keeps your notes for the session. Live Sales lets you sell during the stream.
Build Your Look With Setup
Setup is the part worth learning first, because everything else sits inside it. It opens on four tabs.
Design holds your brand color as a hex code, your font, and a style preset. Bubble, Retro, Minimal, Glow, Classic and Futuristic each change how name tags and on-screen text look. You can also choose whether participant names and titles appear.
Media holds your stage backgrounds and your branding. Upload visuals up to 40MB at 1920×1080, or switch on Built-in Visuals. Background music takes MP3 and WAV files up to 20MB, with Built-in Music as an alternative. Below that, Branding carries a primary logo, which always sits top left, plus a secondary logo and your overlays. Logos take PNG, JPG or WebP up to 20MB.
Banners and Tickers hold your on-screen text, organized into folders.
The dropdown at the top switches between saved Setups, so one click loads a different look.
Read More: How to Create and Save Multiple Setups in OneStream Studio
How to Invite Guests
Open the Attendees panel and click Invite Attendees, or use the link icon beside it to copy the invite link. Send that to your guests through any channel you like.
The panel shows your guest limit at the top. You can invite up to 16 attendees, depending on your plan.
Guests appear under On the call once they join. Add them to the stage through your layout, and switch layouts as the number of people changes.
How to Set Destinations and Go Live
This is where a session becomes a broadcast. Follow the steps below.
1
Open Set Destinations
Click Set Destinations at the top of the screen. The Broadcast to panel opens.
2
Decide whether to record
Switch on Automatically record live event if you want a file at the end. It applies to this session and every future one.
3
Choose your platforms
Switch on the social accounts you want to reach. The counter shows how many connections your plan allows. Any Stream Player or Custom Website you have built also appears here under Other Destinations. Switch one on and the stream plays on your own page too.
4
Confirm and go live
Save your selection and start the broadcast. The status bar switches to LIVE, and the recording indicator appears beside it if you turned recording on.
5
End the broadcast
Click End Broadcast when you are done. If recording was on, a Download Recording button appears. The file also saves to My Content under Videos & Recordings as an MP4.
How to Schedule a Broadcast
Click Schedule Broadcast instead of Go Live and you can book the session for a later time. Set your destinations and your Setup beforehand, so nothing needs doing on the day.
How to Record Without Going Live
Studio also records on its own. Turn on Automatically record live event, then leave every destination switched off.
The Go Live button becomes Record, and the top bar reads Recording Only once you start. Pause lets you break mid-session. Studio offers to Set Intro before recording and Set Outro before you finish, or you can skip both and end as-is.
Final Word
Studio looks busy the first time you open it, but most of it sits behind one panel. Build your Setup once and the visual side stops being work.
After that, a session is three decisions. Who is on the call, where the stream goes, and whether you keep a copy.
Ready to try it? Open Studio, set your destinations, and go live.
Frequently Asked Questions
What is the difference between Instant Studio and a Studio Livestream?
Instant Studio keeps the same link forever, which suits recurring shows. A Studio Livestream creates a new link each time, so an old invite stops working once the session is over.
How many guests can join my Studio session?
That depends on your plan. The Attendees panel shows your limit at the top, and you can invite up to 16 guests.
Can I stream to my own website from Studio?
Yes. Any Stream Player or Custom Website you have built appears as a destination alongside your social accounts. Switch it on before you go live.
What is a Setup?
A Setup is a saved bundle of your on-screen look. It holds your Design, Media, Banners and Tickers together, so one click loads the whole thing.
Can I record a Studio session?
Yes. Turn on Automatically record live event in Set Destinations. Leave your destinations off to record only, or switch them on to stream and record at the same time.
OneStream Live is a cloud-based live streaming solution to create, schedule, and multistream professional-looking live streams across 45+ social media platforms and the web simultaneously. For content-related queries and feedback, write to us at [email protected]. If you have a story to share about your live streaming experience with OneStream Live, we would be glad to feature it. You’re also welcome to Write for Us!