
Nothing kills a live stream faster than a frozen camera feed or audio that sounds like it’s coming through a tin can. You hit “Go Live,” your viewers pile in, and then someone drops a comment asking if you’re on mute. By then, the damage is done. The fix is simple: test webcams and microphones before you open your streaming software. A few minutes of prep catches the problems that would otherwise show up in front of your audience, live and unedited.
This guide covers how to check camera and microphone quality, what usually goes wrong, and how to build a habit out of the whole thing so you’re not doing it from scratch every time.
- Test webcams and microphones separately from your streaming platform first, using your operating system’s built in tools.
- A webcam sound test and a camera and mic test catch different problems.
- Video and audio fail for different reasons.
- Background noise, echo, and low input volume are the most common mic issues, and most get fixed by repositioning the mic or adjusting gain, not buying new gear.
- Do a real test video call with a friend or teammate before any stream that matters. Software checks miss things a second person catches right away.
- Lighting affects how good your webcam looks more than the webcam itself does, for most budget and mid range setups.
Why Bother Testing Before You Go Live
Viewers forgive a lot. Bad audio isn’t one of them. Research on audiovisual perception has found that viewers rate video paired with high fidelity sound more favorably than video alone, and separate work on video production quality found that audio fidelity has a more pronounced impact on attention and memory than visual fidelity, with good audio actually improving how polished the visuals seem. Bad sound doesn’t just annoy people, it makes the whole stream feel lower quality, even when the picture is fine.
That’s why you test your camera and mic before every stream, not just the first time you set up. Drivers update. Cables get bumped. Someone unplugs your USB hub to charge a phone. Setups that worked fine last week don’t always survive the week.
Five minutes now, or a ruined stream and an audience that starts wondering if it’s worth showing up next time.
How to Test a Webcam Before Going Live
Start with video. It’s the faster check.
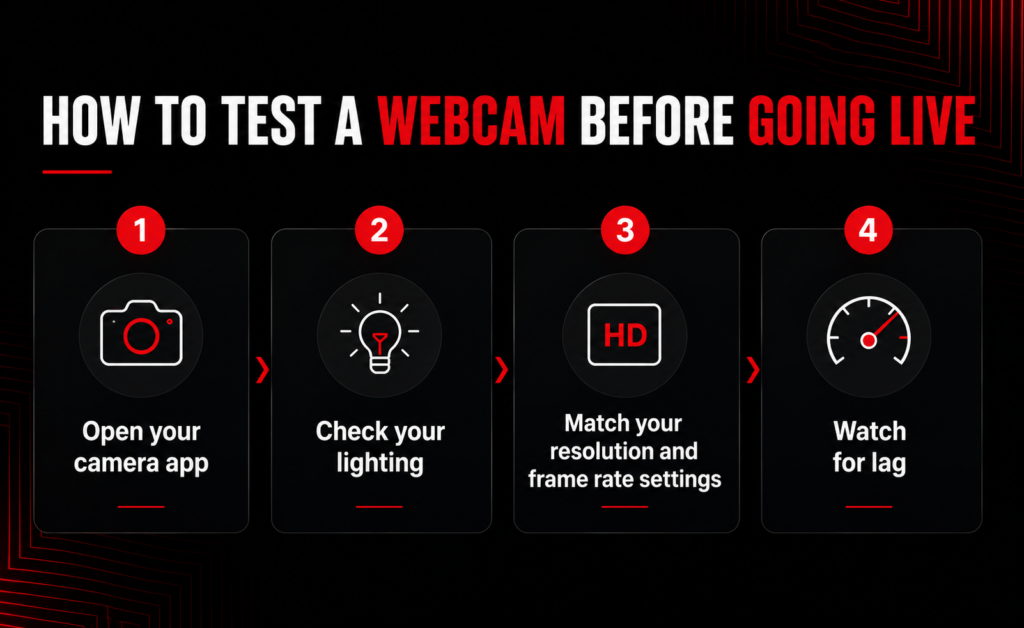
Open your camera app
Windows has the Camera app, Mac has Photo Booth or QuickTime. Confirm your webcam shows a live picture with no lag, no green tint, no frozen frames. Doing this outside your streaming software isolates the hardware. If the built in app looks clean but your streaming platform doesn’t, the problem is settings or permissions, not the camera.
Check your lighting
This does more heavy lifting than most people expect. A mid range webcam in good light beats an expensive webcam in bad light, almost every time. Face a window or light source instead of sitting with your back to one, backlighting turns you into a silhouette and most webcams can’t fix that on their own.
Match your resolution and frame rate settings
Confirm these match what the webcam actually supports. Pushing a 720p webcam to output 1080p just stretches the image and adds blur.
Watch for lag
Wave your hand and look at the delay on screen. Noticeable lag usually points to a USB bandwidth problem, especially if the webcam’s running through a hub with other devices attached.
How to Test a Microphone Before Going Live
Once video checks out, move to audio.
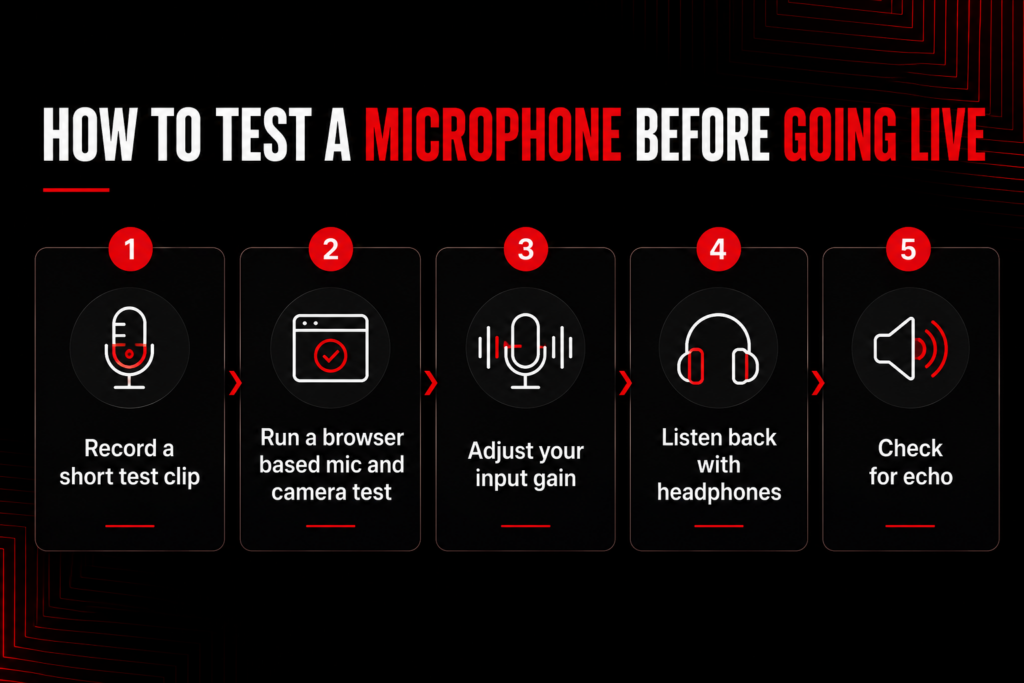
Record a short test clip
Use your phone’s voice memo app, your computer’s built in recorder, or OneStream Live Studio for recording. Speak at your normal streaming volume for 15 to 20 seconds and play it back. This is the fastest microphone test there is, and it catches the obvious stuff immediately: static, popping, or a mic that isn’t picking up sound at all.
Run a browser based mic and camera test
A tool like the open source Webcam Tester at addpipe.com shows a live waveform as you talk, which is useful because you can actually see if you’re too quiet or clipping from being too loud, instead of guessing. Tools like this run entirely through your browser’s built in camera and mic access, so there’s nothing to install.
Adjust your input gain
If your voice sounds distant or the waveform barely moves, raise the input gain in your sound settings. If it’s distorted or clips at the peaks, lower it. You’re aiming for a level that stays steady without hitting red on a live meter.
Listen back with headphones
Fans, AC units, and computer fans show up on a mic more than your ears notice in the room, and headphones expose that in a way speakers don’t.
Check for echo
Echo usually means your speakers are feeding back into your mic. Switching to headphones during the stream, or turning on echo cancellation in your audio settings, fixes it almost every time.
Common Problems and Quick Fixes
Even a solid setup runs into the same handful of issues over and over. Here’s what usually causes them, and the fastest way to fix each one before it turns into a live troubleshooting session.
|
Problem |
Likely Cause |
Fix |
|---|---|---|
Video is frozen of choppy |
USB bandwidth overload |
Unlug other USB devices, use a direct port |
Audio sounds distant |
Mic too far from mouth, low gain |
Move mic closer, raise input gain |
Echo on test calls |
Speakers feeding into mic |
Switch to headphones, enable echo cancellation |
Webcam picture is dark |
Backlighting |
Face a light source, add a front-facing lamp |
Audio cuts in and out |
Loose cable or driver issue |
Reseat the cable, update drivers |
Background noise is loud |
Room acoustics, fan noise |
Move mic away from fans, add soft furnishings |
How Do You Test a Webcam and Mic Together With OneStream Live
When using OneStream Live, open the studio and enable your camera and mic. Go to Settings and find the Audio section. Test your speakers there, then turn on noise suppression, echo cancellation, and auto gain control. These three settings handle most of the audio problems covered earlier without you touching a single cable.
Under the Camera section, select Full HD 1080p. This gives you the clearest picture your setup can output without stretching a lower resolution feed.
Then, without going live, just start a session. Watch your camera preview and speak normally to check your mic levels. You can even record the session and play it back afterward, so you’re not guessing how you’ll actually look and sound to your audience, you’re watching it.
Final Words
A clean stream starts before you hit “Go Live.” Testing your camera and mic catches the stuff that would otherwise show up in front of your audience: frozen video, muffled audio, an echo bad enough that people start typing “can you hear us?”
Run through the checks above, get one real person on a test call, and make it part of your routine. It’s the difference between a stream that starts smooth and one that starts with you troubleshooting in front of everyone watching.
Frequently Asked Questions
Why should I test my webcam and microphone before going live?
Testing your webcam and microphone helps you catch poor video quality, audio issues, and awkward technical delays before your audience sees them, not during your stream.
How can I test my webcam before a live stream?
Open your streaming software and check the camera preview. Look at lighting, framing, and focus, and confirm the picture is clear before you go live.
How do I know if my microphone is working properly?
Record a short audio sample or use your streaming tool’s mic test feature. Play it back and listen for whether your voice sounds clear, balanced, and free of background noise.
What should I do if my webcam is not detected?
Check your browser or app permissions, reconnect the webcam, and restart your device. Also confirm no other app is already using the camera, that’s one of the most common causes.
How often should I test my webcam and microphone?
Before every live stream, especially if you’ve changed your device, browser, internet connection, or streaming setup since the last time you went live.
OneStream Live is a cloud-based live streaming solution to create, schedule, and multistream professional-looking live streams across 45+ social media platforms and the web simultaneously. For content-related queries and feedback, write to us at [email protected]. You’re also welcome to Write for Us!