To stream on Discord in 2026, simply join a Voice Channel within any server, locate the “Share Your Screen” monitor icon (Go Live) above your user panel, and select either a specific “Application” window for gameplay or “Screen” to broadcast your entire desktop. This process allows you to instantly broadcast video and audio to up to 50 concurrent viewers (or more with Stage Channels) with low latency.
While the platform has made it ridiculously easy to go live (roughly 30 seconds from login to launch), the barrier to entry is low, but the barrier to quality is high. We have seen a massive shift in which “good enough” streaming no longer cuts it.
In this Article:
If you are going to broadcast, you need to do it with intent. This guide gives you the updated system requirements, the hidden quality settings, and the professional standards for how to start streaming on Discord in 2026.
System Requirements for Discord Live Stream in 2026
It’s easy to go live on Discord, but you wouldn’t want people complaining about compromised quality, right? That’s exactly why you should know the preferred system requirements for streaming different types of content.
System Requirements to Stream Games on Discord
It’s easy to hit “Go Live,” but streaming Battlefield 6 or the upcoming Forza Horizon 6 requires hardware that can handle both the game and the broadcast encoding. Here is the realistic hardware standard for 2026:
System Requirements to Stream Games on Discord:
Processor: Intel Core i5 (12th Gen or newer) or AMD Ryzen 5 (5000 Series or newer).
RAM: 16GB is the new minimum for smooth gaming + streaming. (8GB will cause stuttering in modern titles).
Graphics Card: NVIDIA RTX 3060 / 4060 or AMD Radeon RX 7600. (Older cards like the GTX 1050 are no longer sufficient for modern streaming).
Internet Connection: 15 Mbps upload speed for 1080p/60fps.
Operating System: Windows 11 (Recommended).
Note: If you are prepping for the Grand Theft Auto VI launch later this year, we strongly recommend 32GB of RAM and an RTX 40-series GPU.
For new users, the Discord interface might look a bit overwhelming, but it’s easy when you know where to look. Here’s a step-by-step guide with screenshots to help you get your Discord screen share up and running in seconds.
Two Methods to Stream on Discord: Streaming in a Server or in a Voice Call
To stream on Discord, you need to either join a channel in a specific server or be in a live call. We’ve explained all the steps for each method.
How to Stream on a Discord Server – Method A
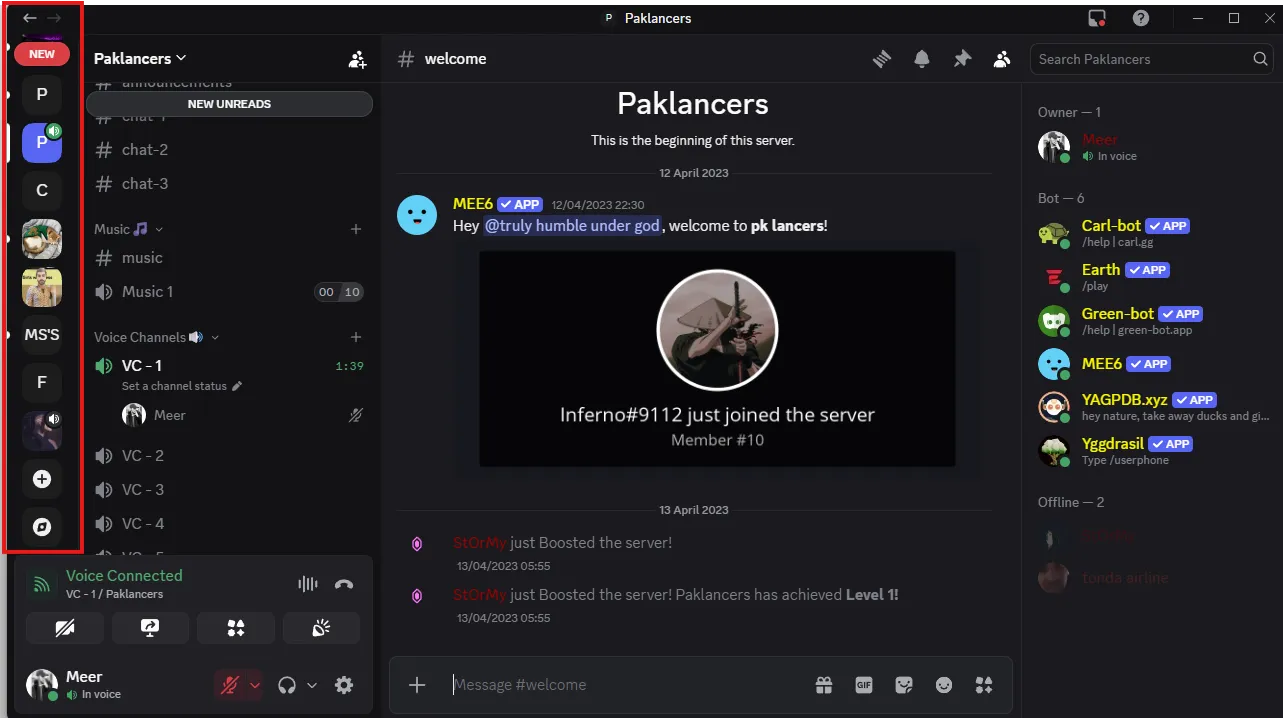
Step 1 – To stream on a server, you need to join a channel by selecting the specific server from the left sidebar, like this:
Step 2 – After you’ve selected the server, select the channel you want to stream in and join like this:
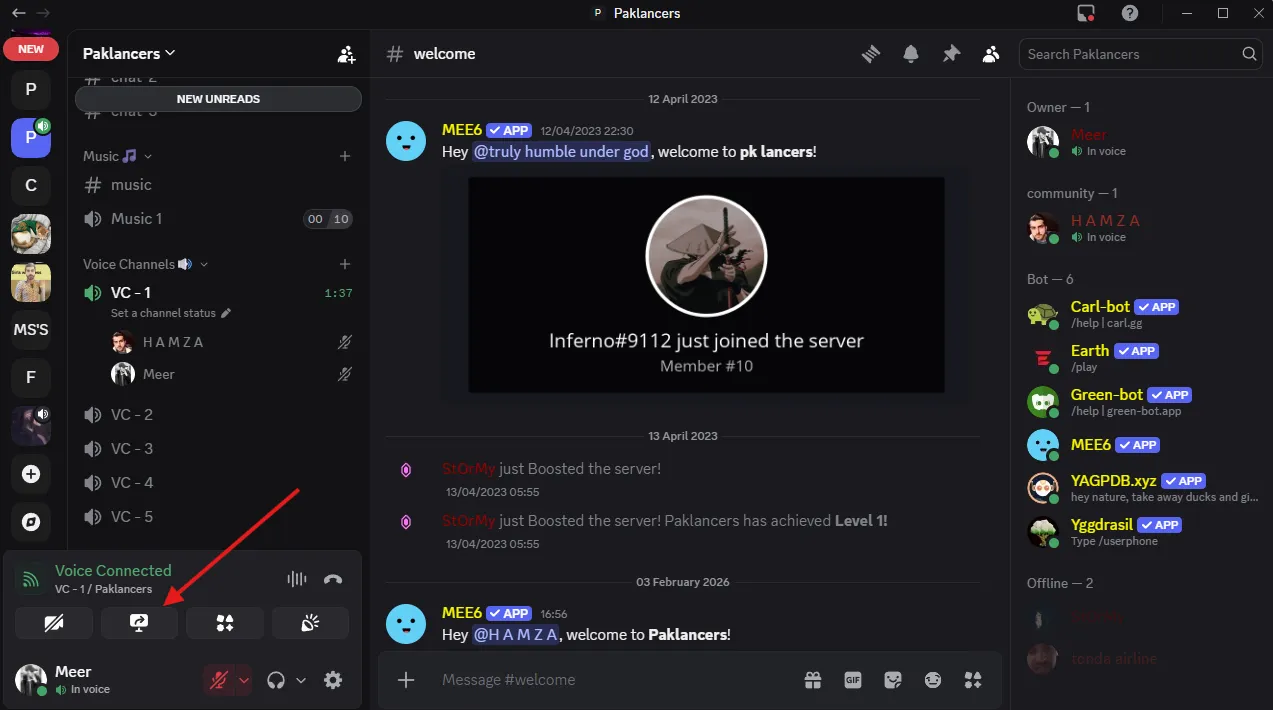
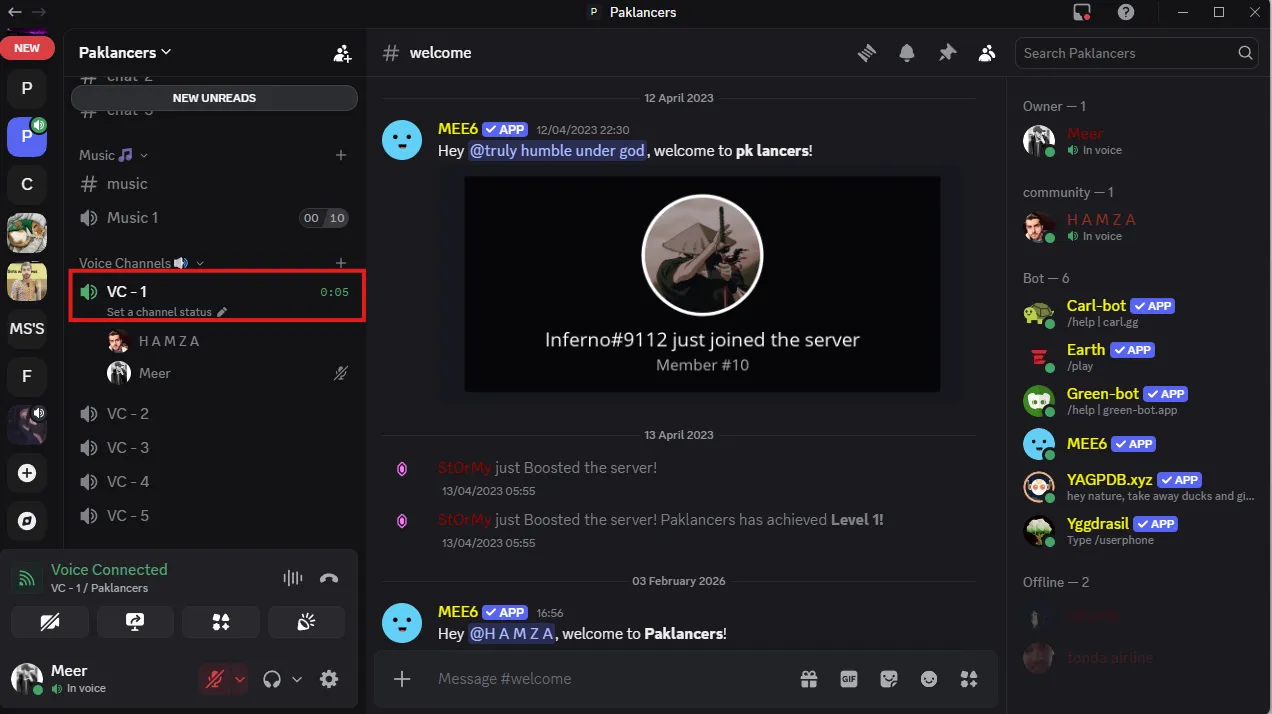
Step 3 – Once you’re in the channel, you will see the Discord screen share option from here:
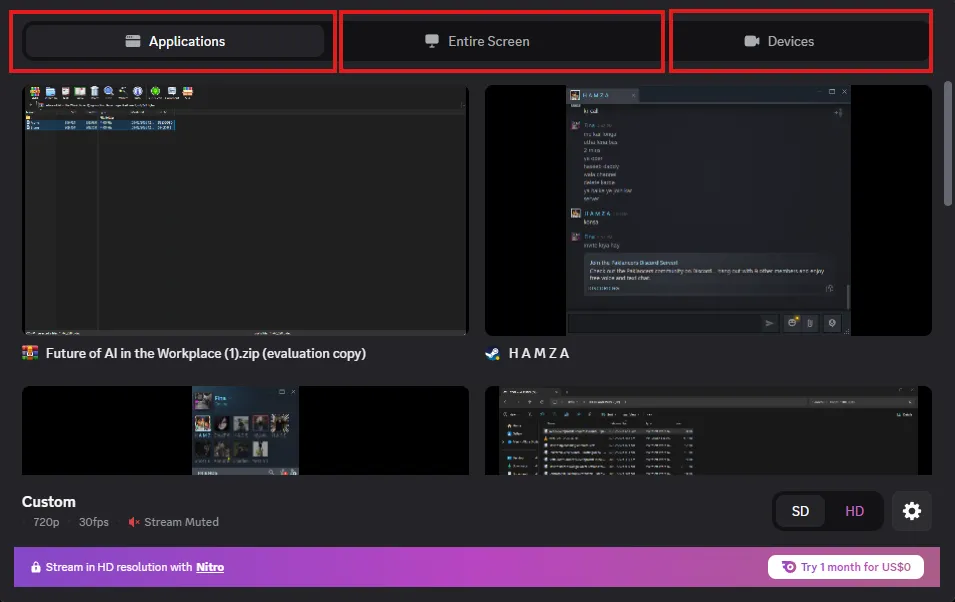
Step 4 – After you click on this, you’ll get three screen share options, like:
Step 5 – Choose screen share mode from the following and go live:
Applications (Best for Gaming): Select your specific game window (e.g., Battlefield 6). This mode captures audio only from that game, ensuring your Spotify or system alerts don’t blast your viewers. This is the only way to stream games on Discord with optimized frame pacing.
Screens (Best for Tutorials): Broadcasts your entire monitor. Warning: This shares everything, including your taskbar and private notifications.
Capture Devices: Select your Elgato or capture card directly here if you are piping in a PS5 or Xbox feed.
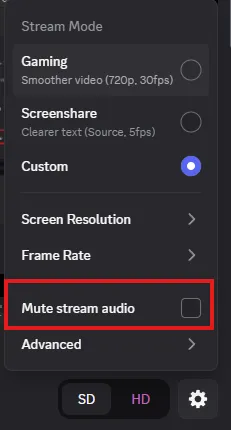
Note: Make sure your stream audio isn’t muted because most people complain about Discord stream no sound, and they have the mute audio option checked here:
Make sure it’s unchecked before you go live.
How to Stream in a Voice Call – Method B
Streaming in voice calls is ideal for client meetings, one-on-one consultations, or just teaching your friend how to use Discord. Here’s how to do it:
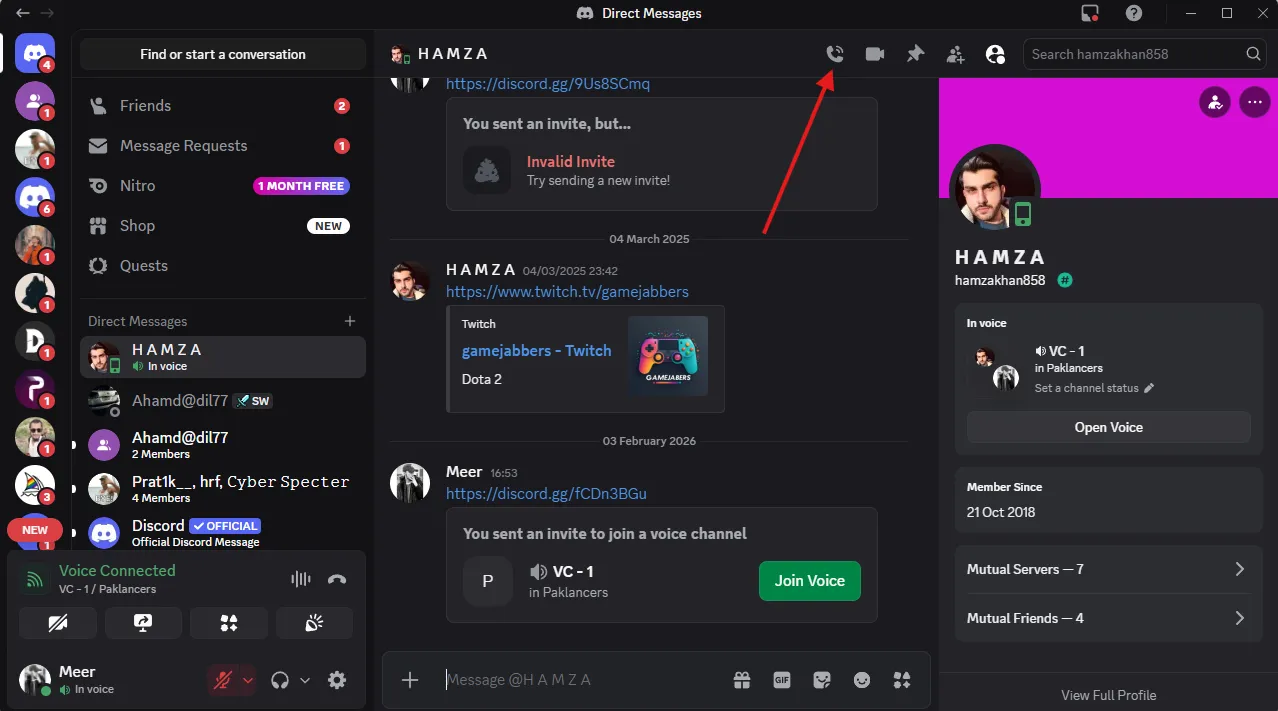
Step 1 – Start a Call: To start a call, you need to find the contact you want to call. You can look for your contact by clicking Direct Messages > Friends.
Step 2 – After you open the chat window for a specific friend/contact, you should see an option to call like this:
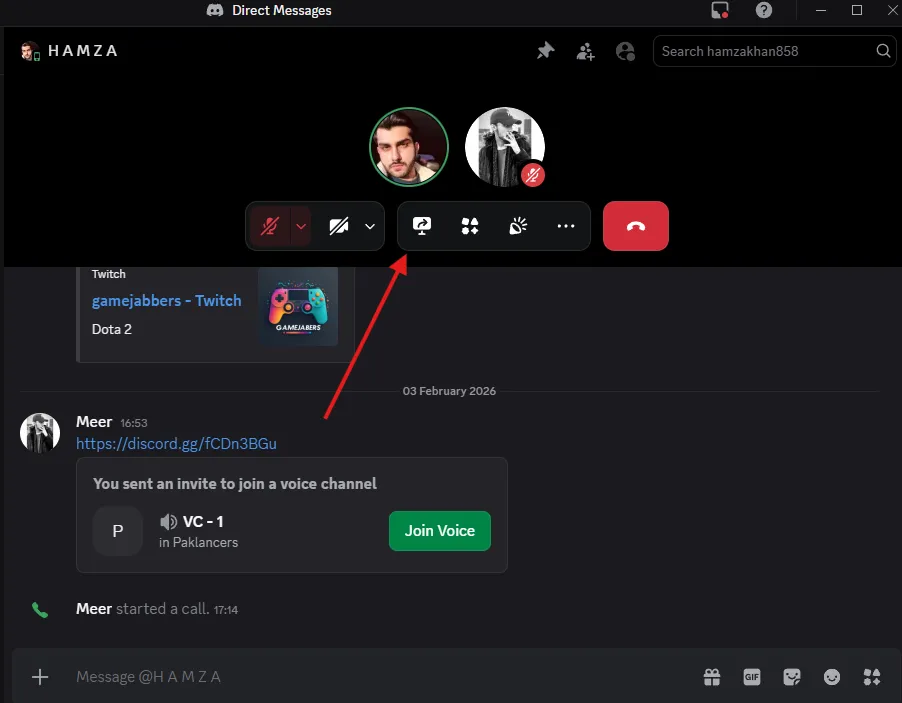
Step 3 – After starting the call, you will see these options:
Step 4 – Once you click the “screen share” button, you will get the same screen options we’ve discussed above.
Pro Tip: Fix the “Discord Stream No Sound” Bug
The Fix: Go to User Settings > Voice & Video and scroll down. Ensure “Soundboard” is not muting your stream, or try toggling “Use an experimental method to capture audio” to Off.
The “Application” Rule: Always stream the Application window, not the Screen, to capture direct game audio.
If the issue persists, you can watch this video for all the possible solutions:
Discord Streaming Settings: Optimize Your Broadcast Quality
Discord gives you a bunch of options related to stream quality when you click “Share Your Screen”. These settings are important for the viewer experience and need to be adjusted for the type of content you’ll be streaming.
Before we discuss the best settings for each scenario, here’s how to access these settings:
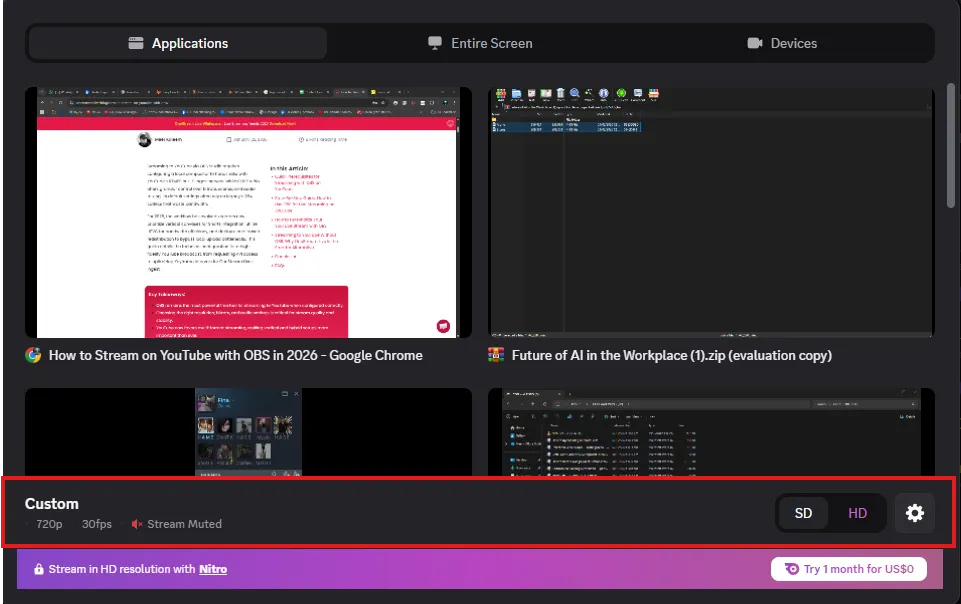
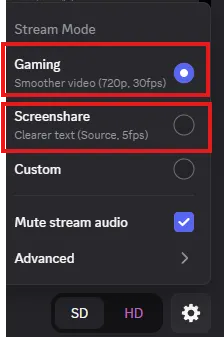
After clicking “Share Your Screen,” you’ll see the current stream quality settings like this:
If you click the “settings” button at the bottom right, you’ll get Discord’s preferred settings you can choose from, like this:
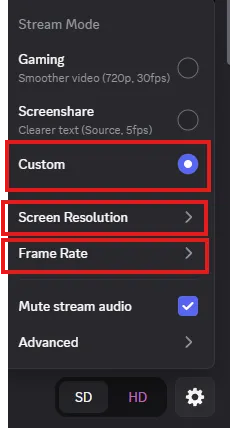
If these don’t fit your desired stream quality, you can also go for custom settings by checking the “Custom” box. Once you do that, you’ll get two more options: “screen resolution” and “frame rate” like this:
High-fidelity creative work or 4K gaming. Matches your monitor's native output.
Nitro Only
Pro Tip:“Source” resolution is the only setting that bypasses Discord’s downscaling. If you have a 1440p or 4K monitor and want pixel-perfect clarity, you must select Source.
Discord Free Streaming Limitations and Discord Nitro Benefits
Is the subscription worth it? If you are a casual user, the free tier (720p) is passable. But for anyone building an audience, the free tier’s bitrate cap often turns complex game scenes into “confetti” (pixelated artifacts).
Discord Nitro Benefits for Streaming:
Source Quality: Stream up to 4K resolution at 60fps.
60 FPS Unlock: Essential for any action game; 30fps looks jarring in 2026.
Higher Bitrate: Discord allocates more bandwidth to – Nitro streams, reducing artifacting during fast motion.
Link Between Discord Streaming and Server Boost
You don’t always need to buy Nitro personally. If you stream inside a Boosted Server, you inherit that server’s premium perks.
Server Boost Levels & Streaming Perks:
Level 1 (2 Boosts): Unlocks 720p / 60fps for everyone in the server.
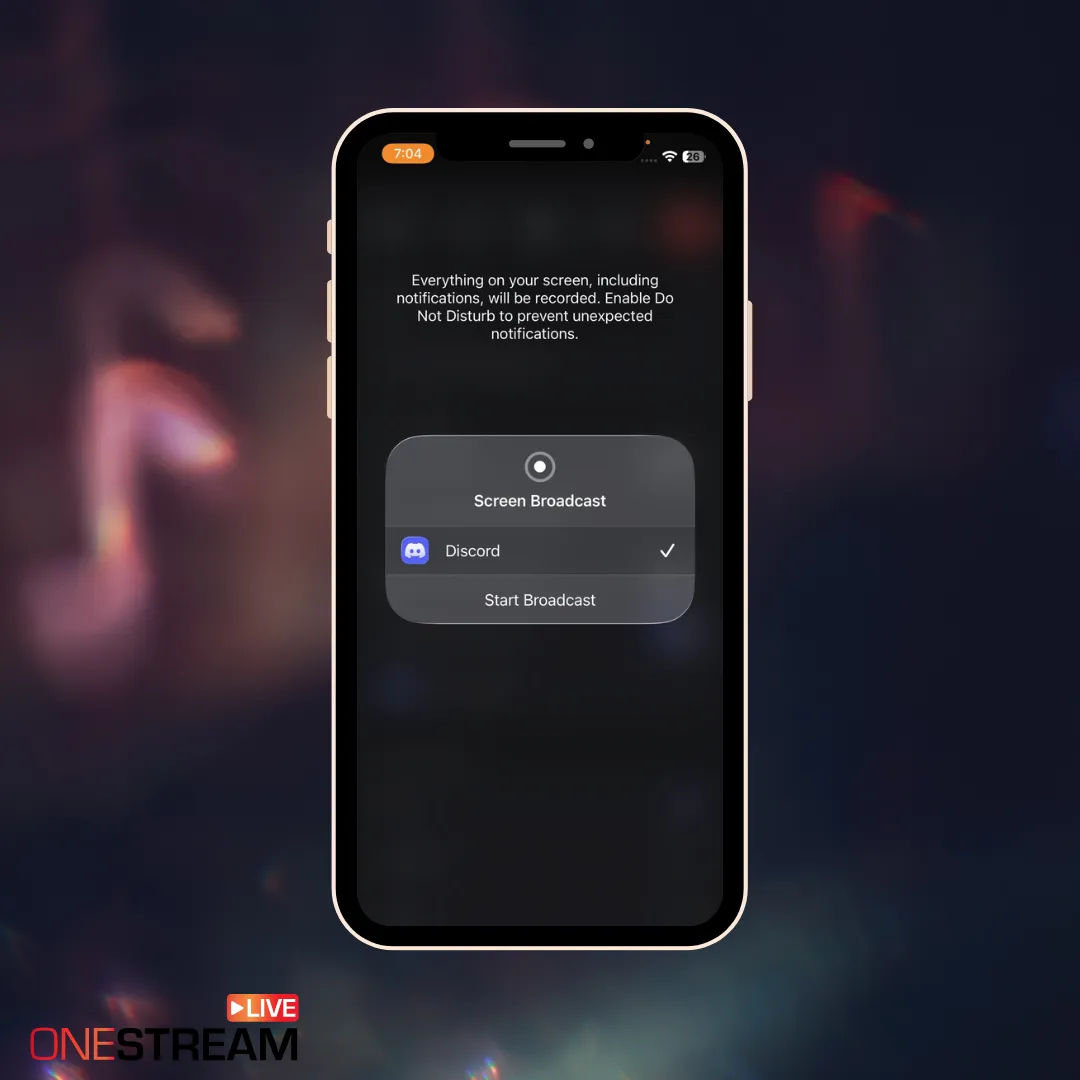
Streaming on the go is also easy on Discord. Here are easy steps on how to stream on a Discord server from a mobile device.
Pro Tip: Before you do anything, turn on “Do Not Disturb” mode. Discord mobile captures your entire screen. Without DND, a well-timed text message could broadcast your private life to the whole server.
Join the server channel you want to stream in.
Once you’re in the voice channel, you’ll see these options:
3. Then swipe up from the bottom like shown here:
4. Click screen share, and you’ll get this:
5. Start broadcasting, and Discord will capture everything on your screen.
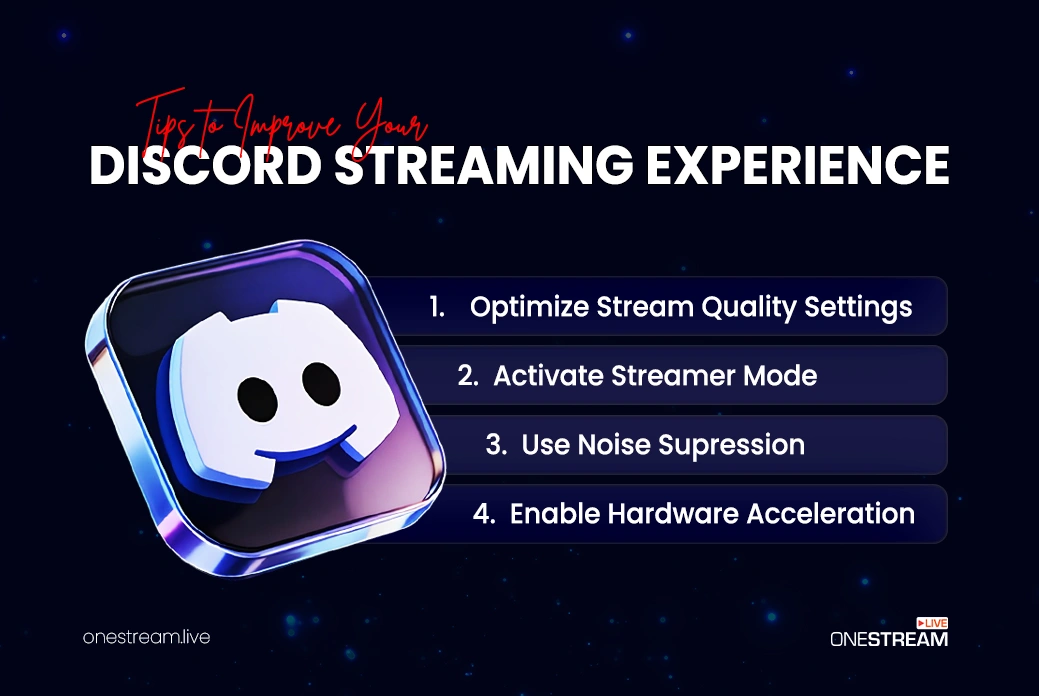
4 Pro Tips to Enhance Your Discord Streaming Experience
Discord offers additional options that you can use to improve the streaming experience for the viewers.
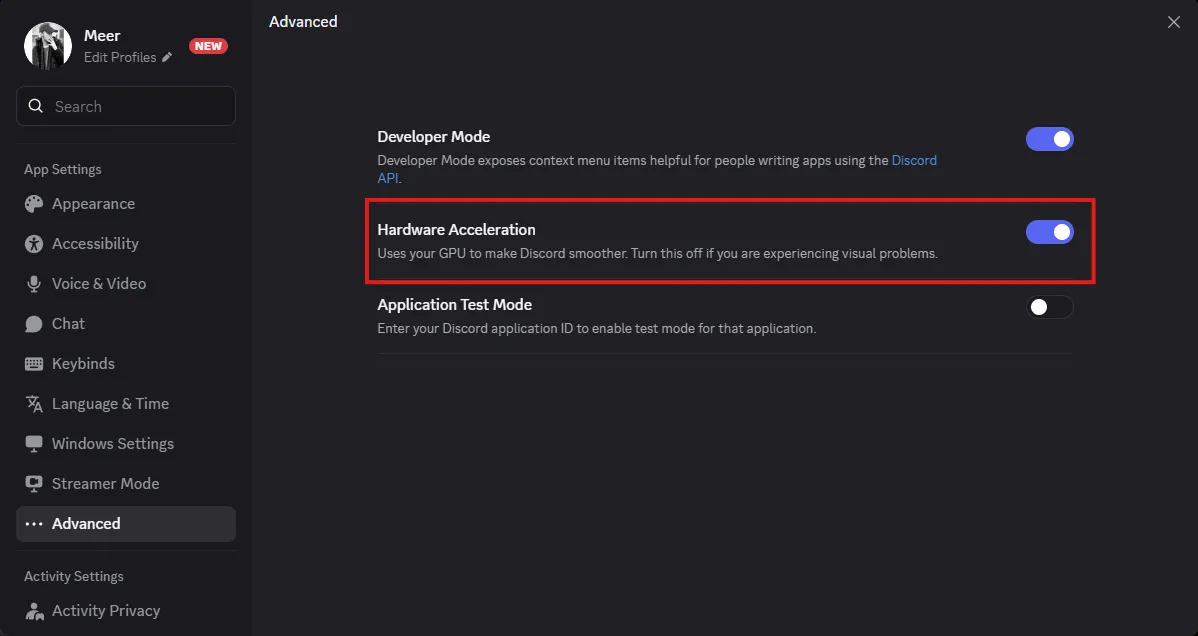
1. Enable Hardware Acceleration
By enabling hardware acceleration, you offload the processing from the CPU and hand it over to your GPU. This is recommended if you’re using a GPU. Here’s how to enable this:
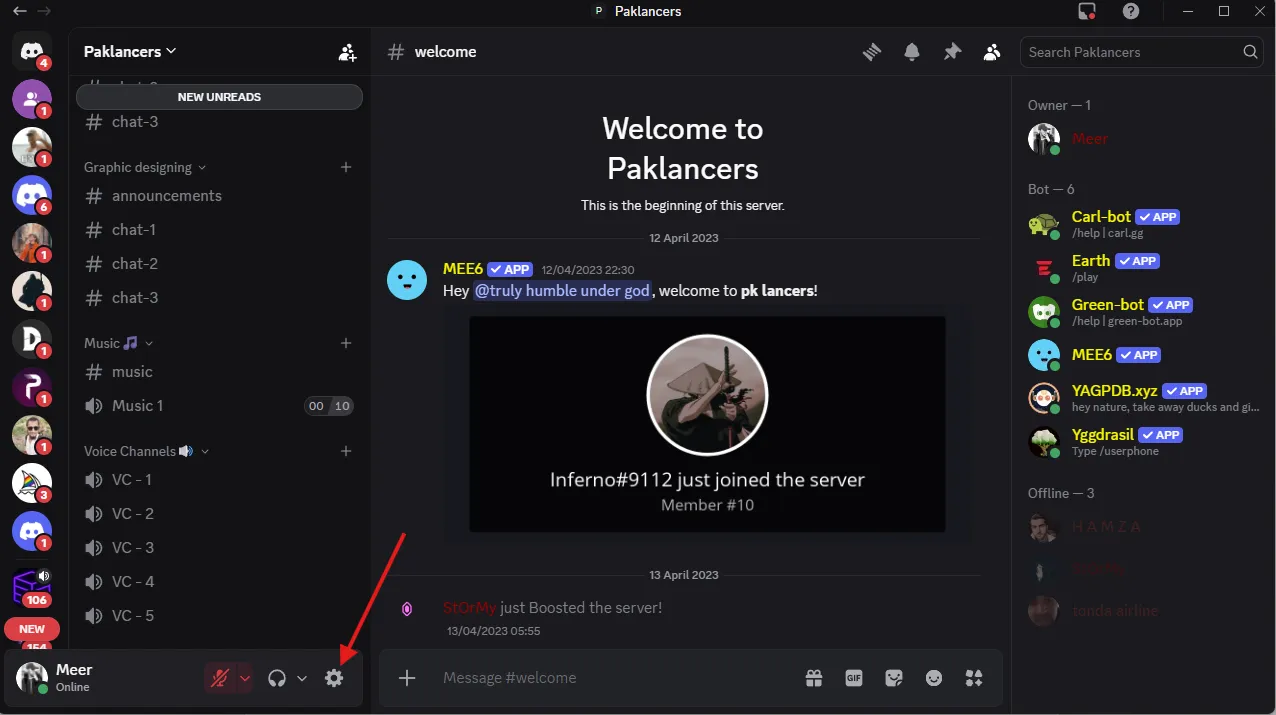
Click the “settings” icon from here:
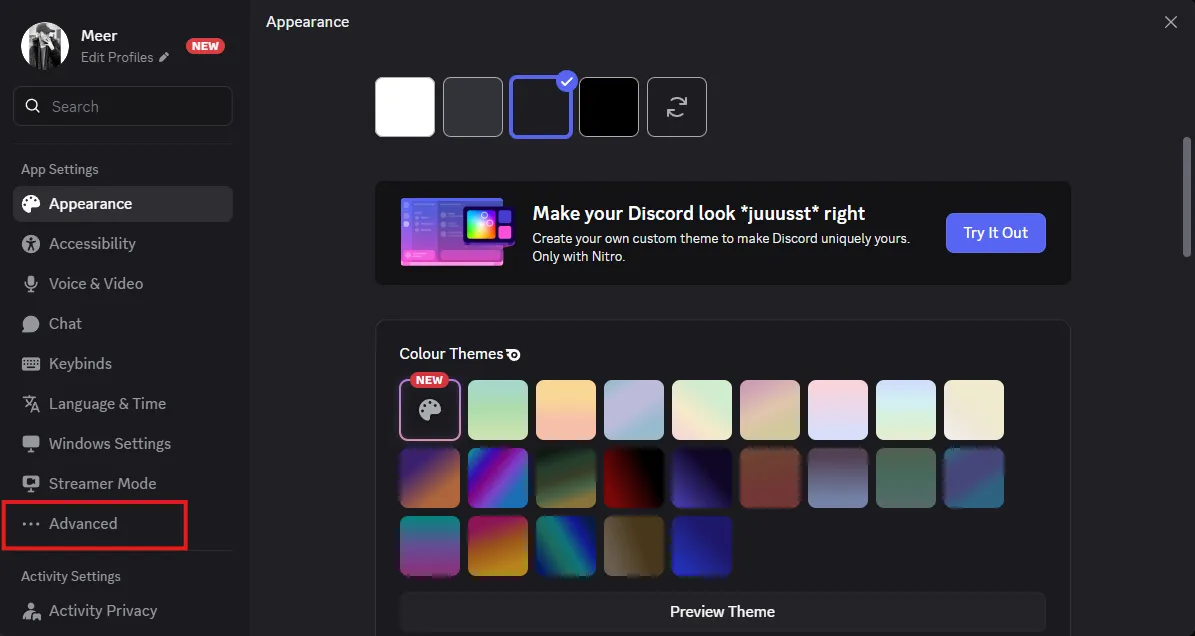
2. Then scroll down to “App Settings” options and click on “Advanced” like this:
3. After this, you’ll see an option to enable “Hardware Acceleration” from here:
4. Enable, and you’re done.
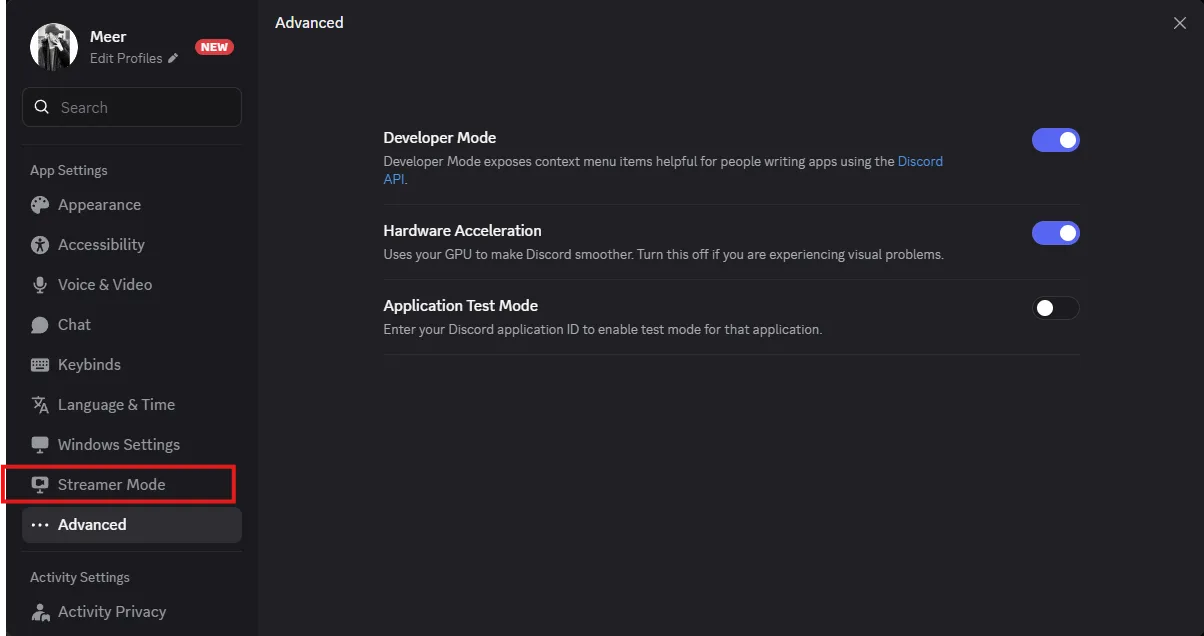
2. Activate Streamer Mode
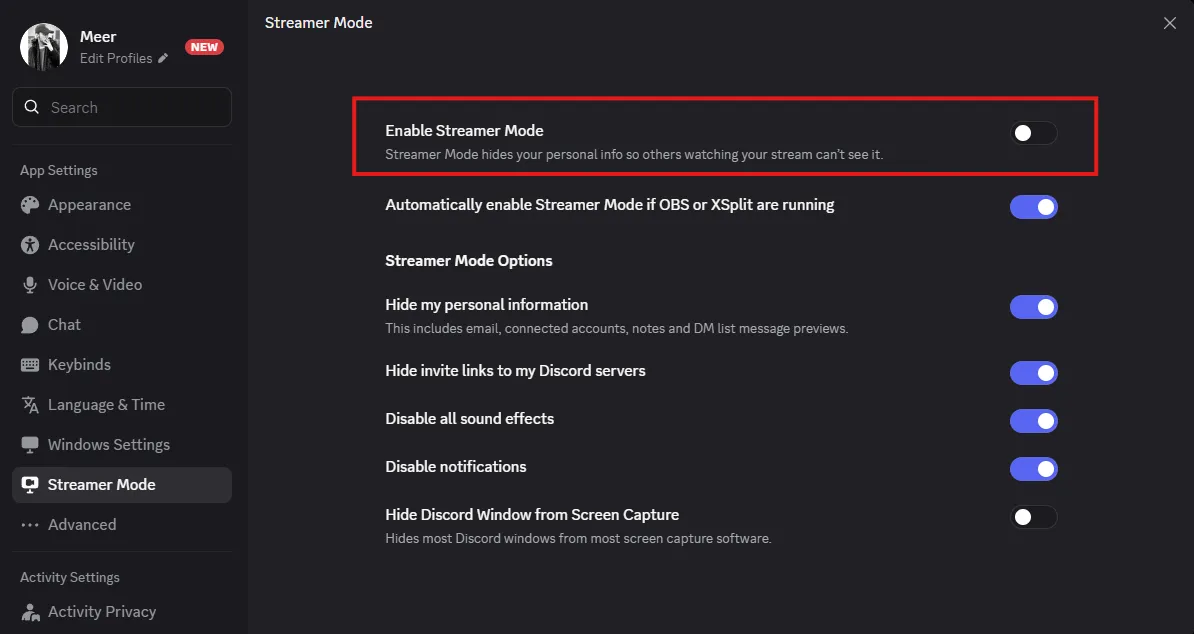
Streamer Mode protects your privacy by automatically hiding sensitive information when you’re broadcasting. It conceals personal details like email addresses, connected accounts, and incoming notifications that could accidentally appear on stream. Here’s how to activate streamer mode:
Under the app settings, you’ll see an option “Streamer Mode” like this:
2. Once you click, you’ll get an option to enable “Streamer Mode” from here:
3. Enable The "Game Overlay" (Read Chat While Playing)
The biggest pain point? “How do I see chat without Alt-Tabbing?” The answer is the Overlay.
How to do it: User Settings > Game Overlay > Enable in-game overlay.
You get a semi-transparent chat window over your game, letting you react to your friends in real-time without pausing the action.
4. Enable Noise Suppression
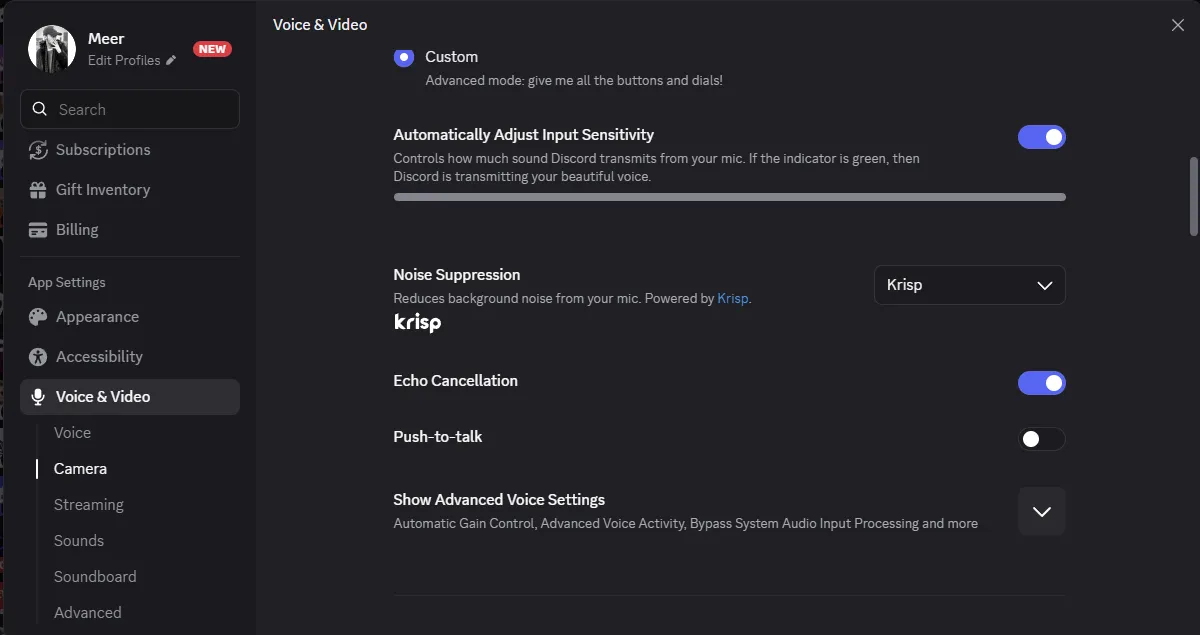
Background noise is common, but this can affect the viewer’s experience drastically. The good news is that Discord comes with a built-in noise suppression that filters out keyboard clicks, fan noise, and other unwanted background noises. Here’s how to enable noise suppression:
Under the app settings, you’ll see an option for “Voice & Video” like this:
2. Once you click this, you need to scroll down until you see these options:
3. Make sure you have “Krisp” selected in the “Noise Suppression” option.
Learning how to stream on Discordopens endless possibilities. When you want to livestream gameplay or stream a movie in high quality for your friends, you won’t have to use the complicated traditional broadcasting software. However, if you’re going to stream on a daily basis, then you need to follow the quality settings for both video and audio we’ve discussed.
You need to be everywhere. OneStream Live breaks down Discord’s walls. Instead of choosing between your Discord community and your Twitch audience, you use OneStream Live to broadcast to 45+ platforms simultaneously (YouTube, Twitch, X, Facebook) while keeping your Discord “Screen Share” active for your VIPs.
Don’t limit your stage to 50 people when the internet holds billions!
For basic use, no. But if you want Source Quality (4K) or 1080p/60fps, yes. Free users are capped at 720p/30fps, which can look grainy on modern high-res monitors.
Yes. The best method is to join a Voice Channel, click “Share Your Screen,” and select your Web Browser window. (Avoid using the “Watch Together” activity if you want full control over the playback and ad-blocking).
Not natively. Discord allows you to switch between apps seamlessly without stopping the stream, but it cannot show two windows side-by-side (like a game + a web browser) simultaneously. To do that, you would need to use OBS Studio as your virtual camera.
It depends on the channel. Standard Voice Channels are typically capped at 50 viewers to preserve bandwidth. However, if you use a Stage Channel, you can broadcast to thousands of listeners (up to 10,000 on Community servers).
Discord does not have a native “Record Stream” button for full broadcasts. You will need third-party software like OBS Studio or a bot like Craig to capture the audio and video. (Note: Discord’s “Clips” feature can capture short gaming highlights, but not full streams).
OneStream Live is a cloud-based live streaming solution to create, schedule, and multistream professional-looking live streams across 45+ social media platforms and the web simultaneously. For content-related queries and feedback, write to us at [email protected]. You’re also welcome to Write for Us!
Meer is a tech enthusiast and writer who’s been exploring the digital world for over four years. He loves diving into how technology shapes our online presence. He’s worked with a range of clients and platforms around the globe, helping brands communicate complex ideas in a clear, relatable way. Outside of writing, you'll find him hiking or streaming his favorite video games.